
Software Updates User guide

CFX Manager™ Software
24
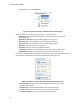
To Set up the Scheduler
1. The first time Scheduler is opened, any User, Instrument, and SMTP email settings will
be imported from CFX Manager software.
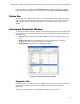
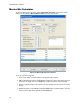
2. To add a new instrument, select View > Instrument Details or click the Manage
Instruments button below the Instruments list (Figure 16) in the scheduler main window.
In the Instrument Details window, enter the instrument name in the Name column.
Choose a model from the drop-down menu or leave it blank to schedule instrument
types not listed. Entering base and optical head serial numbers is optional.
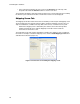
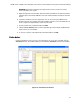
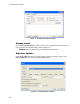
3. To add a new user, select View > User Details or click the Manage Users button below
the Users list. In the User Details window (Figure 17), enter the new user name in the
Name column. An email address can be entered so that optional electronic notifications
can be sent.
NOTE: The SMTP server needs to be set up in order for electronic notifications to be
enabled.
Figure 17. Scheduler User Details window.
4. To remove an instrument or user, open the appropriate details window and check the
corresponding box in the Delete column.
WARNING! All events associated with this instrument or user will be removed from
the calendar.
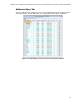
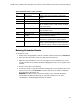
Scheduler Menu Bar
The Scheduler menu bar contents are listed in Table 10.