
Owners manual


33
REVALVING.
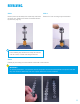
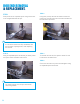
STEP 3
Carefully lay out valving on a clean surface in the order it was removed.
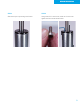
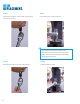
STEP 1
Remove piston rod assembly from shock body and fasten
rod end in vise. (Refer to the section: Piston Rod Assem-
bly Removal, page 12)
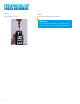
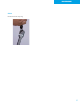
STEP 2
Remove 3/4” rod nut using a open end wrench.
Use a buering layer between the clamp and rod end,
such as a towel, to avoid scratching the rod end.
IMPORTANT!
To maintain performance, it is imperative that the components are removed and replaced in the precise order that
they were removed. Additionally, take note of piston direction for correct installation.
!