
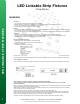
Specification


8
(866) 786-1117 • www.BeyondLEDTechnology.com
Due to continuous product improvement, information in this document is subject to change.
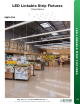
Installation
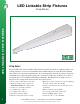
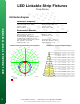
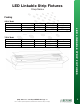
LED Linkable Strip Fixtures
Crisp Series
LED LINKABLE STRIP FIXTURES
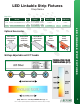
LED Strip Installation Instruction
B. Hanging Installation
Step1. Hang one end of the installation rope in the accessory kit on the wall or hook (Choose accessories according
to your needs) (Figure 6)
Step2. Fasten the other end of the installation rope to the lamp (Figure 7)
Step3. Press the screws on both sides of the lamp by hand to open the lamp.
Step4. Connect the wires according to safety requirements, and then install the lamp body back to the chassis (Figure
8)
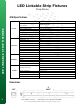
Extra Accessory Option Installation: 1:Product lengthening, 2: Sensor,3: Backup driver.
1. Product lengthening:
Step1. Use the screws in the accessory kit to lock the bracket onto one lamp (figure 9)
Step2. Align the other lamp to the bracket and lock the screws (Figure 10)
(Product connection: 40W lamps can be connected to maximum 20pcs, 60W 12pcs)
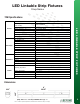
2-1. AC PIR Sensor:
Step1. Press the screws on both sides of the lamp by hand to open the lamp.
Step2. Assemble the PIR sensor onto the lamp (Figure 11), connect the wires according to the wiring instructions,
and then assemble the disassembled lamp back. (Figure 12)