
Installation Guide

INSTALLATION GUIDE
VERTICAL DRAPES
Please Note: These instructions should be read thoroughly before installing.
This is a guide to assist in the installation and care of your blinds. Betta Blinds and Awnings does not guarantee the accuracy of
the information contained in this guide. We recommend an experienced expert installer to rely upon their own skills. This is
based on general knowledge concerning the assembly, materials and working process of the blinds, which is known to us at the
time of printing this guide, consequently, is subject to change and Betta Blinds & Awnings specifically reserves the right to
change this guide without notification.
⬧
The person installing a corded internal window covering must attach a label to the corded window covering containing the
name and contact details of the person or company responsible for the installation.
⬧
They also must ensure that any warning label or swing tag supplied with the corded window covering remains attached to the
cord.
We recommend the use of the following Tools:
Steel measuring tape, Carpenter’s level, Power or battery drill & bits, Flat blade and Phillips head screwdrivers
The following should be included for each vertical blind ordered
Mounting clips (number depends on size)
Mounting brackets (if face fixed)
Vertical Cord Safety Guide (if cord operation is required)
Wand (standard) (except if cord operation is ordered)
We recommend clean, soft cotton gloves (or the rubber gloves supplied) worn to avoid marking
the fabrics when installing and handling fabric blinds.
Since different screws are required to suit different fixing applications, we do not supply screws. Please ensure you use the
correct screws for mounting to the desired application, for example Gyprock, timber, concrete, brick, steel, or aluminium.
The most important procedure in installing these blinds is to be sure that the correct anchorage method has been
used so that the mounting area (i.e., wall or architrave) is able to support the weight of the blind and its operation.
Brick or Rendered Surfaces Warning: Make sure drilling is no closer than 25mm from edge of surfaces as the brick or
render may chip or break out.
INSTALLATION
Face & Reveal
1. After receiving the order check the marked width and drop sizes as indicated on the blind against your original order. To
assist you in establishing the correct location for fitting multiple blinds the room location is marked on each blind, as per your
order.
2. Betta Blinds supplies mounting brackets only and where appropriate the child safety devices.
3. If all is correct layout the blinds at their location and remove protective packaging.
4. Remove the supplied installation brackets from packaging.
5. Ensure the blind has brackets to suit the application, either face fix or reveal.
6. Remove the supplied installation brackets and wand off the top of the track. Remove pelmet brackets as well if pelmet
ordered.
7. Extension Brackets (which must be ordered) can be used optionally to extend the position of the track to a point outside of
the reveal where required. E.g., Generally used on sliding doors to get past the door handle.
FOR REVEAL FIT - Install blind into recess as far as possible. Allow enough clearance for blades to rotate. Clearance at back
varies according to the width of the blades.
BLADE WIDTH SCREW POSITION
89mm blades will be 50mm
127mm blades will be 70mm
FOR FACE FIT - Mark where you are attaching the brackets on the architrave/wall of the window.
8. Evenly space and screw the brackets along the front of the architrave or wall/window for even load bearing distribution. The
end brackets should be mounted no further than 200mm from the end of the blind.
9. Level mounting of brackets is critical for the correct operation of the blind (use a spirit level).
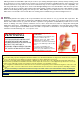
Cord Safety Guide