
Installation Guide
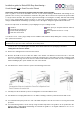


7. Wind the awning up to its desired top finish position. The arms should be hanging downwards.
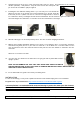
8. With the arms hanging downwards mark the holes where you are fixing the arm to your structure. Drill holes
and attach the arm using bolts. (See Pic 3) The arms are universal so can be fitted face or reveal fit. Make
sure the arms are fitted level. If the arms fall in line with a mortar joint move the arms inwards or outwards to
miss the mortar line.
9. Attach the second arm to the wall.
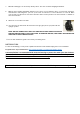
10. Once the arms are attached to the wall remove the grey pin (refer to pic) that holds the
spring in position.
NOTE: DO NOT REMOVE THE GREY PINS UNTIL BOTH ARMS ARE ATTACHED TO
THE BOTTOM RAIL AND TO THE STRUCTURE. IF REMOVED BEFORE, THE SPRING TENSION ON THE
ARM COULD CAUSE SERIOUS INJURY
11. Insert crank handle into gearbox and crank your awning down.
MOTORISATION
For motorised awnings you may need a qualified electrician to trim and attach plug to the lead or hardwire.
Program motor as per instructions:
https://www.betta-blinds.com.au/bbaa/installation-guides
A Cassette/Pelmet is recommended with motorised awnings to protect the motor from the elements.
If no cassette has been ordered the awning will need to be installed where the motor can be protected
from the elements. Motor warranty does not cover water damage.
Caution: Like all outdoor blinds, it is prudent to retract the blind in the presence of strong winds.