
Installation Guide

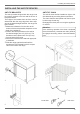


21
Step 3: visual checks
Surface burners
The burner fl ame color should be blue with no yel-
low on the tips. It is not uncommon to see orange
in the
fl ame color; this indicates the burning of airborne
impurities in the gas and will disappear with use.
With propane (LP) gas, slight yellow tips on the
primary icone are normal.
The fl ame should burn completely around the bur-
ner cap. If it doesn’t, check that the cap is posi-
tioned
correctly on the base and that the ports are not
blocked.
The fl ame should be stable with no excessive noi-
se or fl uttering.
After performing all these visual checks, reinstall
the bottom panel of the oven compartment and
proceed to setting the minimum for each burner.
Step 4: minimum fl ame adjustment
WARNING!
These adjustments should be made only for use
of the appliance with natural gas. For use with li-
quid propane gas, the choke screw must be fully
turned in a clockwise direction.
SURFACE BURNERS
Light one burner at a time and set the knob to the
MINIMUM position (small fl ame).
Remove the knob.
The range is equipped with a safety valve. Using
a small-size slotted screwdriver, locate the choke
valve on the valve body and turn the choke screw
to the right or left until the burner fl ame is adjusted
to desired minimum.
Make sure that the fl ame does not go out when
switching quickly from the MAXIMUM to the MINI-
MUM position.
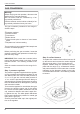
For the gas valve of dual burner the choke valve
is located on the valve body (fi g.20), the A screw
adjust the outer ring, the B screw adjust the inner
ring.
yellow fl ames:
further adjustment is required
yellow tips on outer cones:
normal for LP gas
soft blue fl ames:
normal for natural gas
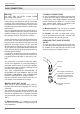
B
A
/ Gas conversion