
Installation Manual


19
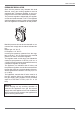
ANTI-TIP BRACKETS
The anti-tip bracket shipped with the range must
be properly secured to the rear wall as shown in
the picture below.
The height of the bracket from the fl oor must be
determined after the range legs have been adju-
sted to the desired height and after the range has
been levelled.
• Measure the distance from the fl oor to the
bottom of the anti-tip bracket receptacle on the
back of the appliance.
• Position the anti-tip brackets on the wall at
the desired height plus 1/8” (0.32 cm). The
brackets must be placed at 2”5/16 (6,0 cm)
from the side of the range.
• Secure the brackets to the wall with appropria-
te hardware.
• Slide the range against the wall until the
brackets are fully inserted into their recepta-
cles on the back of the range.
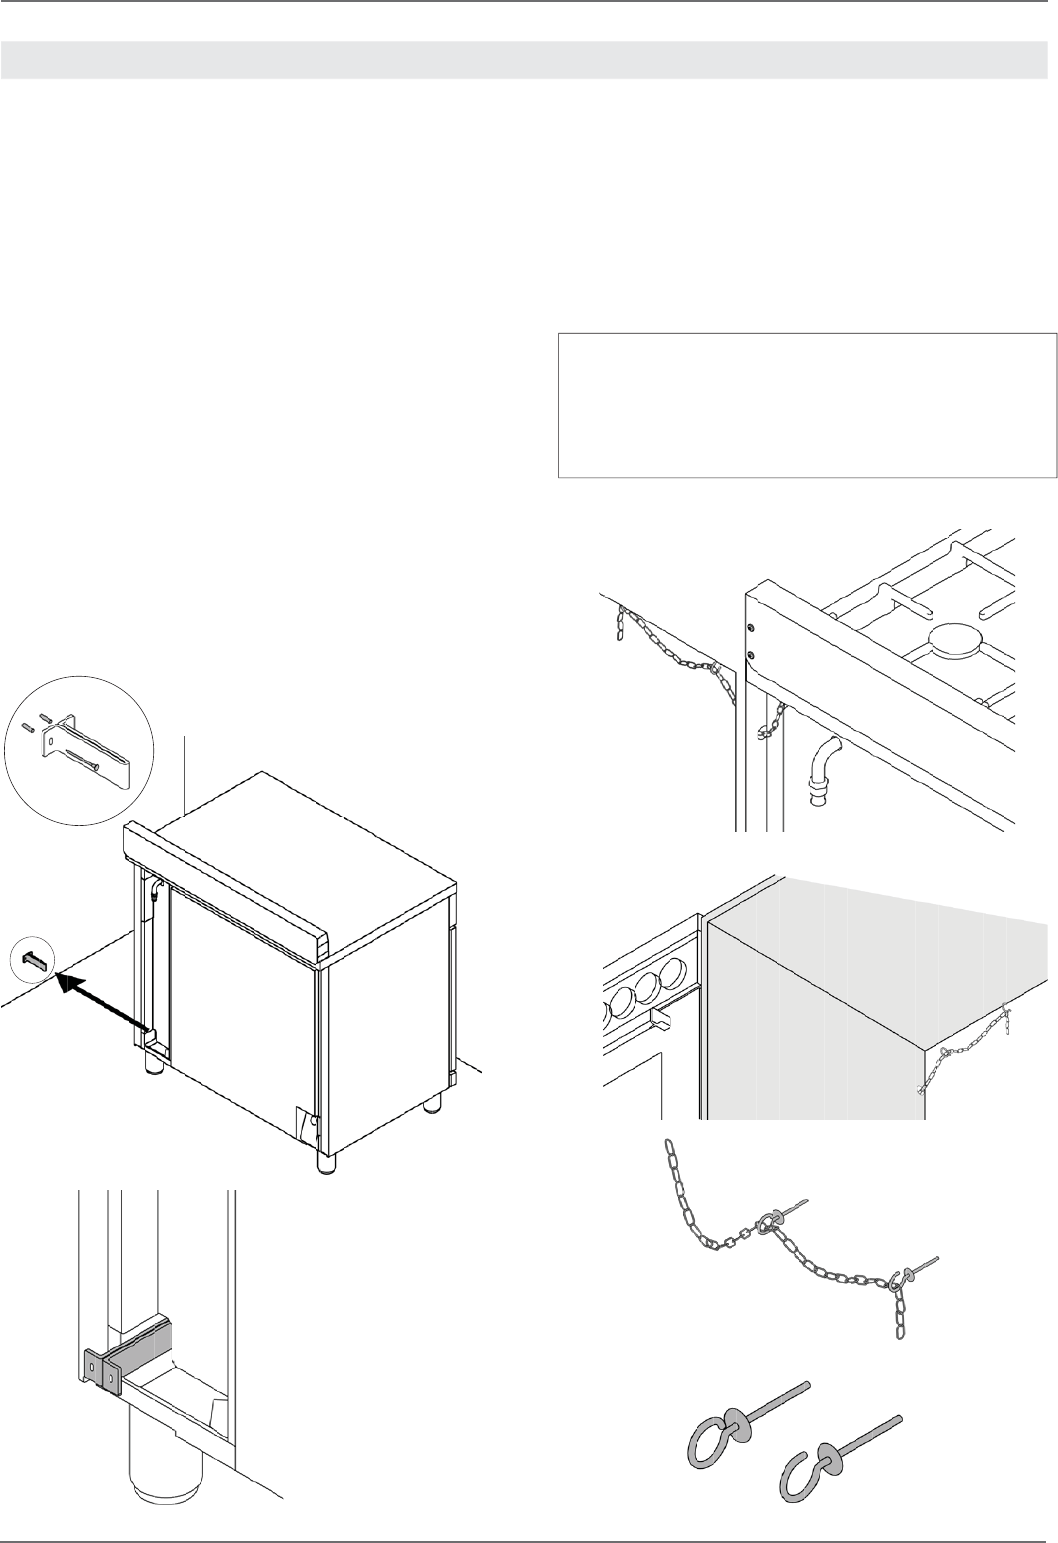
ANTI/TILT CHAIN
The anti-tilt chain shall be installed on right or left
side alternatively according below instructions.
The chain shall be hand pulled and fi xed to open
hook through closed ring.
Disengage the chain prior to moving the appliance
for service.
Attention:
Once servicing operation have been completed
the anti-tilt devices ( brackets and chain) shall be
re-engaged according above instruction/installa-
tions.
INSTALLING THE ANTI/TIP DEVICES
1
2
CLOSED RING OPEN HOCK
/ Installing the anti/tip devices