
User's Guide


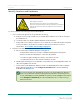

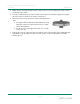


Table Of Contents

Complete the Mounting Surface
About Using Adhesives
To prevent devices separating from the machinery
they monitor and to obtain accurate high frequency
response, it's important to choose an adhesive that
provides excellent adhesion, temperature rating,
gap filling properties, and rigidity. Many two-part
epoxies and acrylic adhesives are suitable. Two
examples are Loctite AA330 or ClickBond CB200.
If you're mounting a tri-axial sensor, it can be
difficult to align the device to the axis of the machine
being monitored. We recommend you first screw
the pad onto the actual sensor. Then mark the
sensor’s X-direction on the pad. Remove the pad
from the sensor before applying adhesive.
Apply 0.5g to 1g of adhesive to the center of the
mounting pad, then position the pad on the
mounting surface. Align the pad to sensor's X-
direction if required. Rotate it back and forth until
you feel slight metal-to-metal contact. Your goal is
to force most of the adhesive out the sides, forming
a slight band around the pad.
To finish the mounting surface:
1. Prepare the mounting surface.
o
The mounting diameter should be a
minimum of 40mm (1 ½ inches) on
the machine at the mounting point.
o
On curved surfaces, use a spot facing
tool to provide a flat mounting
surface.
o
Use a steel wire brush to remove all
paint from the mounting surface.
2. Prepare the attachment point.
o
(Recommended) Drill and tap a
suitable hole in the center of the
prepared surface, perpendicular to
the mounting surface.
o
(Alternative)Cement an adhesive
mounting pad onto the prepared
surface with a suitable bonding
agent. See "About Using Adhesives"at
right.
For machine manufacturers or when installing in
a suitable environment, the surface finish for stud
mounted devices should meet these specifications:
l Roughness: 32 micro inch rms
l Flatness: 0.001" TIR
l Spot face Diameter: 1.5 inch Hole
l Perpendicularity: +/- 1 °
l Hole Depth: mounting stud dependent
The mounting point hole and thread depth should be sufficient for the mounting stud to
be seated against the prepared mounting surface.
Attach the Device
1. Align the axis of the device as needed to the axis of the acceleration being monitored.
o
The vertical or z-axis of the Ranger Pro sensor is the most sensitive.
o
Where possible, mount the device in the axial or radial direction of the machine.
2. Apply a suitable thread locking compound to the machine mounting stud. This is
necessary due to vibration.
35/57
Ranger Pro Wireless Condition Monitoring Device
User Guide 125M6113 Rev. F