W750/W770ST Digital Projector Home Cinema Series User Manual
Table of contents Important safety instructions.......3 Overview..........................................6 Shipping contents...................................... 6 Replacing the remote control batteries...................................................... 7 Remote control effective range ............ 7 Projector features .................................... 9 Projector exterior view ........................10 Controls and functions..........................11 Control panel ...............................
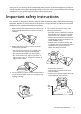
Thank you for your purchase of this quality BenQ video projector! It has been designed to provide you with an enjoyable home theater viewing experience. For the best results, please read this manual through carefully as it is your guide through the control menus and operation. Important safety instructions Your projector is designed and tested to meet the latest standards for safety of information technology equipment.
5. Do not block the vents holes while the projector 9. Do not look straight into the projector lens during operation. It may harm your sight. is on (even in standby mode): - Do not cover the projector with any item; - Do not place the projector on a blanket, bedding or any other soft surface. 6. In areas where the mains power supply voltage 10. Do not operate the projector lamp beyond the may fluctuate by ±10 volts, it is recommended rated lamp life.
13. Never attempt to replace the lamp assembly until Moisture condensation the projector has cooled down and is unplugged Never operate the projector immediately after from the power supply. moving it from a cold location to a hot location. When the projector is exposed to such a change in temperature, moisture may condense on the crucial internal parts. To prevent the projector from possible damage, do not use the projector for at least 2 hours when there is a sudden change in temperature. 14.
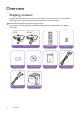
Overview Shipping contents Carefully unpack and verify that you have the items below. Some of the items may not be available depending on your region of purchase. Please check with your place of purchase. Some of the accessories may vary from region to region. The warranty card is only supplied in some specific regions. Please consult your dealer for detailed information.
Replacing the remote control batteries 1. To open the battery cover, turn the remote control over to view its back, push on the finger grip on the cover and slide it up in the direction of the arrow as illustrated. The cover will slide off. 2. Remove any existing batteries (if necessary) and install two AAA batteries observing the battery polarities as indicated in the base of the battery compartment. Positive (+) goes to positive and negative (-) goes to negative. 3.
If you use a non-BenQ brand projector ceiling mount kit, there is a safety risk that the projector may fall from the ceiling due to an improper attachment through the use of the wrong gauge or length screws. You can purchase a BenQ projector ceiling mount kit from the place you purchased your BenQ projector.
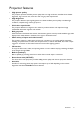
Projector features • • • • • • • • • High picture quality The projector provides excellent picture quality due to its high resolution, excellent home theater brightness, high contrast ratio, vivid color and rich gray-scale reproduction. High brightness The projector features super high brightness to achieve excellent picture quality in ambient light conditions, outperforming ordinary projectors.
Projector exterior view Front and upper side view W750 1 2 3 6 7 8 4 9 5 10 W770ST 1 2 3 6 7 8 4 9 5 10 Rear and lower side view See "Connecting with video equipment" on page 19 for connection details. 11 12 11 13 14 15 16 17 18 19 20 21 22 23 23 10 Overview 23 1. Control panel (See "Control panel" on page 11 for details.) 2. Lamp cover 3. Vent (heated air exhaust) 4. Quick-release button 5. Lens cap 6. Focus and Zoom ring 7. Vent (cool air intake) 8. Speaker grill 9.
Controls and functions Control panel W750 1 2 8 9 10 11 3 4 5 6 7 4 12 13 14 W770ST 1 2 8 9 10 11 3 4 5 6 7 4 12 13 14 6. MODE/ENTER Selects an available picture setup mode. Activates the selected On-Screen Display (OSD) menu item. 7. ECO BLANK Used to make the screen go blank. 8. LAMP indicator light Indicates the status of the lamp. Lights up or flashes when the lamp has developed a problem. 9. TEMPerature warning light Lights up red if the projector's temperature becomes too high. 10.
Remote control 8. SmartEco Displays the lamp mode selection bar. 2 (Normal/Economic/SmartEco) 7 13 3 9. Aspect 14 4 Selects the display aspect ratio. 5 10. Digital Zoom (+, -) 15 6 Magnifies or reduces the projected picture size. 7 16 8 11. Picture quality adjustment keys (Brightness, Contrast, Color, Tint) 9 10 Displays the setting bars for adjustment of the 17 11 appropriate picture quality values. 18 12. 3D Setting 19 20 Enters 3D settings directly. 21 12 13.
Positioning your projector Choosing a location Your projector is designed to be installed in one of four possible installation locations. Your room layout or personal preference will dictate which installation location you select. Take into consideration the size and position of your screen, the location of a suitable power outlet, as well as the location and distance between the projector and the rest of your equipment. 1. Front: 3.
Obtaining a preferred projected image size The distance from the projector lens to the screen, the zoom setting, and the video format each factors in the projected image size. The projector should always be placed horizontally level (like flat on a table), and positioned directly perpendicular 90° right-angle square) to the screen. This prevents image distortion caused by angled projections (or projecting onto angled surfaces). If the projector is mounted on a ceiling, it must be mounted upside-down.
Projection dimensions Installation for a 16:9 ratio screen Ceiling Installation Floor Installation : Screen : Screen : Center of lens : Center of lens W750 The screen aspect ratio is 16:9 and the projected picture is 16:9 Screen dimensions Diagonal [inch (mm)] Height [mm] Projection distance [mm] Width [mm] Min distance (with max zoom) Average Max distance (with min zoom) Vertical offset [mm] 50 (1
W770ST The screen aspect ratio is 16:9 and the projected picture is 16:9 Screen dimensions Diagonal [inch (mm)] Height [mm] Projection distance [mm] Width [mm] Min distance (with max zoom) Average Max distance (with min zoom) Vertical offset [mm] 40 (1016) 498 886 640 704 768 37 50 (1270) 623 1107 800 880 960 47 60 (1524) 747 1328 960 1056 1152 56 70 (1778) 872 1550 1120 1232 1344 65 80 (2032) 996 1771 1280 1408 1536 75 90 (2286) 1121 1992 14
Installation for a 4:3 ratio screen Ceiling Installation Floor Installation : Screen : Center of lens W750 The screen aspect ratio is 4:3 and the projected picture is 16:9 Screen dimensions Diagonal Height [inch [mm] (mm)] Width [mm] Projection distance [mm] Min distance (with max zoom) Max distance Average (with min zoom) Lowest/ Highest lens position [mm] Image height [mm] 50 (1270) 762 1
W770ST The screen aspect ratio is 4:3 and the projected picture is 16:9 Screen dimensions Diagonal Height [inch [mm] (mm)] Width [mm] Projection distance [mm] Min distance (with max zoom) Max distance Average (with min zoom) Lowest/ Highest lens position [mm] Image height [mm] 45 (1143) 686 914 661 727 793 39 514 50 (1270) 762 1016 734 808 881 43 572 60 (1524) 914 1219 881 969 1057 51 686 70 (1778) 1067 1422 1028 1131 1234 60 800 80 (2032) 1219
Connecting with video equipment You can connect the projector to any type of video equipment, such as a VCR, DVD player, Blu-ray player, digital tuner, cable or satellite decoder, video game console or digital camera. You can also connect it to a desktop or laptop PC or Apple Macintosh system. You need only connect the projector to a source device using just one of the connecting methods, however each provides a different level of video quality.
Connecting component-video devices Be sure to match the corresponding colors between the cables and the terminals. The RCA type component video jacks are provided for connection to video output devices. You should also connect the separate audio cable to a suitable audio amplifier. AV equipment: DVD player, digital tuner, etc.
Connecting a computer Connect the projector to a computer with a VGA cable. Laptop or desktop computer From audio output terminal To audio input terminals VGA cable Many laptops do not turn on their external video ports when connected to a projector. Usually a key combination like Fn + F3 or CRT/LCD key turns the external display on/off. Locate a function key labeled CRT/LCD or a function key with a monitor symbol on the laptop. Press Fn and the labeled function key simultaneously.
Using the projector Preparations 1. Plug in and turn all of the connected equipment on. 2. If not already in, plug the supplied power cable into the AC inlet on the rear of the projector. 3. Plug the power cable into a wall power outlet and turn the wall switch on. Please use the original accessories (e.g. power cable) only with the device to avoid possible dangers such as electric shock and fire. Turning the projector on Follow the steps below. 1.
Selecting an input source The projector can be connected to multiple equipment at the same time. When the projector is first turned on, it will attempt to reconnect with the input source which was in use when the projector was last shut down. HDMI 1 HDMI 2 Video S-Video NOTE: When automatically searching for a valid input source, the projector cycles through the available signals following the sequence from top to bottom as the source selection bar shows.
Using the menus The projector is equipped with multilingual On-Screen Display (OSD) menus for making various adjustments and settings. Below is the overview of the OSD menu. Main menu icon Main menu Picture Preset Mode Highlight Standard User Mode Management Sub-menu Brightness 50 Contrast 50 Color 50 Tint 0 Sharpness 3 Status Color Temperature Normal SmartEco Lamp Power Press MENU/EXIT to go back to the previous page or to exit. Advanced...
Utilizing the password function For security purposes and to help prevent unauthorized use, the projector includes an option for setting up password security. The password can be set through the On-Screen Display (OSD) menu. Once the password is set and this function is selected, the projector is password-protected. Users who do not know the correct password can not use the projector. You will be inconvenienced if you activate the password functionality and subsequently forget the password.
Entering the password recall procedure 1. Make sure the Input Password page displays on screen. Press and hold AUTO on the projector or remote control for 3 seconds. The projector will display a coded number on the screen. 2. Write down the number and turn off your projector. 3. Seek help from the local BenQ service center to decode the number. You may be required to provide proof of purchase documentation to verify that you are an authorized user of the projector.
Adjusting the projected image Adjusting the projection angle The projector is equipped with 1 quick-release adjuster foot and 1 rear adjuster foot. These adjusters change the image height and projection angle. To adjust the projector: 1. Press the quick-release button and lift the front of the projector. Once the image is positioned where you want it, 2 release the quick-release button to lock the foot in position. 2. Screw the rear adjuster foot to fine-tune the horizontal angle.
Using the preset and user modes Selecting a preset mode The projector is preset with several pre-defined picture modes so that you can choose one to suit your operating environment and input source picture type. To select a picture mode that suits your need: 1. Press MENU/EXIT and then press / until the Picture menu is highlighted. 2. Press to highlight Preset Mode. 3. Press / until your desired mode is selected.
4. Press to highlight Reference Mode and press MODE/ENTER. 5. Press to highlight a picture mode that is closest to your need and press MODE/ENTER and MENU/EXIT to go back to the User Mode Management page. 6. Here you can rename the User 1, User 2, or User 3 mode by press to highlight Rename User Mode and press MODE/ENTER. The Rename User Mode page displays. 7. Press / / / until your desired character is selected and press MODE/ENTER. 8. Press MENU/EXIT to go back to the main menu once you are done. 9.
Adjusting Color Highlight Color in the Picture menu and adjust the values by pressing remote control. / on the projector or Lower setting produces less saturated colors; setting to the minimum value makes the image black and white. If the setting is too high, colors on the image will be overpowering, which makes the image unrealistic. Adjusting Tint Highlight Tint in the Picture menu and adjust the values by pressing control.
Advanced picture quality controls There are more advanced functions in the Picture > Advanced... and Display menus to be adjusted to your preference. To save the settings, just press MENU/EXIT to leave the OSD menu. Setting Black Level Highlight Black Level in the Picture > Advanced... menu and press remote control to select 0 IRE or 7.5 IRE. / on the projector or The grayscale video signal is measured in IRE units. In some areas which use NTSC TV standard, the grayscale is measured from 7.
Selecting a Gamma setting Highlight Gamma Selection in the Picture > Advanced... menu and select a preferred setting by pressing / on the projector or remote control. Gamma refers to the relationship between input source and picture brightness. • Gamma 1.6/1.8/2.0/BenQ Select these values according to your preference. • Gamma 2.2 Increases the average brightness of the picture. Best for a lit environment, meeting room or family room. • Gamma 2.4/2.5 Best for viewing movies in a darkened environment.
1. In the Picture > Advanced... menu, highlight Color Management and press MODE/ENTER. The Color Management page displays. 2. Highlight Primary Color and press / to select a color from among Red, Green, Blue, Cyan, Magenta and Yellow. 3. Press to highlight Hue and press / to select its range. Increase in Red the range will include colors consisted of more proportions of its two adjacent colors.
Adjusting the sound The sound adjustments made as below will have an effect on the projector speaker(s). Be sure you have made a correct connection to the projector audio input. See "Connecting with video equipment" on page 19 for how the audio input is connected. Muting the sound To temporarily turn off the sound, press Mute on remote control, or 1. Press MENU/EXIT and then press / until the Audio Setup menu is highlighted. 2. Press to highlight Mute and press / to select On.
Selecting the aspect ratio The "aspect ratio" is the ratio of the image width to the image height. Digital TV is usually in 16:9 ratio, which is the default for this projector, and most analog TV signals and DVDs are in 4:3 ratio. With the advent of digital signal processing, digital display devices like this projector can dynamically stretch and scale the image output to a different aspect than that of the image input source.
image. Anamorphic is most suitable for images which are already in a 16:9 aspect, like high definition TV, as it displays them without aspect alteration. 6. Letter Box: Scales a picture to fit the projector’s native resolution in its horizontal width and resize the picture’s height to the 3/4 of the projection width. This may produce a picture greater in height than can be displayed, so part of the picture is lost (not displayed) along the 16:9 picture top and bottom edges of the projection.
Operating in a high altitude environment We recommend that you activate High Altitude Mode when your environment is higher than 1500 meters (around 4920 feet) above sea level, or whenever the projector will be used for extended periods of time (>10 hours) without shutdown. To activate High Altitude Mode: 1. 2. 3. 4. Press MENU/EXIT and then press / until the System Setup : Advanced menu is highlighted. Press to highlight High Altitude Mode. Press / to select On. A confirmation message displays.
5. Press / to highlight 3D Sync Invert and press / to select Invert to switch between the image for the left eye and the right eye for the more natural viewing. You can also toggle this function between Invert and Disable by pressing 3D Invert on the remote control.
Personalizing the projector menu display The On-Screen Display (OSD) menus can be set according to your preferences. The following settings do not affect the projection settings, operation, or performance. • Menu Display Time in the System Setup : Basic > Menu Settings menu sets the length of time the OSD will remain active after your last key press. Use / to select a suitable time length. • Menu Position in the System Setup : Basic > Menu Settings menu sets the OSD position in five locations.
On-Screen Display (OSD) menus On-Screen Display (OSD) structure Please note that the on-screen display (OSD) menus vary according to the signal type selected. Main menu Sub-menu Preset Mode Options Cinema/Dynamic/Standard/User 1/User 2/User 3/3D User Mode Management Picture Brightness 0–100 Contrast 0–100 Color 0–100 Tint 0–100 Sharpness 0–15 Color Temperature Normal/Cool/Lamp Native/Warm Lamp Power Advanced... Normal/Economic/SmartEco Black Level 0 IRE/7.
Language System Setup : Basic Background Color Black/Blue/Purple Splash Screen BenQ/Black/Blue Projector Position Front/Front Ceiling/Rear/Rear Ceiling Auto Off Disable/5 min/10 min/15 min/20 min/25 min/ 30 min Sleep Timer Disable/30 min/60 min/90 min/120 min/150 min/180 min Menu Settings Menu Display Time 5 sec/10 sec/15 sec/20 sec/25 sec/30 sec/ Always On Menu Position Center/Top-Left/Top-Right/Bottom-Right/ Bottom-Left Blank Reminder Message On/Off HDMI 1/HDMI 2/Video/S-Video/Component/
Picture menu Function Description Pre-defined picture modes are provided so you can optimize your projector picture set-up to suit your program type. See "Selecting a preset mode" on Preset Mode page 28 for details. Selects a preset mode that most suits your need for the picture quality and User Mode further fine-tune the picture based on the selections listed below. See "Setting Management the User 1/User 2/User 3 mode" on page 28 for details. Adjusts the brightness of the picture.
Audio Setup menu Function Description Mute See "Muting the sound" on page 34 for details. Volume See "Adjusting the sound level" on page 34 for details. Power On/Off Ring Tone See "Turning off the Power On/Off Ring Tone" on page 34 for details. Display menu Function Aspect Ratio Keystone Position Description There are several options to set the picture’s aspect ratio depending on your input source. See "Selecting the aspect ratio" on page 35 for details. Corrects any keystoning of the picture.
3D Mode This projector features a 3D function which enables you to enjoy the 3D movies, videos, and sporting events in a more realistic way by presenting the depth of the images. You need to wear a pair of 3D glasses to view the 3D images. When the 3D Mode function is enabled: • The brightness level of the projected image will decrease. • The Preset Mode cannot be adjusted. 3D • The Keystone can only be adjusted within limited degrees.
System Setup : Advanced menu Function Lamp Settings HDMI Settings Baud Rate Test Pattern Description Reset Lamp Timer Once the lamp is renewed, select Reset to return the lamp timer to "0". See "Resetting the lamp timer" on page 51 for details. Equivalent Lamp Hour Shows the lamp hour information. See "Getting to know the lamp hour" on page 48 for details. HDMI Format Selects an input source type for the HDMI signal. You can also manually select the source type.
Returns all settings to the factory preset values. Reset All Settings The following settings will still remain: Keystone, Language, Projector Position, High Altitude Mode, Password, and Key Lock. Information menu This menu shows you the current operating status of the projector. Some picture adjustments are available only when certain input sources are in use. Unavailable adjustments are not shown on the screen. Function Source Shows the current signal source.
Additional information Care of the projector Your projector needs little maintenance. The only thing you have to do on a regular basis is keep the lens clean. Never remove any parts of the projector except the lamp. Contact your dealer or local customer service center if the projector fails to operate as expected. Cleaning the lens Clean the lens whenever you notice dirt or dust on the surface.
Lamp information Getting to know the lamp hour When the projector is in operation, the duration (in hours) of lamp usage is automatically calculated by the built-in timer. See "Setting Lamp Power as Economic or SmartEco" below for more information on Economic mode. To obtain the lamp hour information: 1. 2. 3. 4. Press MENU/EXIT and then press / until the System Setup : Advanced menu is highlighted. Press to highlight Lamp Settings and press MODE/ENTER. The Lamp Settings page displays.
Timing of replacing the lamp When the Lamp indicator lights up red or a message appears suggesting it is time to replace the lamp, please install a new lamp or consult your dealer. An old lamp may cause a malfunction in the projector and in some instances the lamp may explode. Go to http://lamp.BenQ.com for a replacement lamp. The Lamp indicator light and Temperature warning light will light up if the lamp becomes too hot. Turn the power off and let the projector cool for 45 minutes.
2. Loosen the screws that secure the lamp cover on both sides of the projector until the lamp cover loosens. 3. Remove the lamp cover from the projector. • Do not turn the power on with the lamp cover removed. • Do not insert your fingers between the lamp and the projector. The sharp edges inside the projector may cause injuries. 1 2 4. Disconnect the lamp connector from the projector. 5. Loosen the screw that secures the lamp. 6. Lift the handle so that it stands up. 2 1 3 7.
12. Replace the lamp cover on the projector. 2 1 13. Tighten the screws that secure the lamp cover on both sides of the projector. • Loose screws may cause a bad connection, which could result in malfunction. • Do not over tighten the screws. 14. Connect the power and restart the projector. Resetting the lamp timer Do not reset the lamp timer if the lamp has not been replaced as this could cause damage. 15.
Indicators There are three indicators which show the status of the projector. Check the following for information about the indicator lights. If there is anything wrong, turn the projector off and contact your dealer. When the projector is in a normal state Power Temp Lamp Orange Off Off Stand-by mode. Green Flashing Off Off Powering up. Green Off Off Normal operation.
Green Green Flashing Red Red Off Off The internal temperature is too high. • The intake ventilation or the exhaust ventilation is blocked. • The projector may be in a poorly ventilated location. • The ambient temperature may be too high.
Troubleshooting Problem The projector does not turn on. Cause Remedy There is no power from the power cable. Plug the power cable into the AC inlet on the rear of the projector, and plug the power cable into to the power outlet. If the power outlet has a switch, make sure that it is switched on. (See page 22.) Attempting to turn the projector on again during the cooling process. Wait until the cooling down process has completed. The lamp cover is not securely attached.
Specifications All specifications are subject to change without notice. Optical Control Resolution 1280 (H) x 720 (V) Display system Single-chip DLPTM system Lens F/Number W750 F = 2.54 to 2.73, f = 18.18 to 21.84 mm W770ST F = 2.6 to 2.78, f = 10.2 to 12.24 mm Lamp 210 W lamp RS-232 serial control 9 pin x 1 IR receiver x 2 Mini B type USB x 1 (Used for service) Electrical Power supply AC100–240V, 3.2 A, 50-60 Hz (Automatic) Power consumption 295 W (Max); < 0.5 W (Standby) Mechanical Weight W750 2.
Dimensions W750: 324.7 mm x 241.5 mm x 113.8 mm (W x D x H) 324.7 Unit: mm 241.5 113.8 W770ST: 324.7 mm x 253.4 mm x 113.8 mm (W x D x H) Unit: mm 324.7 253.4 113.8 Ceiling mount installation Ceiling mount screws: M6 x 8 (Max. L = 8 mm) 77 76.5 127.7 W750 8 199.6 25 537.9 577.7 625.65 62.59 122.07 102.84 241.56 162.47 324.
Ceiling mount screws: M6 x 8 (Max. L = 8 mm) 77 76.5 127.7 W770ST 8 Unit: mm 199.6 25 537.9 577.7 625.65 74.5 133.97 102.84 253.47 162.47 324.
Timing chart Supported timing for PC input Format Resolution Refresh rate (Hz) H. Frequency (KHz) Pixel Frequency (MHz) 720 x 400 720 x 400_70 70.087 31.469 28.3221 VGA_60* 59.940 31.469 25.175 VGA_72 72.809 37.861 31.500 VGA_75 75.000 37.500 31.500 VGA_85 85.008 43.269 36.000 SVGA_60* 60.317 37.879 40.000 SVGA_72 72.188 48.077 50.000 SVGA_75 75.000 46.875 49.500 SVGA_85 85.061 53.674 56.250 SVGA_120** (Reduce Blanking) 119.854 77.425 83.000 XGA_60* 60.004 48.
SXGA_60*** 60.020 63.981 108.000 SXGA_75 75.025 79.976 135.000 SXGA_85 85.024 91.146 157.500 1280 x 960_60*** 60.000 60.000 108 1280 x 960_85 85.002 85.938 148.500 1360 x 768 1360 x 768_60*** 60.015 47.712 85.500 1440 x 900 WXGA+_60*** 59.887 55.935 106.500 1400 x 1050 SXGA+_60*** 59.978 65.317 121.750 1600 x 1200 UXGA*** 60.000 75.000 162.000 1680 x 1050 1680 x 1050_60*** 59.954 65.290 146.250 640 x 480@67Hz MAC13 66.667 35.000 30.
Supported timing for HDMI (HDCP) input Resolution Refresh rate (Hz) H. Frequency (KHz) Pixel Frequency (MHz) VGA_60* 59.940 31.469 25.175 VGA_72 72.809 37.861 31.500 VGA_75 75.000 37.500 31.500 VGA_85 85.008 43.269 36.000 720 x 400_70 70.087 31.469 28.3221 SVGA_60* 60.317 37.879 40.000 SVGA_72 72.188 48.077 50.000 SVGA_75 75.000 46.875 49.500 SVGA_85 85.061 53.674 56.250 SVGA_120** (Reduce Blanking) 119.854 77.425 83.000 XGA_60* 60.004 48.363 65.
SXGA_60*** 60.020 63.981 108.000 SXGA_75 75.025 79.976 135.000 SXGA_85 85.024 91.146 157.500 1280 x 960_60*** 60.000 60.000 108 1280 x 960_85 85.002 85.938 148.500 1360 x 768 1360 x 768_60*** 60.015 47.712 85.500 1440 x 900 WXGA+_60*** 59.887 55.935 106.500 1400 x 1050 SXGA+_60*** 59.978 65.317 121.750 1600 x 1200 UXGA*** 60.000 75.000 162.000 1680 x1050 1680 x 105_60*** 59.954 65.290 146.250 640x480@67Hz MAC13 66.667 35.000 30.240 832x624@75Hz MAC16 74.
Supported timing for EDTV and HDTV (via Component inputs) Format Resolution Refresh rate (Hz) H. Freq. (KHz) Pixel Freq. (MHz) 480i* 720 x 480 59.94 15.73 13.5 480p 720 x 480 59.94 31.47 27 576i 720 x 576 50 15.63 13.5 576p 720 x 576 50 31.25 27 720/50p 1280 x 720 50 37.5 74.25 720/60p 1280 x 720 60 45.00 74.25 1080/50i 1920 x 1080 50 28.13 74.25 1080/60i 1920 x 1080 60 33.75 74.25 1080/24P 1920 x 1080 24 27 74.25 1080/25P 1920 x 1080 25 28.13 74.
Warranty and Copyright information Warranty BenQ warrants this product against any defects in material and workmanship, under normal usage and storage. Proof of purchase date will be required with any warranty claim. In the event this product is found to be defective within the warranty period, BenQ’s only obligation and your exclusive remedy shall be replacement of any defective parts (labor included).