
Operation Manual


Multimedia OSD operation54
3. Have your computer ready with the EZ WiFi/LAN software installed. To obtain the
EZ WiFi/LAN software, please go to local website from www.BenQ.com.
4. Depending on your need and the availability of the equipment, select a connection
method (Auto/Manual) in the Settings > LAN menu.
- Auto: Select it when you are in a DHCP environment.
- Manual: Fill in the required information when you are not in a DHCP
environment.
5. Go to the EZ Display > EZ LAN menu and confirm your selection. The password
of the display appears on the screen.
6. Open the EZ WiFi/LAN software and enter the password for the display. Use the
software to set how you will use the display. You can allow multiple computers to
connect to the display, and manage those computers by selecting a split screen, send
your computer screen directly to the display by selecting Mirror mode, or treat the
display as an extended desktop by selecting Extension mode. For details about how
to install and use the software, see its user manual.
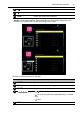
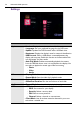
Menu system
EZ Media
Select the device where the files you want to present are stored, and select the file type.
Supported file formats
• Photo: JPEG, BMP
• Audio: MP1/MP2/MP3, WMA, OGG, ADPCM-WAV, PCM-WAV, AAC, MPEG Layer-3
(.mp3), IMA-ADPCM (.wav)
• Video: avi, divx, mkv, ts, dat, vob, mpg, mpeg, mov, mp4, rm, mvb, wmv
• Subtitle: Standard SRT (UTF-8/UTF-16)
Do not support mixed code in subtitle files.
Name Description
Internal
Memory
See Viewing files on page 43 for details.
USB