
Operation Manual


EN-28
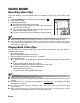
Removing Red-eye
You can use this function to remove the red-eye effect after an image is taken.
1. Press the 7 button.
The last image appears on the screen.
2. Select the image that you want to edit with the e
/ f buttons.
3. Press the MENU button.
4. Select [Fix Red Eyes] with the c / d buttons, and
press the SET button.
5. Select [Execute] with the e / f buttons, and
press the SET button.
6. View the changes on the corrected image.
7. To save your corrected image, select [Confirm]
with the e / f buttons, and press the SET
button.
When this process ends, this replaces the
original image with the corrected image.
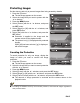
Erasing Images
Erasing a single image / Erasing all images
1. Press the 7 button.
The last image appears on the screen.
2. Select the image you want to erase with the e /
f buttons.
3. Press the MENU button.
4. Select [Delete] with the c / d buttons, and press
the SET button.
5. Select [Single] or [All] with the e / f buttons,
and press the SET button.
[Single]: Erases the selected image or the
last image.
[All]: Erases all of the images except for the
protected images.
6. Select [Execute] with the e / f buttons, and
press the SET button.
To not erase, select [Cancel], and press the
SET button.
7. To exit from the menu, press the MENU button.
MENU SET
;;
MENU SET
;;
MENU SET
;;
MENU SET
;;