
Operation Manual
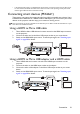
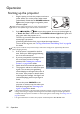
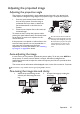
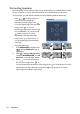
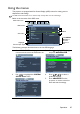

Table Of Contents
- Table of contents
- Important safety instructions
- Introduction
- Positioning your projector
- Connection
- Operation
- Starting up the projector
- Adjusting the projected image
- Using the menus
- Securing the projector
- Switching input signal
- Magnifying and searching for details
- Selecting the aspect ratio
- Optimizing the image
- Setting the presentation timer
- Remote paging operations
- Freezing the image
- Hiding the image
- Locking control keys
- Operating in a high altitude environment
- Adjusting the sound
- Using the test pattern
- Using the teaching templates
- Presenting from a USB Reader
- Shutting down the projector
- Direct power off
- Menu operation
- Maintenance
- Troubleshooting
- Specifications
- Warranty and Copyright information
Operation24
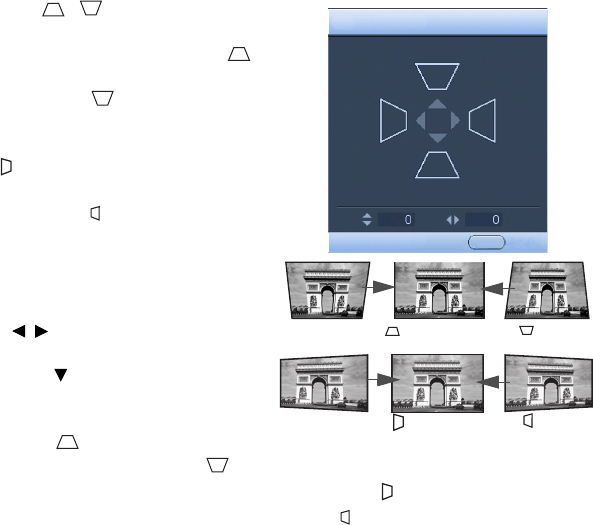
Correcting keystone
Keystoning refers to the situation where the projected image is noticeably wider at either
the top or bottom. It occurs when the projector is not perpendicular to the screen.
To correct this, you will need to manually correct it following ONE of these steps.
• Press / on the projector or
remote control to display the
Keystone correction page. Press
to correct keystoning at the top of the
image. Press to correct
keystoning at the bottom of the image.
For the MW665+, you can also press
on the projector to correct
keystoning at the right side of the
image. Press on the projector to
correct keystoning at the left side of
the image.
• Using the OSD menu
1. Press MENU/EXIT and then press
/ until the DISPLAY menu is
highlighted.
2. Press to highlight 2D Keystone
and press MODE/ENTER. The 2D
Keystone correction page displays.
3. Press to correct keystoning at
the top of the image. Press to
correct keystoning at the bottom of the image. Press on the projector to correct
keystoning at the right side of the image. Press on the projector to correct
keystoning at the left side of the image.
Press .
Press .
Press .
Press .
2D Keystone
MENU Exit