
Operation Manual
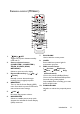
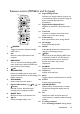
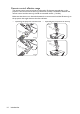
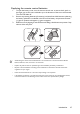
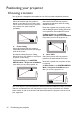
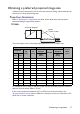
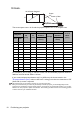
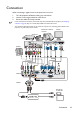
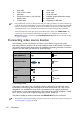
Table Of Contents
- Table of contents
- Important safety instructions
- Introduction
- Positioning your projector
- Connection
- Operation
- Starting up the projector
- Adjusting the projected image
- Using the menus
- Securing the projector
- Switching input signal
- Magnifying and searching for details
- Selecting the aspect ratio
- Optimizing the image
- Setting the presentation timer
- Remote paging operations
- Freezing the image
- Hiding the image
- Locking control keys
- Operating in a high altitude environment
- Adjusting the sound
- Using the test pattern
- Using the teaching templates
- Presenting from a USB Reader
- Shutting down the projector
- Direct power off
- Menu operation
- Maintenance
- Troubleshooting
- Specifications
- Warranty and Copyright information
Connection 19
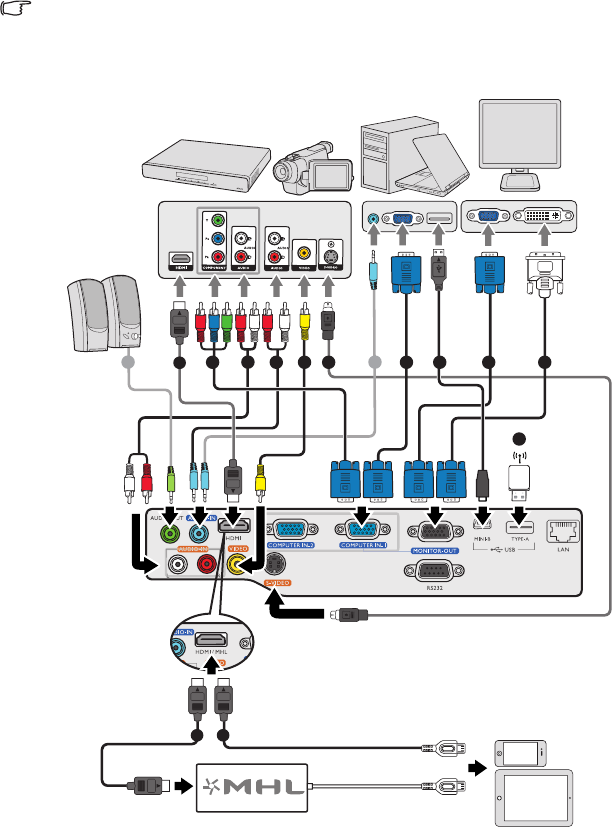
Connection
When connecting a signal source to the projector, be sure to:
1. Turn all equipment off before making any connections.
2. Use the correct signal cables for each source.
3. Ensure the cables are firmly inserted.
• In the connections shown below, some cables may not be included with the projector (see "Shipping
contents" on page 8). They are commercially available from electronics stores.
• The connection illustrations below are for reference only. The rear connecting jacks available on the
projector vary with each projector model.
11
10
784 1 216 3
9
57 7
MX666+
MW665+
10
Notebook or desktop
computer
Speakers
or
A/V device
Monitor
(DVI)
(VGA)
or
Smartphone
or tablet PC
or