
User manual


Table Of Contents
- Table of contents
- Important safety instructions
- Introduction
- Positioning your projector
- Connection
- Operation
- Starting up the projector
- Adjusting the projected image
- Using the menus
- Securing the projector
- Switching input signal
- Magnifying and searching for details
- Selecting the aspect ratio
- Optimizing the image
- Setting the presentation timer
- Remote paging operations
- Hiding the image
- Freezing the image
- Operating in a high altitude environment
- Adjusting the sound
- Use Teaching Template
- Personalizing the projector menu display
- Select the lamp saver mode
- Shutting down the projector
- Menu operation
- Maintenance
- Troubleshooting
- Specifications
- Warranty and Copyright information
Operation
26
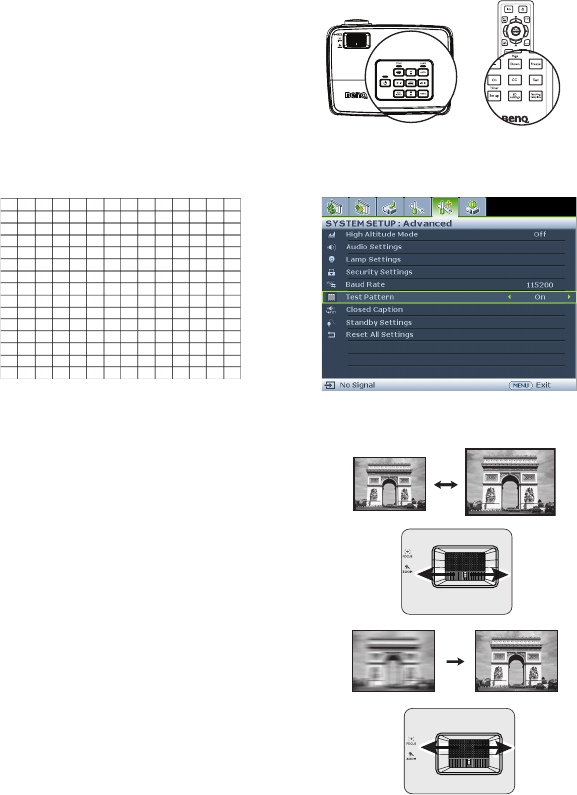
Use build-in test pattern
You can adjust the image shape and focus
status by observing the input signal content, or
using the test pattern build-in OSD manual
from OSD or remote control for better
observe the shape changed.
Open the OSD menu and go to the SYSTEM
SETUP: Advanced > Test Pattern > On.
Press MODE/ENTER. The Test Pattern
displays.
Fine-tuning the image size and clarity
1. Adjust the projected image to the size that
you need using the zoom ring.
2. Then sharpen the image by rotating the
focus ring.