
Operation Manual
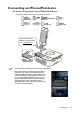
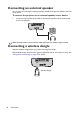
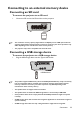
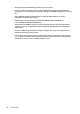
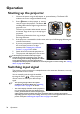
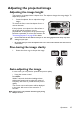
Table Of Contents
- Table of contents
- Important safety instructions
- Introduction
- Positioning your projector
- Connection
- Connecting the power
- Connecting a computer
- Connecting Video source devices
- Connecting an HDMI source device
- Connecting a Component Video source device
- Connecting a Composite Video source device
- Connecting an iPhone/iPod device
- Connecting an external speaker
- Connecting a wireless dongle
- Connecting to an external memory device
- Playing sound through the projector
- Operation
- Starting up the projector
- Switching input signal
- Adjusting the projected image
- Hiding the image
- Securing the projector
- Selecting the aspect ratio
- Optimizing the image
- Operating in a high altitude environment
- Adjusting the sound
- Firmware upgrade
- Personalizing the projector menu display
- Playing files with iPhone/iPod
- Using iPhone/iPod pop-up menus
- Displaying images with PC and Video source devices
- Using PC/ Video pop-up menus
- Displaying files with internal memory, USB Drive and SD card
- Using USB Streaming
- Using Wireless Streaming
- Settings menu
- Shutting down the projector
- Maintenance
- Troubleshooting
- Specifications
- Warranty and Copyright information
Operation
36
Operation
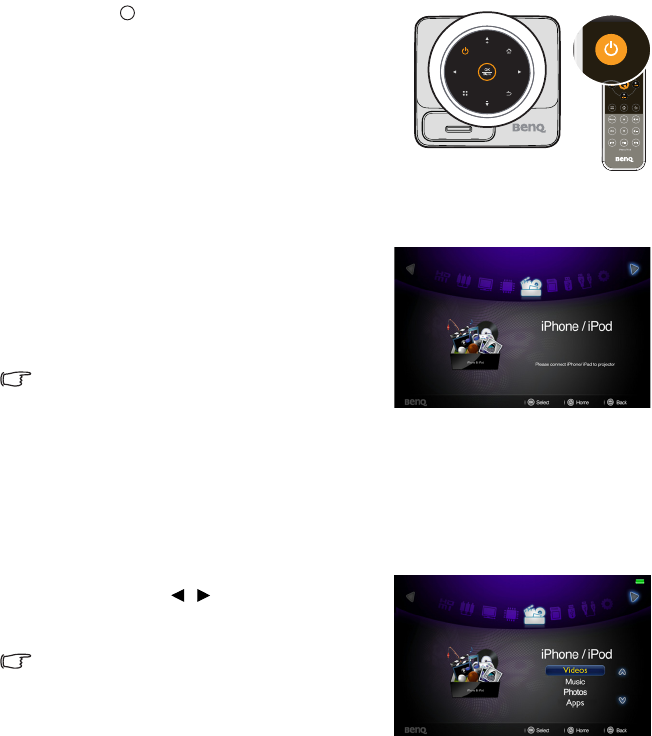
Starting up the projector
1. Connect the power using the AC adapter or optional battery. The Power LED
indicator turns into orange and flashes slowly.
2. Press Power on the projector or remote
control to start the projector. The Power, OK
and Ring LED indicators light orange when the
projector is on.
The start up procedure takes several seconds.
In the later stage of start up, a startup logo is
projected.
(If necessary) Rotate the focus ring to adjust
the image clearness.
3. If the projector is activated for the first time, select your OSD language following the
onscreen instructions.
4. If you are prompted for a password, press
the arrow keys to enter a six digit
password. See "Utilizing the password
function" on page 39 for details.
5. Switch all of the connected equipment on.
6. The projector will display the home screen.
If the frequency/resolution of the input signal
exceeds the projector's operating range, you will
see the message 'Out of Range' displayed on a blank
screen. Please change to an input signal which is
compatible with the projector's resolution or set the input signal to a lower setting. See "Timing
chart" on page 96 for details.
Switching input signal
The projector can be connected to multiple devices at the same time. However, it can only
display one full screen at a time.
You can manually cycle through the available
input signals. Press / on the projector or
remote control to select your desired input
signal.
• The input signal type effects the options
available for the Picture Mode. See "Selecting
the aspect ratio" on page 41 for details.
• The native display resolution of this projector is
in a 16:10 aspect ratio. For best display picture
results, you should select and use an input signal
which outputs at this resolution. Any other resolutions will be scaled by the projector
depending upon the 'aspect ratio' setting, which may cause some image distortion or loss of
picture clarity. See "Selecting the aspect ratio" on page 41 for details.
I
I