
Operation Manual
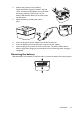

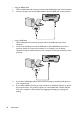
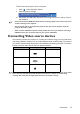
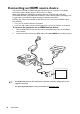
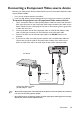
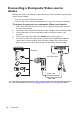
Table Of Contents
- Table of contents
- Important safety instructions
- Introduction
- Positioning your projector
- Connection
- Connecting the power
- Connecting a computer
- Connecting Video source devices
- Connecting an HDMI source device
- Connecting a Component Video source device
- Connecting a Composite Video source device
- Connecting an iPhone/iPod device
- Connecting an external speaker
- Connecting a wireless dongle
- Connecting to an external memory device
- Playing sound through the projector
- Operation
- Starting up the projector
- Switching input signal
- Adjusting the projected image
- Hiding the image
- Securing the projector
- Selecting the aspect ratio
- Optimizing the image
- Operating in a high altitude environment
- Adjusting the sound
- Firmware upgrade
- Personalizing the projector menu display
- Playing files with iPhone/iPod
- Using iPhone/iPod pop-up menus
- Displaying images with PC and Video source devices
- Using PC/ Video pop-up menus
- Displaying files with internal memory, USB Drive and SD card
- Using USB Streaming
- Using Wireless Streaming
- Settings menu
- Shutting down the projector
- Maintenance
- Troubleshooting
- Specifications
- Warranty and Copyright information
Connection
27
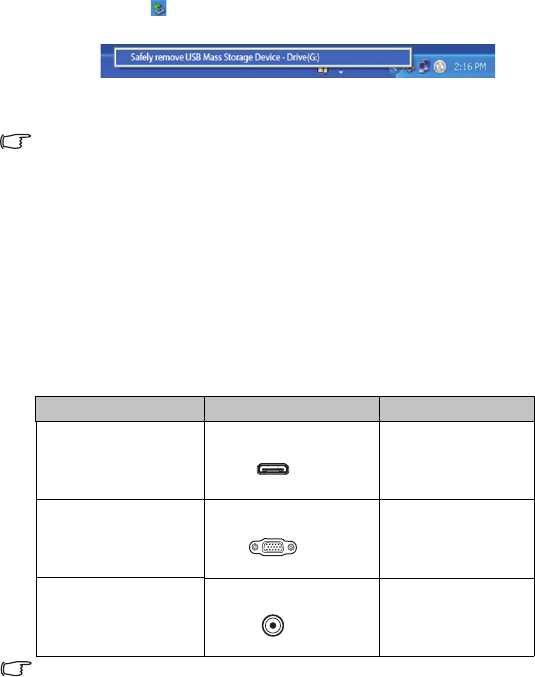
To disconnect the projector from a computer:
i. Click on the Windows Taskbar.
ii. Click the pop-up message.
iii. Disconnect the USB cable only when the message says that it is safe to remove
the hardware.
• Do not disconnect the USB cable while the files are being copied, as this could result in loss
of data or damage to the projector.
• The connection will not end if you have projector files open on the computer. Close all
projector files and try again.
• Other versions of Windows operate similarly. Follow the correct procedure for removing a
USB device from your computer safely for your version of Windows.
Connecting Video source devices
You need only connect the projector to a Video source device using just one of the above
connecting methods, however each provides a different level of video quality. The method
you choose will most likely depend upon the availability of matching terminals on both the
projector and the Video source device as described below:
If the selected video image is not displayed after the projector is turned on and the correct video
source has been selected, check that the Video source device is turned on and operating
correctly. Also check that the signal cables have been connected correctly.
Te r m i n a l n a m e Terminal appearance Picture quality
Mini HDMI Mini HDMI Best
Component Video VGA Better
Video Video Good