
Operation Manual
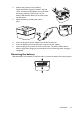

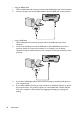
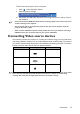
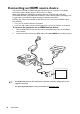
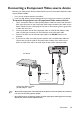
Table Of Contents
- Table of contents
- Important safety instructions
- Introduction
- Positioning your projector
- Connection
- Connecting the power
- Connecting a computer
- Connecting Video source devices
- Connecting an HDMI source device
- Connecting a Component Video source device
- Connecting a Composite Video source device
- Connecting an iPhone/iPod device
- Connecting an external speaker
- Connecting a wireless dongle
- Connecting to an external memory device
- Playing sound through the projector
- Operation
- Starting up the projector
- Switching input signal
- Adjusting the projected image
- Hiding the image
- Securing the projector
- Selecting the aspect ratio
- Optimizing the image
- Operating in a high altitude environment
- Adjusting the sound
- Firmware upgrade
- Personalizing the projector menu display
- Playing files with iPhone/iPod
- Using iPhone/iPod pop-up menus
- Displaying images with PC and Video source devices
- Using PC/ Video pop-up menus
- Displaying files with internal memory, USB Drive and SD card
- Using USB Streaming
- Using Wireless Streaming
- Settings menu
- Shutting down the projector
- Maintenance
- Troubleshooting
- Specifications
- Warranty and Copyright information
Connection
25
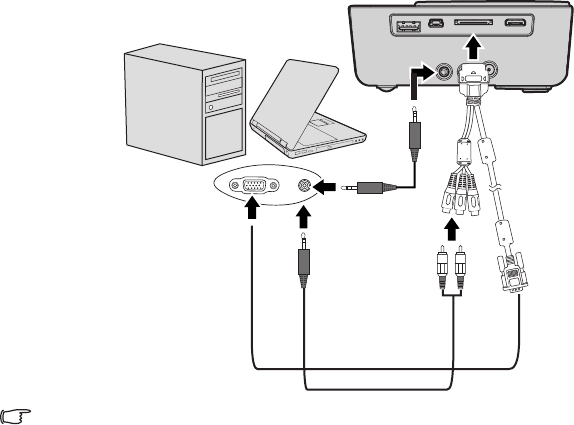
Connecting a computer
The projector provides a VGA input socket that allows you to connect it to both IBM
®
compatibles and Macintosh
®
computers. A Mac adapter is needed if you are connecting
legacy version Macintosh computers.
To connect the projector to a notebook or desktop computer:
• Using a VGA cable
1. Take the supplied multi-input cable and connect one end to the D-Sub output socket
of the computer.
2. Connect the other end of the multi-input cable to the PC/AV socket on the
projector.
3. If you wish to make use of the projector speaker, take a suitable audio cable and
connect one end of the cable to the audio output socket of the computer, and the
other end to the audio input sockets of the multi-input cable.
Many notebooks do not turn on their external video ports when connected to a projector.
Usually a key combo like FN + F3 or CRT/LCD key turns the external display on/off. Locate a
function key labeled CRT/LCD or a function key with a monitor symbol on the notebook. Press
FN and the labeled function key simultaneously. Refer to your notebook's documentation to find
your notebook's key combination.
Notebook or desktop computer
Multi-input cable
Audio cable
or