
Operation Manual
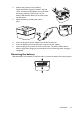
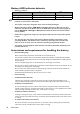

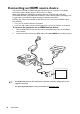
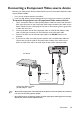
Table Of Contents
- Table of contents
- Important safety instructions
- Introduction
- Positioning your projector
- Connection
- Connecting the power
- Connecting a computer
- Connecting Video source devices
- Connecting an HDMI source device
- Connecting a Component Video source device
- Connecting a Composite Video source device
- Connecting an iPhone/iPod device
- Connecting an external speaker
- Connecting a wireless dongle
- Connecting to an external memory device
- Playing sound through the projector
- Operation
- Starting up the projector
- Switching input signal
- Adjusting the projected image
- Hiding the image
- Securing the projector
- Selecting the aspect ratio
- Optimizing the image
- Operating in a high altitude environment
- Adjusting the sound
- Firmware upgrade
- Personalizing the projector menu display
- Playing files with iPhone/iPod
- Using iPhone/iPod pop-up menus
- Displaying images with PC and Video source devices
- Using PC/ Video pop-up menus
- Displaying files with internal memory, USB Drive and SD card
- Using USB Streaming
- Using Wireless Streaming
- Settings menu
- Shutting down the projector
- Maintenance
- Troubleshooting
- Specifications
- Warranty and Copyright information
Connection
21
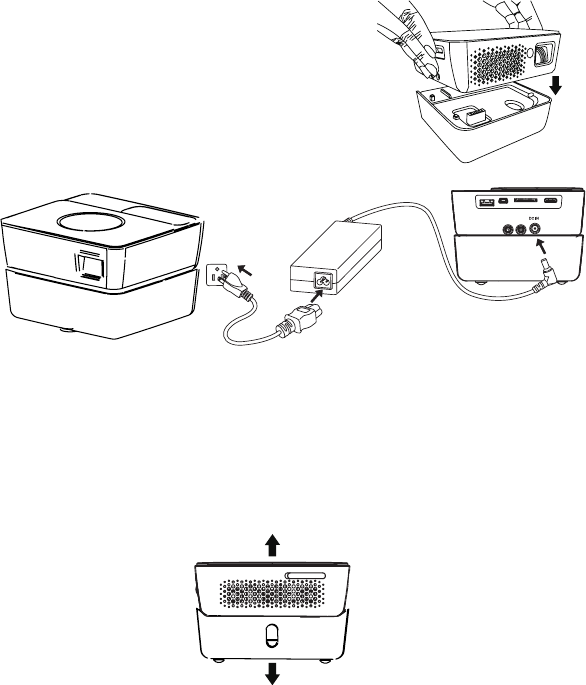
2. Position the projector on the battery.
When the battery capacity is between 10% and
100 % , the battery LED indicator turns off. When
the battery capacity is lower than 10%, the
battery LED indicator blinks red, and the system
will shut down.
3. Match the battery carefully until it fits in
place.
4. Insert the plug from the AC adapter into the DC IN terminal.
5. Insert the appropriate end of the power cord into the AC adapter.
6. Insert the plug on the power cord into a wall outlet. The battery LED indicator
blinks orange when charging is started and turns into solid orange when charging is
completed.
Removing the battery
Slide the battery lock switches on the two sides to remove the battery from the projector.
1
2
3