
Owner's Manual


7
6. Pressurizing the Airgun
Your new airgun is unique because it operates on compressed air or N
2
. This owner’s
manual describes operating the airgun with compressed air and N
2
only.
CAUTION: Use of CO
2
liquid or gas will damage the valve and void your warranty.
This airgun is designed for use at pressures between 1,000 psi (69 Bar) and 3,000 psi (207
Bar) depending on how you, as the user, adjust (tune) the airgun to work.
Explosion Danger. Use only compressed air or N
2
in this airgun.
Use of other gasses, including oxygen, can cause a re or explosion may result in
serious injury or death.
Do not disconnect the ll hose before rst bleeding the air. Fail-
ure to follow these instructions may cause the hose to whip from pressure built up
in the ll hose and may result in serious injury or death.
DO NOT FILL AT A RATE GREATER THAN 1000 PSI (69 BAR) PER MINUTE.
CAUTION:
It is important to ll the pressure reservoir slowly when lling from a low
pressure (from 0 psi). Filling too rapidly will over pressurize the airgun’s low pressure
system and may damage the regulator and/or electrical control valve.
A. Pressurizing (Filling) the Airgun with a High Pressure Tank
Airgun may be lled from a high pressure tank (bottle) like the Benjamin HBP45K. Scuba
tanks can also be utilized for the task. For scuba tank use go to Crosman.com to select
the correct adapter.
• Be sure to wear eye protection.
• Make sure the airgun is unloaded and not cocked. (See Section 10 for instructions
on unloading)
• Read all instructions with your tank so you are familiar with its operation. Review
EPiC™ operation (Section 5) to view the airgun reservoir pressure.
• Put the airgun “ON SAFE” (See Section 2A).
• Point the airgun in a SAFE DIRECTION.
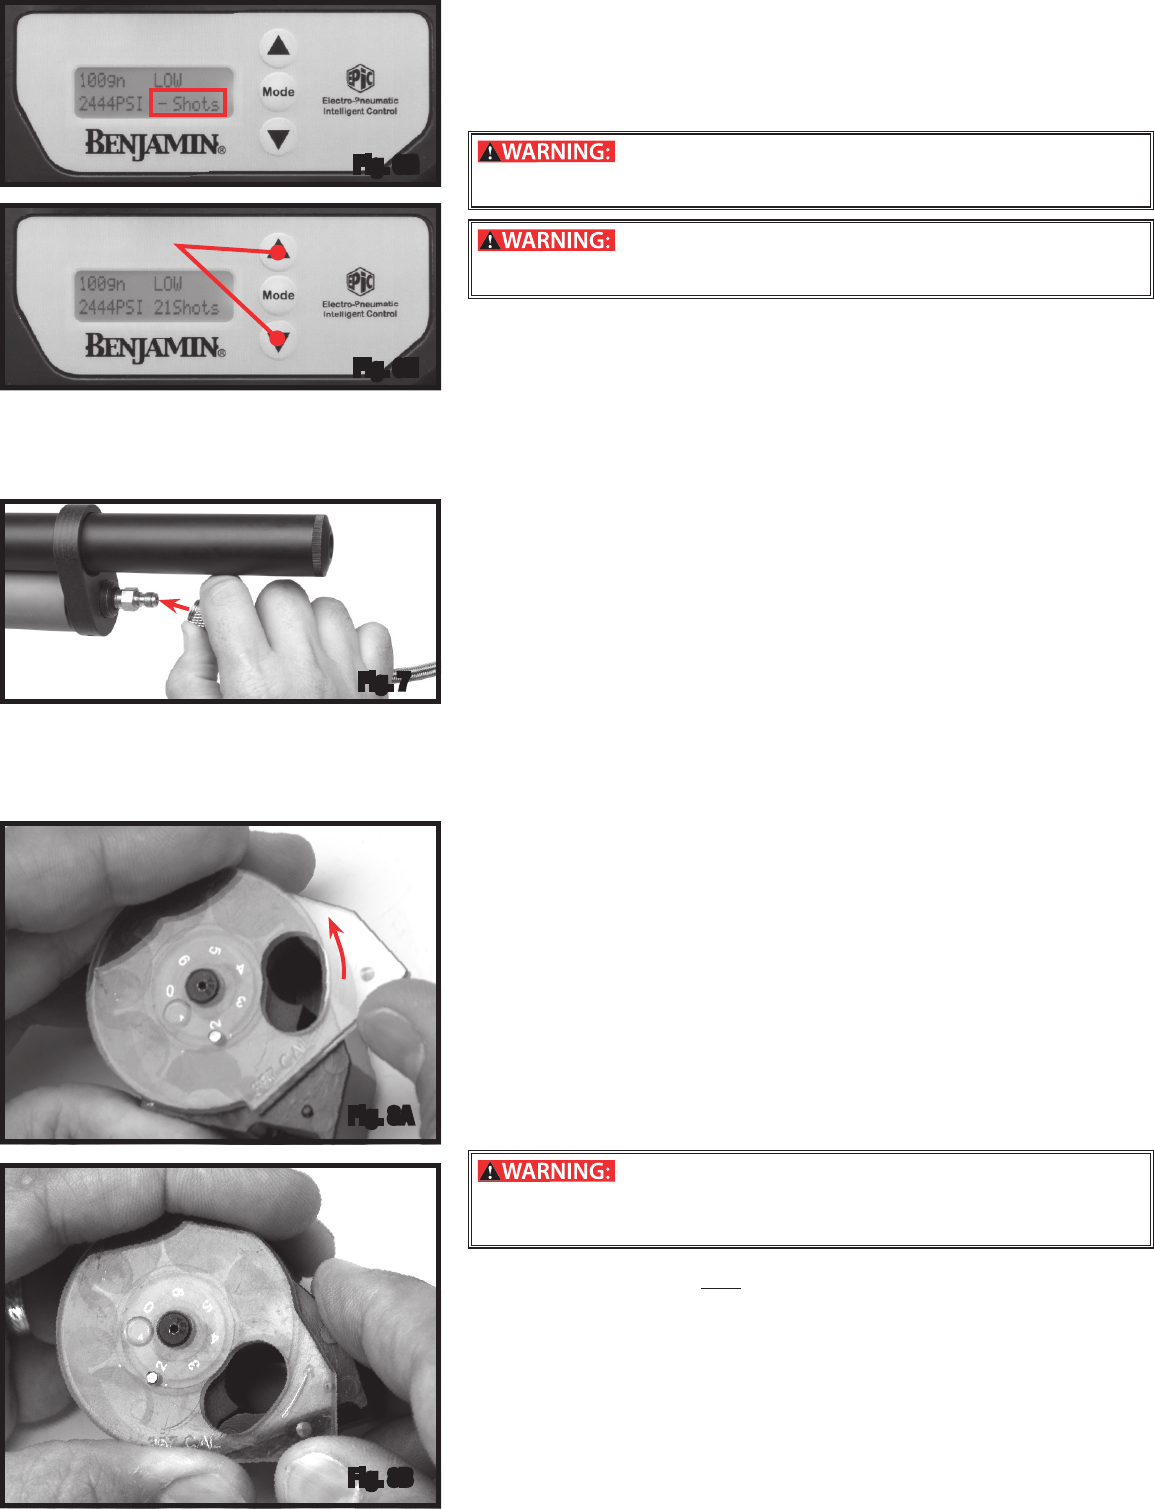
• Remove the cap that covers the ll nipple on the airgun.
• Connect the quick-disconnect tting on the adaptor’s hose to the ll nipple (Fig. 7).
• Slowly open the valve on your tank and start lling the airgun SLOWLY. Filling too
quickly will cause heat buildup that can affect accuracy of the ll pressure.
• Watch the gauges on the airgun and your tank (if equipped) until the desired pres-
sure is reached (1000-3000 psi).
• DO NOT ll the airgun to more than 3000 psi. See “Overll” information below.
• Turn the valve on your tank off when the desired ll pressure is reached.
• BLEED the ll hose COMPLETELY to avoid hose whip from pressure in the ll hose.
• Disconnect the tank’s ll hose from the ll nipple on the airgun.
• Replace the cap over the ll nipple and tighten. Always keep the ll nipple capped to
eliminate the possibility of dirt entering the check valve.
• If the airgun shows the Critical Halt for Low PSI then the airgun can be relled with a
bullet in the barrel. First you must open the bolt to the most rearward position before
relling the reservoir to a pressure greater than 1000psi.
Note: the airgun will be ready to re at any pressure above 1000psi.
B. AVOID PRESSURE OVERFILL
• Overlling 3000psi ll pressure does not improve performance. If you discover that
the airgun has been overlled, try to dry re the airgun (cock and shoot without bullet
loaded) in a SAFE DIRECTION until pressure on your airgun drops to 3,000 psi.
• If the airgun will not discharge air with each shot, the valve may be completely pres-
sure locked and will require use of the degassing procedure of your airgun. Follow
the instructions for how to degas your airgun (See Section 7) using the .125 allen
wrench included with your airgun.
7. Depressurizing the Airgun
To depressurizing your airgun (e.g., for service) utilize the following methods:
A. Manual Depressurizing Method
Performing the following procedure may exhaust air from the
barrel at a high rate and re a bullet from the airgun if one is in the barrel. There-
fore, make certain the airgun is pointed in a SAFE DIRECTION. Failure to follow
these instructions may result in serious injury or death.
• Keep the airgun pointed in a SAFE DIRECTION.
• Make certain the airgun is
NOT in the “READY TO FIRE” position by:
o Moving the cross block safety to “ON SAFE”.
o Remove the clip.
o Closing the bolt by moving it forward and then downward.
o Moving the bolt activation lever so the word, “DISABLED,” is visible to prevent
movement of the bolt. (See Section 3)
• Locate the opening at the front of the trigger housing. Insert a .125 in. allen wrench.
• Turn the set screw 1/8 turn counter clockwise.
• You should hear the pressure vent through the vent port.
• When venting is complete, turn the set screw 1/8 turn clockwise to seal the vent.
• Check the gauge to make certain all pressure has been relieved from the airgun. See
Section 5C for viewing gauge information.
Fig. 6H
Press and Hold
for Backlight
Fig. 6F
Fig. 6G
Fig. 7
Fig. 8A
Fig. 8B