
Use and Care Manual

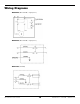
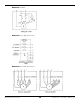

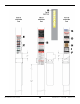
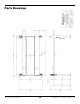
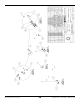
Table Of Contents
- HD-9 Manual
- Table of Contents
- Introduction
- Shipping Information
- Safety Considerations
- Components
- Specifications
- Frequently Asked Questions
- Installation Checklist
- Installation
- Being Safe
- Using Tools
- Planning for Electrical Work
- Selecting a Location
- Checking Clearances
- Deciding the Lift Orientation
- Creating Chalk Line Guides
- Unloading and Unpacking
- Moving the Posts into Position
- Installing the Crosstubes
- About Safety Locks
- Installing the Ladders and Top Cap
- Raising the Crosstubes
- Securing the Ladders
- Removing the Sheaves
- Installing the Runways
- Installing the First End of the Flex Tube
- Routing the Lifting Cables
- Working with Compression Fittings and Tubing
- Installing the Air Lines
- Installing the Return Line
- Hydraulic Fluid Contamination
- About Thread Sealants
- Installing the Hydraulic Hose
- Installing the Power Unit
- Filling the Hydraulic Fluid Reservoir
- Installing the Second End of the Flex Tube
- Installing the Pushbutton Air Valve
- Connecting the Return Line
- Connecting the Hydraulic Hose
- Contacting the Electrician
- Connecting the Power Source
- Installing a Power Disconnect Switch
- Installing a Thermal Disconnect Switch
- About Effective Embedment
- Anchoring the Posts
- Final Leveling
- Installing Accessories
- Lubricating the Lift
- Bleeding the Hydraulic Cylinder
- Test the Lift
- Final Checklist
- Outdoor usage
- Operation
- Maintenance
- Troubleshooting
- Wiring Diagrams
- Labels
- Parts Drawings
- Automotive Lift Institute (ALI) Store

HD-9 Series Four-Post Lifts 73 P/N 5900123 — Rev. M1 — March 2020
Troubleshooting
This section describes how to troubleshoot your Lift.
⚠ WARNING If your Lift is
not
functioning correctly,
you must take it out of service until
it is fixed
. All repair work must be done by qualified personnel. If your
organization has Lockout/Tagout policies, make sure to implement them after
connecting to the power source.
Runways do not raise or do not
lower, once raised.
Make sure there is sufficient Hydraulic Fluid in the Reservoir.
Make sure there is no air in the Hydraulic System.
Make sure none of the Hydraulic Hoses are pinched or
leaking.
Make sure the Power Unit is getting power.
If the Hydraulic Fluid is dirty, replace it with clean fluid.
Make sure Lift is not overloaded.
Runways do not lower past the
nearest Safety Lock even when
pressing and holding the
pushbutton.
Problem with the Air Lines; check to make sure all sections of
the Air Line are connected and not leaking.
One corner of a Platform is lower
than the other three corners.
The Safety Lock on the lower corner is not engaged. Raise the
Runways up, then lower them down onto the Safety Locks.
Check to make sure all four Safety Locks are engaged on
Safety Locks of the same height.
Runways move erratically or squeak
when in use.
Move the Runways up and down a few times to flush any
residual air from the Hydraulic System. Make sure to pause for
at least 2 minutes between cycles.
Runways do not stay up. Check for leaking Hydraulic Fluid.
Make sure the Runways are left on their Safety Locks.
Motor not running. Check the connection to the power source; make sure it is
plugged in and of the appropriate voltage.
Check the wiring diagram.
Hydraulic Fluid is dirty. Replace the dirty fluid with clean, approved Hydraulic Fluid.
Runways make odd noises. Lubricate the Bushings on the Sheaves on the sides of the
Crosstubes using white lithium grease. If the Lift is new, a
break-in period may be needed; run the Lift several times
each day. If the noises persist, contact BendPak Support.
If you continue to have issues with your Lift, take it out of service, then contact your dealer, go to
bendpak.com/support, email support@bendpak.com, or call (800) 253-2363.