
Use and Care Manual

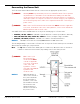

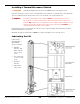


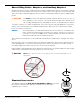
Table Of Contents
- Table of Contents
- Introduction
- Shipping Information
- Safety Considerations
- Components
- Specifications
- Installation Checklist
- Installation
- Reviewing the Safety Rules
- Gathering Your Tools
- Preparing for Electrical Work
- Reviewing the Installation Orientation
- Checking Clearances
- Selecting a Location
- Choosing a Wide or Narrow Configuration
- Installing the Safety Assemblies and Positioning the Safety Lock Cable
- Putting the Equalizing Cables into Position
- About Thread Sealants
- Identifying Hydraulic Fittings
- Routing the Hydraulic Hoses
- Creating Chalk Line Guides
- Anchoring the Posts
- Installing the Overhead Assembly and Safety Shutoff Bar
- Installing the Microswitch
- Completing the Equalizing Cables Installation
- Mounting the Power Unit
- Installing the Safety Lock Cable
- Connecting the Hydraulic Hoses
- Installing the Lift Arms
- Double Threaded Rod Installation
- Leveling
- Contact the Electrician
- Electrical Information
- Wiring the Microswitch
- Connecting the Power Unit
- Installing a Power Disconnect Switch
- Installing a Thermal Disconnect Switch
- Lubricating the Lift
- Review Final Checklist Before Operation
- Leave the Manual with the Owner/Operator
- Perform an Operational Test
- Operation
- Maintenance
- Troubleshooting
- Wiring Diagrams
- Labels
- Parts Drawings
- Automotive Lift Institute (ALI) Store
- Maintenance Log
- Maintenance Log

10AP Series Two-Post Lifts 58 P/N 5900265 — Rev. A10 — September 2023
To perform an Operational Test:
Make sure you have covered all the areas in Review Final Checklist before Operation
before proceeding further.
Follow the instructions in Raising a Vehicle and Lowering a Vehicle to safely raise and lower
a Vehicle on the Lift.
⚠ DANGER Follow the instructions carefully when it comes to contacting the manufacturer’s
recommended Lifting Points on the underside of the Vehicle. If you do not, the
Vehicle could become unstable and fall, which could damage the Vehicle, damage
the Lift, and injure or even kill anyone under the Vehicle.
Adjust the Lift Arms under the Vehicle so the Lift Pads are directly under the Lifting Points for the
Vehicle you are raising. If necessary, use Auxiliary Adapters
(see Optional Accessories) for
additional height.
Press the Up button to raise the Lift until just before the Lift Pads contact the Lifting Points.
Check the Arm Restraint Gears on all four Lift Arm Assemblies to verify they are engaged. If they
are not engaged, move the Lift Arms back and forth until they engage.
Raise the Lift until the tires of the Vehicle are a few inches off the ground.
Verify all four Lift Pads are making solid contact with all four Lifting Points.
If any of the Lift Pads are not making solid contact with the Lifting Points, carefully lower the Lift
and start over again; the Lift Pads must make solid contact with all Vehicle Lifting Points.
Raise the Vehicle approximately three feet off the ground, then release the Up button, then press
and hold the Safety Lock Release Handle and the Lowering Handle to lower the Lift back down.
NOTICE Residual air in the Hydraulic System can cause the Lift to shake, move erratically, or
squeak; this is normal when you first start using the Lift. It will soon stop doing this,
as the Hydraulic System is self-bleeding.
Wait for one minute.
⚠ WARNING The Power Unit is not a constant duty motor; it cannot be run continuously.
Repeat the process, this time raising the Lift, engaging it on a Safety Lock position, taking it off the
Safety Lock position, and then lowering it back down to the ground.
If the Lift is working without shaking, moving erratically, or squeaking, there is no need to repeat
the procedure. If the Lift is shaking, moving erratically, or squeaking, repeat the procedure one
more time. If you continue to have issues, refer to
Troubleshooting for assistance.
When the Lift is on the ground and the Vehicle is on all four tires, move the four Lift Arms to their
full drive-through positions, then drive the Vehicle out.
With no Vehicle on the Lift Arms, press and hold the Up button on the Power Unit.
Have another person push up the Safety Shutoff Bar until it triggers the Microswitch.
If the Lift Arms do not stop rising when the Microswitch is triggered, the Microswitch is either not
installed correctly or not wired correctly. Return to the sections in this manual where installation
and wiring of the Microswitch is described to identify and correct the issue.
⚠ CAUTION Do not put the Lift into normal operation until you have confirmed that triggering the
Microswitch stops the Lift Arms from rising.