
Installation Guide


15
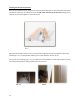
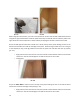
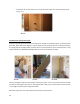
Pic. 4.2
Dry fit the Opposite Wall Design Strip (DS) making sure the top of the DS aligns to the top of the line
drawn on the wall and to the lines drawn on the outside edges.
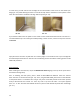
o Apply fast adhesive to the back of the DS and silicone groove of the back
bottom panel
o Install the tongue of DS into the groove of panel
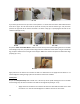
Installing Top Panel Layer
Dry fit Top Level Back Panel aligning top of panel to line on the wall as well as the tongue (male) fitting
into the groove (female) of DS.
o Pull off and apply fast adhesive circles to the back of the panel, both of the Internal Trims
and silicone the groove of the DS and Install panel
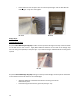
Dry fit the Upper Level Valve Wall to make sure it fits by the top of the panel meeting the line on the
wall as well as outside line on wall for the edge of the panel and make sure tongue (male) slots into
groove (female)of DS.
o Make sure that the shower head hole lines up properly.
o Apply silicone to the groove (female) of the DS and Internal Trim channel. Apply fast
adhesive to the back of the panel but make sure to hold the fast adhesive 1 ½” short of the
top & outside edge lines on wall for the trims to slot in later, Install panel.
Dry fit the Upper Level Opposite Wall to make sure it fits by the top of the panel meeting the line on the
wall as well as outside line on wall for the edge of the panel and make sure the tongue (male) slots into
groove (female) of DS.
Apply silicone to the groove (female) of the DS and Internal Trim channel. Apply fast adhesive to the
back of the panel, leave 1 ½” clearance on all outer edges where the external trim will be installed later.
(pic. 4.3).