ADSL2+ Modem with Wireless G Router User Manual F5D7632uk4A
Table of Contents 1. Introduction Product Features Benefits of a Home Network Advantages of a Belkin Wireless Network 1 1 3 3 2.
Introduction Product Features 1 2 3 4 Compatibility with both PCs and Mac® Computers The Router supports a variety of networking environments including Mac OS® 8.x, 9.x, X v10.x, AppleTalk®, Linux®, Windows® 95, 98SE, Me, NT®, 2000, XP, Vista, and others. You need an Internet browser and a network adapter that supports TCP/IP (the standard language of the Internet). 5 6 7 Front-Panel LED Display Lighted LEDs on the front of the Router indicate which functions are in operation.
Introduction Built-In Dynamic Host Configuration Protocol (DHCP) Built-In Dynamic Host Configuration Protocol (DHCP) on-board makes for the easiest possible connection of a network. The DHCP server will assign IP addresses to each computer automatically so there is no need for a complicated networking setup.
Introduction Benefits of a Home Network • Share resources, such as files, and hard drives among all the connected computers in your home • Share a single printer with the entire family • Share documents, music, video, and digital pictures • Store, retrieve, and copy files from one computer to another • Simultaneously play games online, check Internet email, and chat Advantages of a Belkin Wireless Network 1 2 3 4 5 6 Mobility — you’ll no longer need a dedicated “computer room”—now you can work on a netw
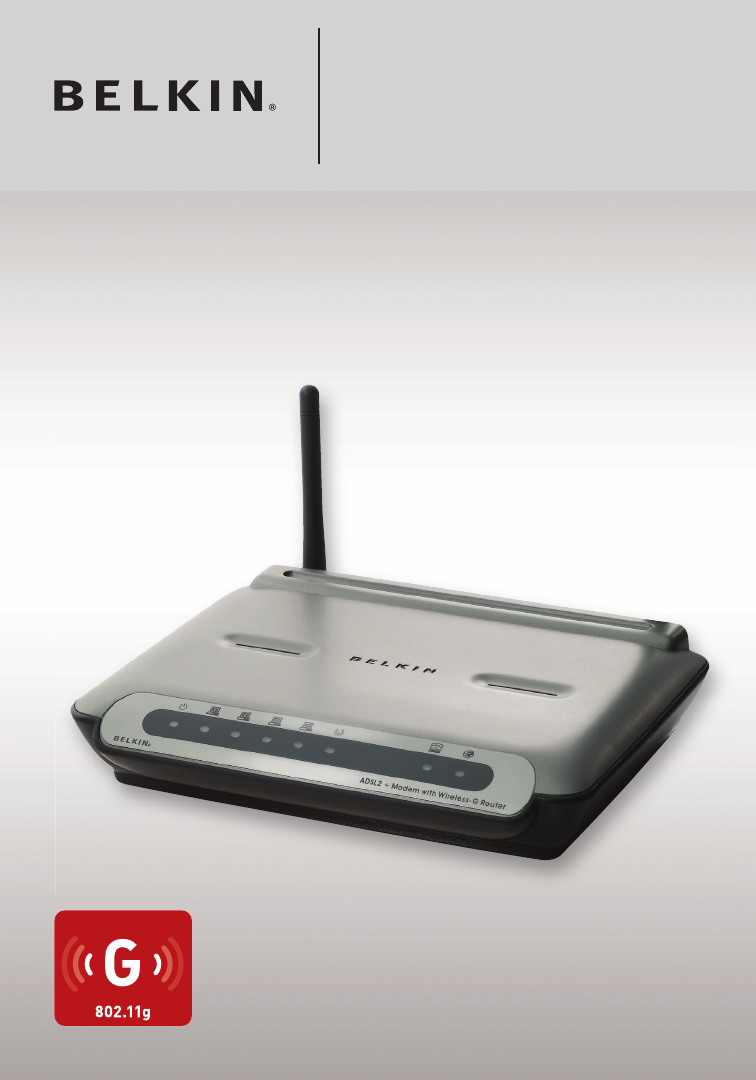
Make Sure You Have the Following Package Contents • • • • • ADSL2+ Modem with Wireless G Router RJ11 Telephone Cord - Gray RJ45 Ethernet Networking Cable – Yellow ADSL Microfilter* Power Adapter • User Manual and Belkin Setup Assistant Software on CD-ROM *ADSL microfilter varies by country. If it’s not included, you will need to purchase one.
Knowing your Router Front Panel The following illustration shows the front panel of the Router: 1 2 3 4 5 6 7 8 Power LED LED Indicators ADSL LED LAN Status LED (1-4) Internet LED Wireless LAN (WLAN) Status LED The Router is equipped with nine LEDs on the front panel as described in the table on the next page (from left to right): 5 9 10 11 section The Router has been designed to be placed on a desktop. All of the cables exit from the rear of the Router for better organization and utility.
��� �������� ������� Knowing your Router LED ADSL Color ���� �������� Green Status OFF Description ��� ��������������� Power off or ADSL line connection is physically disconnected Blinking Handshaking or training is in progress Solid ADSL line connection is OK OFF Power off or no radio signal (WLAN card is not present or Wireless Green fails to function) Blinking Traffic is going through wireless LAN interface Solid Wireless LAN interface ready to work OFF No Internet connection Bl
Knowing your Router Rear Panel The following figure illustrates the rear panel of your Router. (9) (8) (7) 2 3 �������� ���������� ����������������������������� ����� ������������ 4 5 6 Power Plug — Connect the included power supply to this inlet. Using the wrong type of power adapter may cause damage to your Router. Ethernet Ports —The Ethernet ports are RJ45, 10/100 auto-negotiation. The ports are labeled 1 through 4. These ports correspond to the numbered LEDs on the front of the Router.
Connecting and Configuring your Router Setup Assistant Belkin has provided Setup Assistant software to make installing your Router a simple and easy task. You can use it to get your Router up and running in minutes. The Setup Assistant requires that your Windows 2000, XP, or Vista™ computer be connected directly to your ADSL and that the Internet connection is active and working at the time of installation.
Connecting and Configuring your Router 1A.4 Plug your Router’s power supply into the black port labeled “Power” on the back of your Router. Wait 20 seconds for the Router to start up. Look at the display on the front of the Router. Make sure the “Wired” and “Modem-Router” icons are lit in green. If they are not, recheck your connections. 2 3 4 Follow these steps if you currently have a modem or a modem router that you will be replacing with your new Router. 5 1B.1 6 1B.2 1B.
Connecting and Configuring your Router Step 2: Set Up the Router – Run the Setup Assistant Software 2.1 Shut down any programs that are running on your computer at this time.Turn off any firewall or Internet-connection-sharing software on your computer. 2.2 Insert the CD into your computer. The Setup Assistant will automatically appear on your computer’s screen within 15 seconds. Click on “Go” to run the Setup Assistant. Follow the instructions there.
Connecting and Configuring your Router 2.7 Verifying Hardware Connections The Setup Assistant will now verify your hardware connection. 2.8 Naming your Wireless Network 2.9 Requesting Internet Account Info (if needed) If your Internet account requires a login and password, you will be prompted with a screen similar to the illustration below. Select your country or ISP from the dropdown boxes. 2.
Connecting and Configuring your Router Congratulations You have finished installing your new Belkin Router. You will see the Congratulations screen when your Router can connect to the Internet. You can begin surfing by opening your browser and going to any website. You can use the Setup Assistant to set up your other wired and wireless computers to connect to the Internet by clicking “Next”. If you decide to add computers to your Router later, select “Exit the Assistant” and then click “Next”.
Manually Configuring your Router Understanding the Web-Based User Interface 1 The home page shows you a quick view of the Router’s status and settings. All advanced setup pages can be reached from this page. Using Web-Based Manager 2 Once your host PC is properly configured, start your web browser and type the private IP address of the Router into the URL field: “192.168.2.1” and then click “Enter”. 3 5 6 7 8 9 1.
Manually Configuring your Router 5. Internet Status Indicator This indicator is visible in all pages of the Router, showing the connection status of the Router. When the indicator says “connection OK” in GREEN, the Router is connected to the Internet. When the Router is not connected to the Internet, the indicator will read “no connection” in RED. The indicator is automatically updated when you make changes to the settings of the Router. 6.
Manually Configuring your Router Changing LAN Settings All settings for the internal LAN setup of the Router can be viewed and changed here. LAN Settings 2 3 4 5 6 (A) (B) 7 (C) 8 9 10 IP Address The “IP address” is the internal IP address of the Router. The default IP address is “192.168.2.1”. To access the advanced setup interface, type this IP address into the address bar of your browser. This address can be changed if needed.
Manually Configuring your Router DHCP Server The DHCP server function makes setting up a network very easy by assigning IP addresses to each computer on the network automatically. The default setting is “On”. The DHCP server can be turned OFF if necessary; however, in order to do so, you must manually set a static IP address for each computer on your network. To turn off the DHCP server, select “Off” and click “Apply Changes”.
Manually Configuring your Router Internet WAN The “Internet WAN” tab is where you will set up your Router to connect to your Internet Service Provider (ISP). The Router is capable of connecting to virtually any ADSL Service Provider’s system provided you have correctly configured the Router’s settings for your ISP’s connection type. Your connection settings are provided to you by your ISP.
Manually Configuring your Router Setting your ISP Connection Type to PPPoE or PPPoA PPPoE (Point-to-Point Protocol over Ethernet) is the standard method of connecting networked devices. It requires a user name and password to access the network of your ISP for connecting to the Internet. PPPoA (PPP over ATM) is similar to PPPoE, but is mostly implemented in the UK. Select PPPoE or PPPoA and click “Next”. Then, enter the information provided by your ISP, and click “Apply Changes” to activate your settings.
Manually Configuring your Router 5. VPI/VCI — Enter your Virtual Path Identifier (VPI) and Virtual Circuit Identifier (VCI) parameter here. (Assigned by your ISP). 1 6. Encapsulation — Select your encapsulation type (supplied by your ISP) to specify how to handle multiple protocols at the ATM transport layer. VC-MUX: PPPoA Virtual Circuit Multiplexer (null encapsulation) allows only one protocol running per virtual circuit with fewer overheads.
Manually Configuring your Router (1) (2) (3) 1. IP Assigned by ISP — Leave “Yes” if your ISP automatically assigns an IP address. If your ISP assigned a fixed IP address, select “No” and enter assigned values. 2. VPI/VCI — Enter your VPI and VCI parameter here. These identifiers are assigned by your ISP. 3. Encapsulation — Select LLC or VC MUX your ISP uses.
Manually Configuring your Router Setting your Connection Type to Modem Only (Disable Internet Sharing) In this mode, the Router simply acts as a bridge passing packets across the DSL port. It requires additional software to be installed on your computers in order to access the Internet. 1 2 3 5 6 1. VPI/VCI — Enter your VPI and VCI parameter here. (Assigned by your ISP). 2. Encapsulation — Select LLC or VC MUX. (Assigned by your ISP).
Manually Configuring your Router Using DDNS (Dynamic DNS) The DDNS service allows you to alias a dynamic IP address to a static host name in any of the many domains DynDNS.org offers, allowing your network computers to be more easily accessed from various locations on the Internet. DynDNS.org provides this service, for up to five host names, free to the Internet community. TZO.com is another alternative to DynDNS.org.
Manually Configuring your Router Wireless The “Wireless” tab lets you make changes to the wireless network settings. From this tab, you can make changes to the wireless network name (SSID), operating channel, and encryption security settings. 1 2 3 Channel and SSID 5 6 7 1. Changing the Wireless Network Name (SSID) To identify your wireless network, a name called the SSID (Service Set Identifier) is used. You can change this to anything you want to or you can leave it unchanged.
Manually Configuring your Router 3. Using the Wireless Mode Switch Your Router can operate in three different wireless modes: “Mixed (11b+11g)”, “11g Only”, and “11b Only”. The different modes are explained below. Mixed (11b+11g) Mode In this mode, the Router is compatible with 802.11b and 802.11g wireless clients simultaneously. This is the factory default mode and ensures successful operation with all devices compatible with Wi-Fi®. If you have a mix of 802.11b and 802.
Manually Configuring your Router Encryption/Security 1 Securing your Wi-Fi Network Here are a few different ways you can maximize the security of your wireless network and protect your data from prying eyes and ears. This section is intended for the home, home-office, and small-office user. At the time of this User Manual’s publication, there are four encryption methods available.
Manually Configuring your Router 128-Bit WEP As a result of 64-bit WEP’s potential security weaknesses, a more secure method of 128-bit encryption was developed. 128-bit encryption includes a key length of 104 bits plus 24 additional bits of system-generated data (128 bits total). Some hardware manufacturers refer to 128-bit as 104-bit encryption.
Manually Configuring your Router the same network key to access the network. Typically, this is the mode that will be used in a home environment. 1 WPA (with 802.1x radius server) 2 With this system, a radius server distributes the network key to the clients automatically. This is typically found in a business environment.
Manually Configuring your Router Using a Hexadecimal Key A hexadecimal key is a mixture of numbers and letters from A–F and 0–9. 64-bit keys are five 2-digit numbers. 128-bit keys are 13 2-digit numbers. For instance: AF 0F 4B C3 D4 = 64-bit key C3 03 0F AF 0F 4B B2 C3 D4 4B C3 D4 E7 = 128-bit key In the boxes below, make up your key by writing in two characters between A–F and 0–9 in each box. You will use this key to program the encryption settings on your Router and your wireless computers.
Manually Configuring your Router 3. Click “Apply Changes” to finish. Encryption in the Router is now set. Each of your computers on your wireless network will now need to be configured with the same security settings. WARNING: If you are configuring the Wireless Router from a computer with a wireless client, you will need to ensure that security is turned ON for this wireless client. If this is not done, you will lose your wireless connection.
Manually Configuring your Router 4. Click “Apply Changes” to finish. You must now set all clients to match these settings. Setting WPA/WPA2 (with radius server) Settings If your network uses a radius server to distribute keys to the clients, use this setting. 1. From the “Allowed Client Type” drop-down menu, select “WPA/WPA2”. 2. For “Encryption Technique”, select “802.1x” for environments with RADIUS servers. This setting will have to be identical on the clients that you set up. 3.
Manually Configuring your Router 1 2 3 5 6 Note: Make sure your wireless computers are updated to work with WPA2 and have the correct settings to get proper connection to the Router. Configuring your Belkin Wireless G Network Cards to Use Security Note: This section provides information on how to configure your Belkin Wireless G Network Cards to use security. At this point, you should already have your Wireless Router or access point set to use WPA or WEP.
Manually Configuring your Router Important: A WEP key is a mixture of numbers and letters from A–F and 0–9. For 128-bit WEP, you need to enter 26 keys. For 64-bit WEP, you need to enter 10 keys. This network key needs to match the key you assign to your Router. 6. Click “OK” to save the settings. Connecting your Computer to a Wireless Network that Requires WPA-PSK (no server) 1. Double-click the “Signal Indicator” icon to bring up the “Wireless Network” screen.
Manually Configuring your Router 1 2 3 5 6 7 5. Click “OK” to save the settings. Connecting your Computer to a Wireless Network that Requires WPA (with radius server) 8 1. Double-click the “Signal Indicator” icon to bring up the “Wireless Network” screen. The “Advanced” button will allow you to view and configure more options of your wireless card. 9 2. Under the “Wireless Networks” tab, select a network name from the “Available networks” list and click “Configure”. 10 3.
Manually Configuring your Router 5. Click “OK” to save the settings. Setting up WPA for Wireless Desktop and Wireless Notebook Cards that are NOT Manufactured by Belkin For WPA wireless desktop and wireless notebook cards that are NOT manufactured by Belkin and that are not equipped with WPA-enabled software, a file from Microsoft called “Windows XP Support Patch for Wireless Protected Access” is available as a free download. Note: The file that Microsoft has made available works only with Windows XP.
Manually Configuring your Router Note: Select “WPA” if you are using this computer to connect to a corporate network that supports an authentication server such as a radius server. Consult your network administrator for further information. 1 2 3 5 6 7 6. Select “TKIP” or “AES” under “Data Encryption”. This setting will have to be identical to the Router. 8 7. Type in your encryption key in the “Network Key” box. 9 Important: Enter your pre-shared key.
Manually Configuring your Router Setting up a Bridge Between your Router and a Secondary Access Point Bridging your Belkin Router to a secondary access point requires that you access the Router’s Advanced Setup Utility and enter the MAC address of the access point in the appropriate area. There are also a few other requirements. PLEASE BE SURE TO FOLLOW THE STEPS BELOW CAREFULLY. 1. Set your access point to the same channel as the Router.
Manually Configuring your Router 8. In the field named “AP1” (3), type in the MAC address of your secondary access point. When you have typed in the address, click “Apply Changes”. 9. Bridging is now set up. Note: It may take up to a minute for the bridged connection to properly establish itself. In some cases, it may be necessary to restart the access point and the Router to initiate the bridge.
Manually Configuring your Router Virtual Servers Virtual servers allow you to route external (Internet) calls for services such as a web server (port 80), FTP server (Port 21), or other applications, through your Router to your internal network. Since your internal computers are protected by a firewall, machines from the Internet cannot get to them because they cannot be “seen”.
Manually Configuring your Router 1 2 3 Access Control Access control allows users to define the outgoing traffic permitted or denied access through the WAN interface. The default is to permit all outgoing traffic. To configure restrictive access to your computers, do the following: 1. Click “Add PC” on the “Access Control” screen. 2. Define the appropriate settings for client PC services (as shown on the following screen). 5 6 7 8 9 10 11 3.
Manually Configuring your Router Schedule Rule You may filter Internet access for local clients based on rules. Each access control rule may be activated at a scheduled time. Define the schedule on the “Schedule Rule”, and apply the rule on the “Access Control” page. Follow these steps to add a schedule: 1. Click “Add Schedule Rule”. 2. You will see the following screen. 3. To configure the schedule rule, specify the name, comment, start time, and end time that you want to filter on your network. 4.
Manually Configuring your Router Setting MAC-Address Filtering Then, enter the MAC address of each computer on your network by selecting from the “DHCP Client List” drop-down box (2) and the ID to copy to (3) before clicking “Copy to”. As an alternative method, click in the space provided (4) [Designer: pls callout (4) in the screenshot] and enter the MAC address of the computer you want to add to the list. Click “Apply Changes” (5) to save the settings. Click “Apply Changes” to save the settings.
Manually Configuring your Router To put a computer in the DMZ, enter the last digits of its IP address in the IP field and select “Enable”. Click “Apply Changes” for the change to take effect. If you are using multiple static WAN IP addresses, it is possible to select to which WAN IP address the DMZ host will be directed. Type in the WAN IP address to which you wish the DMZ host to direct, enter the last two digits of the IP address of the DMZ host computer, select “Enable”, and click “Apply Changes”.
Manually Configuring your Router Utilities The “Utilities” screen lets you manage different parameters of the Router and perform certain administrative functions. 1 2 3 5 6 Restart Router At times it may be necessary to restart or reboot the Router if it begins working improperly. Restarting or rebooting the Router will NOT delete any of your configuration settings. 7 8 9 10 11 Restarting the Router to Restore Normal Operation 1. Click the “Restart Router” button. 2. The following message will appear.
Manually Configuring your Router 1. Click the “Restore Defaults” button. 2. The following message will appear. Click “OK” to restore factory defaults. Saving/Backing up Current Settings You can save your current configuration by using this feature. Saving your configuration will allow you to restore it later if your settings are lost or changed. It is recommended that you back up your current configuration before performing a firmware update. 1. Click “Save”. A window called “File Download” will open.
Manually Configuring your Router Restore Previous Settings This option will allow you to restore a previously saved configuration. 1 2 3 2. Then, click “Open”. Updating Firmware From time to time, Belkin may release new versions of the Router’s firmware. Firmware updates contain feature improvements and fixes to problems that may have existed. When Belkin releases new firmware, you can download the firmware from the Belkin website and update your Router’s firmware to the latest version.
Manually Configuring your Router 3. When the save is complete, you will see the following window. Click “Close”. The download of the firmware is complete. To update the firmware, follow the next steps in “Updating the Router’s Firmware”. Updating the Router’s Firmware 1. In the “Firmware Update” page, click “Browse” (2) Designer: pls callout (2) in the screenshot]. A window will open that allows you to select the location of the firmware update file. 2. Browse to the firmware file you downloaded.
Manually Configuring your Router 1 2 3 5 4. You will be asked if you are sure you want to continue. Click “OK”. 6 7 8 5. You will see one more message. This message tells you that the Router may not respond for as long as one minute as the firmware is loaded into the Router and the Router is rebooted. Click “OK”. 9 10 11 A 60-second countdown will appear on the screen. When the countdown reaches zero, the Router firmware update will be complete. The Router home page should appear automatically.
Manually Configuring your Router Setting or Changing the Administrator Password The Router ships with NO password entered. If you wish to add a password for greater security, you can set a password here. Write down your password and keep it in a safe place, as you will need it if you need to log in to the Router in the future. It is also recommended that you set a password if you plan to use the remotemanagement feature of your Router.
Manually Configuring your Router Enabling Remote Management Before you enable this advanced feature of your Belkin Router, MAKE SURE YOU HAVE SET THE ADMINISTRATOR PASSWORD. Remote management allows you to make changes to your Router’s settings from anywhere on the Internet. Before you enable this function, it is STRONGLY RECOMMENDED that you set your administrator password. Leaving the password empty will potentially open your Router to intrusion. The remote-access port defaults to port 8080.
Manually Configuring your Router Enabling/Disabling Universal Plug-and-Play (UPnP) UPnP is yet another advanced feature offered by your Belkin Router. It is a technology that offers seamless operation of voice messaging, video messaging, games, and other applications that are UPnP-compliant. Some applications require the Router’s firewall to be configured in a specific way to operate properly. This usually requires opening TCP and UDP ports, and in some instances, setting trigger ports.
Manually Configuring Network Adapters Windows XP, 2000, or NT 1. Click “Start”, “Settings”, then “Control Panel”. 1 2. Double-click on the “Network and dial-up connections” icon (Windows 2000) or the “Network” icon (Windows XP). 2 3. Right-click on the “Local Area Connection” associated with your network adapter and select “Properties” from the drop-down menu. 3 4. In the “Local Area Connection Properties” window, click “Internet Protocol (TCP/ IP)” and click the “Properties” button.
Manually Configuring Network Adapters 6. If not already selected, select “Obtain an IP address automatically” (1) and “Obtain (2) DNS server address automatically” (3). Click “OK”. Your network adapter(s) are (1) now configured for use with the Router. Windows 98SE or Me 1. Right-click on “My Network Neighborhood” and select “Properties” from the dropdown menu. 2. Select “TCP/IP -> settings” for your installed network adapter. You will see the following window. 3.
Manually Configuring Network Adapters 3. Next to “Configure” (2) [Designer: pls callout (2) in the screenshot above], if “Manually” is selected, your Router will need to be set up for a static IP connection type. Write the address information in the table below. You will need to enter this information into the Router. 1 2 3 4 5 6 7 8 5. Close the window. If you made any changes, the following window will appear. Click “Save”. 9 10 11 Restart the computer.
Manually Configuring Network Adapters 2. Select “Network” (1) from the “System Preferences” menu. 3. Select “Built-in Ethernet” (2) next to “Show” in the “Network” menu. (1) 4. Select the “TCP/IP” tab (3). Next to “Configure” (4), you should see “Manually” or “Using DHCP”. If you do not, check the PPPoE tab (5) to make sure that “Connect using PPPoE” is NOT selected. If it is, you will need to configure your Router for a PPPoE connection type using your user name and password. (5) (2) (3) (4) 5.
Recommended Web Browser Settings In most cases, you will not need to make any changes to your web browser’s settings. If you are having trouble accessing the Internet or the Web-Based Advanced User Interface, then change your browser’s settings to the recommended settings in this section. Microsoft Internet Explorer 4.0 or Higher 1. Start your web browser. Select “Tools” then “Internet Options”. 2. In the “Internet Options” screen, there are three selections: “Never dial a 1 2 3 4 5 6 3.
Recommended Web Browser Settings Netscape® Navigator® 4.0 or Higher 1. Start Netscape. Click on “Edit”, then “Preferences”. 2. In the “Preferences” window, click on “Advanced”, then select “Proxies”. In the “Proxies” window, select “Direct connection to the Internet”.
Troubleshooting Problem: The ADSL LED is not on. 1 Solution: 2 1. Check the connection between the Router and ADSL line. Make sure the cable from the ADSL line is connected to the port on the Router labeled “DSL Line”. 2. Make sure the Router has power. The [Insert: Power Icon] Power LED on the front panel should be illuminated. 3 Problem: 4 5 The Internet LED is not on. Solution: Problem: My connection type is static IP address. I cannot connect to the Internet.
Troubleshooting Problem: My wireless PC cannot connect to the Router. Solution: 1. Make sure the wireless PC has the same SSID settings as the Router, and you have the same security settings on the clients such as WPA or WEP encryption. 2. Make sure the distance between the Router and wireless PC are not too far away. Problem: The wireless network is often interrupted. Solution: 1. Move your wireless PC closer to the Router to find a better signal. 2.
Troubleshooting No, my network name is not listed—go to the troubleshooting solution titled “I can’t connect to the Internet wirelessly, and my network name is not listed”. 1 Problem: 2 I can’t connect to the Internet wirelessly, but my network name is listed. Solution: If the name of your network is listed in the “Available Networks” list, please follow the steps below to connect wirelessly: 1. Click on the correct network name in the “Available Networks” list.
Troubleshooting Solution: Wireless technology is radio-based, which means connectivity and the throughput performance between devices decreases when the distance between devices increases. Other factors that will cause signal degradation (metal is generally the worst culprit) are obstructions such as walls and metal appliances. As a result, the typical indoor range of your wireless devices will be between 100 to 200 feet.
Troubleshooting coverage area of your wireless network. An access point is typically placed in the area not currently covered by your wireless router, and connected to the router using either an Ethernet cable, or through your home’s power lines using two powerline Ethernet adapters. • For 802.11g (54g) wireless networks, Belkin offers a Wireless Range Extender/ Access Point that can be connected wirelessly to a Belkin 802.
Troubleshooting Note to Mac users: Original Apple AirPort products support 64-bit encryption only. Apple AirPort 2 products can support 64-bit or 128-bit encryption. Please check your Apple AirPort product to see which version you are using. If you cannot configure your network with 128-bit encryption, try 64-bit encryption. Problem: I am having difficulty setting up Wired Equivalent Privacy (WEP) security on a Belkin Wireless Card.
Troubleshooting Problem: Do Belkin products support WPA? 1 Solution: 2 Note: To use WPA security, all your clients must be upgraded to drivers and software that support it. At the time of this FAQ publication, a security patch download is available, for free, from Microsoft. This patch works only with the Windows XP operating system. 3 Download the patch here: http://www.microsoft.com/downloads/details.
Troubleshooting setting. This is typically used in a business environment. 1. From the “Security Mode” drop-down menu, select “WPA (with server)”. 2. For “Encryption Technique”, select “TKIP” or “AES”. This setting will have to be identical on the clients that you set up. 3. Enter the IP address of the radius server into the “Radius Server” fields. 4. Enter the radius key into the “Radius Key” field. 5. Enter the key interval. Key interval is how often the keys are distributed (in packets). 6.
Troubleshooting Problem: I am having difficulty setting up Wi-Fi Protected Access (WPA) security on a Belkin Wireless Card for a business. Solution: Problem: I am having difficulty setting up Wi-Fi Protected Access (WPA) security and I am NOT using a Belkin Wireless Card for a home network.
Troubleshooting 2. Right-clicking on the “Wireless Networks” tab will display the following screen. Ensure the “Use Windows to configure my wireless network settings” box is checked. 3. Under the “Wireless Networks” tab, click the “Configure” button. 4. For a home or small business user, select “WPA-PSK” under “Network Administration”. Note: Select WPA (with radius server) if you are using this computer to connect to a corporate network that supports an authentication server such as a radius server.
Troubleshooting Wireless Comparison Chart Wireless 802.11b G (802.11g) Technology 1 G Plus G Plus MIMO N1 MIMO (802.11g (802.11g with (draft 802.11n with HSM) MIMO MRC) with MIMO) 2 3 Speed 11Mbps link rate/baseline 5x faster than 802.11b 10x faster than 802.11b 10x faster than 802.11b Wired speed over the air Frequency Common household devices such as cordless phones and microwave ovens may interfere with the unlicensed band 2.
Technical-Support Information Free Tech Support* *National call rates may apply www.belkin.com You can find additional support information on our website www.belkin. com through the tech-support area. If you want to contact technical support by phone, please call the number you need from the list below*. COUNTRY NUMBER INTERNET ADRESS AUSTRIA 0820 200766 www.belkin.com/uk/networking/ BELGIUM 07 07 00 073 www.belkin.com/nl/networking/ CZECH REPUBLIC 239 000 406 www.belkin.
Appendix A: Glossary IP Address The “IP address” is the internal IP address of the Router. To access the advanced setup interface, type this IP address into the address bar of your browser. This address can be changed if needed. To change the IP address, type in the new IP address and click “Apply Changes”. The IP address you choose should be a non-routable IP. Examples of a non-routable IP are: 192.168.x.x (where x is anything between 0 and 255) 10.x.x.
Appendix A: Glossary After you apply the changes, the “Internet Status” indicator will read “connection OK” if your Router is set up properly. PPPoA Enter the PPPoA information in the provided spaces, and click “Next”. Click “Apply” to activate your settings. 1. User name - Enter the user name. (Assigned by your ISP). 2. Password - Enter your password. (Assigned by your ISP). 3. Retype Password - Confirm the password. (Assigned by your ISP). 4.
Appendix A: Glossary Encryption Setting encryption can help keep your network secure. The Router uses Wired Equivalent Privacy (WEP) encryption to protect your data and features two rates of encryption: 64-bit and 128-bit. Encryption works on a system of keys. The key on the computer must match the key on the Router, and there are two ways to make a key. The easiest is to let the Router’s software convert a passphrase you’ve created into a key. The advanced method is to enter the keys manually.
Appendix A: Glossary URL Blocking To configure the URL-blocking feature, specify the websites (www.somesite.com) and/or keywords you want to filter on your network. Click “Apply Changes” to activate the change. To complete this configuration, you will need to create or modify an access rule in the client IP filters section. To modify an existing rule, click the “Edit” option next to the rule you want to modify. To create a new rule, click on the “Add PC” option.
Appendix A: Glossary Administrator Password The Router ships with NO password entered. If you wish to add a password for more security, you can set a password from your Router’s web-based user interface. Keep your password in a safe place as you will need this password if you need to log into the Router in the future. It is STRONGLY RECOMMENDED that you set a password if you plan to use the remote management feature.
Appendix B: Important Factors for Placement and Setup Note: While some of the items listed below can affect network performance, they will not prohibit your wireless network from functioning; if you are concerned that your network is not operating at its maximum effectiveness, this checklist may help. 1. Wireless Router (or Access Point) Placement Place your wireless router (or access point), the central connection point of your network, as close as possible to the center of your wireless network devices.
Appendix B: Important Factors for Placement and Setup phone to channel 1 and move your wireless router (or access point) to channel 11. See your phone’s user manual for detailed instructions. • If necessary, consider switching to a 900MHz or 5GHz cordless phone. 4. Choose the “Quietest” Channel for your Wireless Network In locations where homes or offices are close together, such as apartment buildings or office complexes, there may be wireless networks nearby that can conflict with yours.
Appendix B: Important Factors for Placement and Setup A second alternative is to change your computer’s power management settings so it does not go to sleep; however, this may not be appropriate for portable computers. To change your power management setting under Windows, see the “Power Options” item in the Control Panel. If you continue to have difficulty with Secure Connections, VPNs, and AOL, please review the steps above to be sure you have addressed these issues.
Information FCC Statement DECLARATION OF CONFORMITY WITH FCC RULES FOR ELECTROMAGNETIC COMPATIBILITY We, Belkin International, Inc., of 501 West Walnut Street, Compton, CA 90220, declare under our sole responsibility that the product, F5D7632uk4A to which this declaration relates, complies with Part 15 of the FCC Rules.
Information Modifications The FCC requires the user to be notified that any changes or modifications to this device that are not expressly approved by Belkin International, Inc., may void the user’s authority to operate the equipment. Canada-Industry Canada (IC) The wireless radio of this device complies with RSS 139 & RSS 210 Industry Canada. This Class B digital apparatus complies with Canadian ICES-003. Cet appareil numérique de la classe B conforme á la norme NMB-003 du Canada.
Information 1 2 EC Declaration of Conformity to R&TTE Directive 1999/5/EC Manufacturer : BELKIN LTD, EXPRESS BUSINESS PARK, SHIPTON WAY ,RUSHDEN NN10 6GL ENGLAND Representative : Belkin Ltd Product / Apparatus : ADSL Modem/Wireless G Router Type Number : F5D7632-4 Variants include : All Country Variants (residing in the EC holding the TCF) 3 4 5 6 7 8 Declaration 9 I declare that above product conforms to all the applicable requirements of EU Directive1999/5/EC and is CE-marked according
Information Belkin International, Inc., Limited Lifetime Product Warranty What this warranty covers. Belkin International, Inc., warrants to the original purchaser of this Belkin product that the product shall be free of defects in design, assembly, material, or workmanship. What the period of coverage is. Belkin International, Inc., warrants the Belkin product for the lifetime of the product. What will we do to correct problems? Product Warranty.
Information International, Inc., Belkin may designate, in its sole discretion, an equipment repair facility to inspect and estimate the cost to repair such equipment. The cost, if any, of shipping the equipment to and from such repair facility and of such estimate shall be borne solely by the purchaser. Damaged equipment must remain available for inspection until the claim is finalized. Whenever claims are settled, Belkin International, Inc.
ADSL2+ Modem with Wireless G Router Belkin Tech Support UK: 0845 607 77 87 Europe: www.belkin.com/support Belkin Ltd. Express Business Park Shipton Way, Rushden NN10 6GL, United Kingdom +44 (0) 1933 35 2000 +44 (0) 1933 31 2000 fax Belkin SAS 130 rue de Silly 92100 Boulogne-Billancourt, France +33 (0) 1 41 03 14 40 +33 (0) 1 41 31 01 72 fax Belkin GmbH Hanebergstrasse 2 80637 Munich Germany +49 (0) 89 143405 0 +49 (0) 89 143405 100 fax Belkin Iberia C/ Anabel Segura, 10 planta baja, Of.