DG834G Reference Manual NETGEAR, Inc.
© 2005 by NETGEAR, Inc. All rights reserved. Trademarks NETGEAR is a trademark of Netgear, Inc. Microsoft, Windows, and Windows NT are registered trademarks of Microsoft Corporation. Other brand and product names are registered trademarks or trademarks of their respective holders. Statement of Conditions In the interest of improving internal design, operational function, and/or reliability, NETGEAR reserves the right to make changes to the products described in this document without notice.
Das Bundesamt für Zulassungen in der Telekommunikation wurde davon unterrichtet, daß dieses Gerät auf den Markt gebracht wurde und es ist berechtigt, die Serie auf die Erfüllung der Vorschriften hin zu überprüfen. Certificate of the Manufacturer/Importer It is hereby certified that the 54 Mbps Wireless ADSL Modem Router Model DG834G has been suppressed in accordance with the conditions set out in the BMPT-AmtsblVfg 243/1991 and Vfg 46/1992.
iv v3.
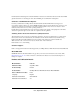
Contents DG834G Reference Manual Chapter 1 About This Manual Audience, Scope, Conventions, and Formats ................................................................1-1 How to Use This Manual ................................................................................................1-2 How to Print this Manual .................................................................................................1-2 Chapter 2 Introduction About the ADSL Modem Router ........................................
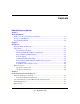
Understanding ADSL Microfilters .............................................................................3-3 Computers Set to DHCP ..........................................................................................3-4 Manually Setting Up Your ADSL Modem Router ............................................................3-4 Auto-Detecting Your Internet Connection Type ............................................................3-10 Wizard-Detected PPPoE Login Account Setup ........................
Outbound Rules (Service Blocking) .......................................................................5-10 Order of Precedence for Rules ..............................................................................5-12 Services ........................................................................................................................5-12 How to Define Services ..........................................................................................
Configuring LAN IP Settings ...........................................................................................7-4 DHCP .......................................................................................................................7-6 How to Configure LAN TCP/IP Settings ...................................................................7-8 Configuring Dynamic DNS .......................................................................................7-9 How to Configure Dynamic DNS .........
Troubleshooting the ISP Connection ..............................................................................9-4 ADSL link .................................................................................................................9-4 Obtaining a WAN IP Address ...................................................................................9-5 Troubleshooting PPPoE or PPPoA ..........................................................................9-6 Troubleshooting Internet Browsing ...........
6 v3.
Chapter 1 About This Manual This chapter describes the intended audience, scope, conventions, and formats of this manual. Audience, Scope, Conventions, and Formats This reference manual assumes that the reader has basic to intermediate computer and Internet skills. However, basic computer network, Internet, firewall, and VPN technologies tutorial information is provided in the Appendices and on the Netgear website. Note: Product updates are available on the NETGEAR, Inc. Web site at http://kbserver.
DG834G Reference Manual Warning: Ignoring this type of note may result in a malfunction or damage to the equipment. Danger: This is a safety warning. Failure to take heed of this notice may result in personal injury or death. This manual is written for the Wireless ADSL Modem Router according to these specifications: Table 1-2.
DG834G Reference Manual • Printing the Full Manual. Use the Complete PDF Manual link at the top left of any page. — Click the Complete PDF Manual link at the top left of any page in the manual. The PDF version of the complete manual opens in a browser window. — Click the print icon in the upper left of the window. Tip: If your printer supports printing two pages on a single sheet of paper, you can save paper and printer ink by selecting this feature. About This Manual 1-3 v3.
DG834G Reference Manual 1-4 About This Manual v3.
Chapter 2 Introduction This chapter describes the features of the NETGEAR 54 Mbps Wireless ADSL Modem Router Model DG834G. The Wireless ADSL Modem Router is a combination of a built-in ADSL modem, ADSL modem router, 4-port switch, and firewall which enables your entire network to safely share an Internet connection that otherwise is used by a single computer.
DG834G Reference Manual Key Features The Wireless ADSL Modem Router provides the following features: • A built-in ADSL modem • A powerful, true firewall • 802.
DG834G Reference Manual 802.11 Standards-based Wireless Networking The Wireless ADSL Modem Router includes an 802.11g-compliant wireless access point, providing continuous, high-speed 10/100 Mbps access between your wireless and Ethernet devices. The access point provides: • 802.11g Standards-based wireless networking at up to 54 Mbps • Works with both 802.11g and 802.
DG834G Reference Manual • Visual monitoring The ADSL modem router’s front panel LEDs provide an easy way to monitor its status and activity. • Flash erasable programmable read-only memory (EPROM) for firmware upgrades. Protocol Support The DG834G supports Transmission Control Protocol/Internet Protocol (TCP/IP) and Routing Information Protocol (RIP). “Internet Networking and TCP/IP Addressing:” on page A-1 provides further information on TCP/IP.
DG834G Reference Manual • PPP over ATM (PPPoA) PPP over ATM is a protocol for connecting remote hosts to the Internet over an ADSL connection by simulating an ATM connection. • Dynamic DNS Dynamic DNS services allow remote users to find your network using a domain name when your IP address is not permanently assigned. The ADSL modem router contains a client that can connect to many popular Dynamic DNS services to register your dynamic IP address.
DG834G Reference Manual Content Filtering With its content filtering feature, the DG834G prevents objectionable content from reaching your PCs. The ADSL modem router allows you to control access to Internet content by screening for keywords within Web addresses. You can configure the ADSL modem router to log and report attempts to access objectionable Internet sites.
DG834G Reference Manual What’s in the Box? The product package should contain the following items: • • • • • • • 54 Mbps Wireless ADSL Modem Router Model DG834G AC power adapter (varies by region) Category 5 (Cat 5) Ethernet cable Telephone cable with RJ-11 connector Microfilters (quantity and type vary by region) Resource CD, including: — The Smart Wizard Installation Assistant — This manual Warranty and Support Information cards If any of the parts are incorrect, missing, or damaged, contact your NETG
DG834G Reference Manual The Router’s Front Panel The front panel shown below contains status LEDs. 1 2 Figure 2-1 3 4 5 You can use the LEDs to verify various conditions. Table 2-1 describes each LED. Table 2-1. LED Descriptions Label Activity Description 1. Power On Off Power is supplied to the router. Power is not supplied to the router. 2. Test On Off The system is initializing. The system is ready and running. 3.
DG834G Reference Manual The Router’s Rear Panel The rear panel of the 54 Mbps Wireless ADSL Modem Router Model DG834G (Figure 2-2) contains port connections. 2 3 1 4 5 Figure 2-2 Viewed from left to right, the rear panel contains the following elements: 1. AC power adapter outlet 2. Four Local Ethernet RJ-45 LAN ports for connecting the firewall to the local computers 3. RJ-11 ADSL port for connecting the firewall to an ADSL line 4. Factory Default Reset push button 5.
DG834G Reference Manual 2-10 Introduction v3.
Chapter 3 Connecting the Router to the Internet This chapter describes how to set up the firewall on your Local Area Network (LAN) and connect to the Internet. It describes how to configure your 54 Mbps Wireless ADSL Modem Router Model DG834G for Internet access using the Setup Wizard, or how to manually configure your Internet connection. What You Need Before You Begin You need to prepare the following before you can set up your firewall: • Active Internet service provided by an ADSL account.
DG834G Reference Manual Two Setup Methods: 1) Smart Wizard Setup 2) Manual Setup You have two methods available for setting up your ADSL modem router: • Smart Wizard Setup: Use the Smart Wizard on the CD to assist you with setting up your ADSL modem router. — This option is the easiest. The Smart Wizard on the CD guides you through the setup process, automating many of the steps, and verifying that necessary conditions exist and that steps you perform have been successfully completed.
DG834G Reference Manual Manual Setup Use the topics and procedures below to manually set up your ADSL modem router. Understanding ADSL Microfilters ADSL technology uses the same wires as your telephone service. However, ADSL adds signals to the telephone lines which create noise in the telephone service. You must use ADSL microfilters to filter out these signals before they reach your telephone.
DG834G Reference Manual ADSL Microfilter with Built-In Splitter Phone Line DSL Figure 3-2 Use an ADSL microfilter with built-in splitter when there is a single wall outlet which must provide connectivity for both the ADSL modem router and telephone equipment. Computers Set to DHCP For the initial connection to your firewall, your computer has to be set to automatically get its TCP/IP configuration from the firewall via DHCP. This is usually the case.
DG834G Reference Manual a. You need to install an ADSL filter for every telephone that uses the same phone line as your ADSL modem router. Select the filter that came with your ADSL modem router. 1 2 0HONE 3 ,INE !$3, 0HONE 1. One-Line Filter: Use with a phone or fax machine. 2. Splitter: Use with a one-line filter to share an outlet with a phone and the ADSL modem router. 3. Two-Line Filter with Splitter: Use to share an outlet with a phone and the ADSL modem router. Figure 3-3 b.
DG834G Reference Manual 2. Connect the ADSL modem router to the ADSL filter. a. Using the included phone cable with RJ-11 jacks, connect the ADSL port (B) of the ADSL modem router to the ADSL port (C) of the two-line filter. Phone C ADSL Line B Figure 3-5 Warning: Improperly connecting a filter to your ADSL modem router will block your ADSL connection. 3-6 Connecting the Router to the Internet v3.
DG834G Reference Manual b. Connect the Ethernet cable (D) from a ADSL modem router LAN port to the Ethernet adapter in your computer. Phone ADSL Line D Figure 3-6 c. Connect the power adapter to the firewall and plug it in to a power outlet. Verify the following: The power light is lit after turning on the firewall. The test light comes on briefly, then goes off. The wireless light is lit after turning on the firewall. The ADSL light is green, indicating you are connected to the ADSL network. d.
DG834G Reference Manual 3. Log in to the ADSL modem router. Note: Your computer needs to be configured for DHCP. For instructions on configuring for DHCP, please see the documentation that came with your computer or “Preparing a Computer for Network Access”. a. Type http://Default IP Address Variable in the address field of a browser such as Internet Explorer or Netscape® Navigator.
DG834G Reference Manual b. After logging in, you will see the menu below. Figure 3-9 4. Connect to the Internet You are now ready to configure your ADSL modem router to connect to the Internet. There are two ways you can configure your ADSL modem router to connect to the Internet: a. Let the ADSL modem router Setup Wizard auto-detect the type of Internet connection you have and configure it. b. Manually choose which type of Internet connection you have and configure it.
DG834G Reference Manual Auto-Detecting Your Internet Connection Type The Web Configuration Manager built in to the ADSL modem router contains a Setup Wizard that can automatically determine your network connection type. The procedures for filling in the configuration page for each type of connection follow below.
DG834G Reference Manual Enter your login user name and password. These fields are case sensitive. Wizard-Detected Dynamic IP Account Setup If the Setup Wizard determines that your Internet service account uses Dynamic IP assignment, you will be directed to the page shown: Figure 3-12 Click Apply to set Dynamic IP as the connection method.
DG834G Reference Manual DNS servers are required to perform the function of translating an Internet name such as www.netgear.com to a numeric IP address. For a fixed IP address configuration, you must obtain DNS server addresses from your ISP and enter them manually here. 3. Click Apply to save the settings. 4. Click the Test button to test your Internet connection. If the NETGEAR Web site does not appear within one minute, refer to Chapter 9, “Troubleshooting”.
DG834G Reference Manual Your ADSL modem router is now configured to provide Internet access for your network. Your ADSL modem router automatically connects to the Internet when one of your computers requires access. It is not necessary to run a dialer or login application such as Dial-Up Networking or Enternet to connect, log in, or disconnect. These functions are performed by the ADSL modem router as needed.
DG834G Reference Manual Manually Configuring Your Internet Connection You can manually configure your ADSL modem router using the menu below, or you can allow the Setup Wizard to determine your configuration as described in the previous section. ISP Does Not Require Login ISP Does Require Login Figure 3-14 How to Perform Manual Configuration We recommend that you start the manual configuration from the Setup Wizard: 1. Select your country and language.
DG834G Reference Manual 5. Follow the instructions below according to the encapsulation method and whether your Internet connection requires a login. The following methods are available: • • • Internet Connection Requires Login and Uses PPPoE Internet Connection Requires Login and Uses PPPoA Internet Connection Does Not Require a Login 6. Usually the default ADSL Settings work fine for most ISPs and you can skip this step. If you have any problems with your connection, check the ADSL Settings.
DG834G Reference Manual 7. You should only disable NAT if you are sure you do not require it. NAT automatically assigns private IP addresses (192.168.0.x) to LAN connected devices. When NAT is disabled, only standard routing is performed by this router. Classical routing lets you directly manage the IP addresses the DG834G uses. Classical routing should be selected only by experienced users. Note: Disabling NAT will reboot the router and reset all the DG834G configuration settings to the factory default.
DG834G Reference Manual Note: Disabling NAT will reboot the router and reset all the DG834G configuration settings to the factory default. Disable NAT only if you plan to install the DG834G in a setting where you will be manually administering the IP address space on the LAN side of the router. Internet Connection Does Note Require A Login 1. If your Internet connection does not require a login, select No and fill in the settings according to the instructions below. 2.
DG834G Reference Manual Note: Disabling NAT will reboot the router and reset all the DG834G configuration settings to the factory default. Disable NAT only if you plan to install the DG834G in a setting where you will be manually administering the IP address space on the LAN side of the router 6. ADSL Modem Router MAC Address: This section determines the Ethernet MAC address that will be used by the ADSL modem router on the Internet port.
Chapter 4 Wireless Configuration This chapter describes how to configure the wireless features of your 54 Mbps Wireless ADSL Modem Router Model DG834G. Considerations for a Wireless Network In planning your wireless network, you should consider the level of security required. You should also select the physical placement of your ADSL modem router in order to maximize the network speed.
DG834G Reference Manual The time it takes to establish a wireless connection can vary depending on both your security settings and placement. WEP connections can take slightly longer to establish. Also, WEP encryption can consume more battery power on a notebook computer. Implement Appropriate Wireless Security Note: Indoors, computers can connect over 802.11g wireless networks at a maximum range of up to 300 feet. Such distances can allow for others outside of your immediate area to access your network.
DG834G Reference Manual • Turn Off the Broadcast of the Wireless Network Name SSID. If you disable broadcast of the SSID, only devices that have the correct SSID can connect. This nullifies wireless network ‘discovery’ feature of some products, such as Windows XP, but the data is still exposed. • WEP. Wired Equivalent Privacy (WEP) data encryption provides data security. WEP Shared Key authentication and WEP data encryption will block all but the most determined eavesdropper. • WPA.
DG834G Reference Manual Understanding Wireless Settings To configure the Wireless interface of your ADSL modem router, click the Wireless link in the main menu of the browser interface. The Wireless Settings menu will appear, as shown below: Figure 4-2 The following parameters are in the Wireless Settings menu: 4-4 Wireless Configuration v3.
DG834G Reference Manual • Wireless Network. — Name (SSID). The Service Set ID, also known as the wireless network name. Enter a value of up to 32 alphanumeric characters. The same Name (SSID) must be assigned to all wireless devices in your network. The default SSID is NETGEAR, but NETGEAR strongly recommends that you change your network Name to a different value. Note: This value is case sensitive. For example, Wireless is not the same as wireless. — Region. Select your region from the drop-down list.
DG834G Reference Manual • Security Options Table 4-1. Wireless Security Options Field Description Disable Wireless security is not used. WEP (Wired Equivalent Privacy) You can select the following WEP options: Authentication Type • Open: the DG834G does not perform any authentication. • Shared: WEP shared key authentication. For a full explanation of WEP shared key, see “Wireless Communications:” on page A-1.
DG834G Reference Manual Table 4-1. Wireless Security Options Field Description WPA-802.1x User authentication is implemented using 802.1x and RADIUS servers. For a full explanation of WPA, see “Wireless Communications:” on page A-1. Fill in the following: • Radius Server Name/IP Address This field is required. Enter the name or IP address of the Radius Server on your LAN. • Radius Port Enter the port number used for connections to the Radius Server.
DG834G Reference Manual 6. For initial configuration and test, leave the Wireless Card Access List set to allow everyone access by making sure that “Turn Access Control On” is not selected in the Wireless Station Access List. In addition, leave the Encryption Strength set to “Disabled.” 7. Click Apply to save your changes.
DG834G Reference Manual Restricting Access to Your Network by Turning Off Wireless Connectivity You can completely turn off the wireless portion of the DG834G. For example, if your notebook computer is used to wirelessly connect to your router and you take a business trip, you can turn off the wireless portion of the router while you are traveling. Other members of your household who use computers connected to the router via Ethernet cables will still be able to use the router.
DG834G Reference Manual 2. From the Wireless Settings menu, Wireless Station Access List section, click the Setup Access List button to display the list, shown below: Figure 4-4 3. Select the Turn Access Control On check box to enable restricting wireless computers by their MAC addresses. 4. If the wireless station is currently connected to the network, you can select it from the Available Wireless Stations list. Click Add to add the station to the Trusted Wireless Stations list. 5.
DG834G Reference Manual You can copy and paste the MAC addresses from the ADSL modem router’s Attached Devices menu into the MAC Address box of this menu. To do this, configure each wireless computer to obtain a wireless link to the ADSL modem router. The computer should then appear in the Attached Devices menu.
DG834G Reference Manual Restricting wireless access prevents intruders from connecting to your network. However, the wireless data transmissions are still vulnerable to snooping. Using the WEP data encryption settings described below will prevent a determined intruder from eavesdropping on your wireless data communications. Also, if you are using the Internet for such activities as purchases or banking, those Internet sites use another level of highly secure encryption called SSL.
DG834G Reference Manual If WEP is enabled, you can manually or automatically program the four data encryption keys. These values must be identical on all computers and access points in your network. There are two methods for creating WEP encryption keys: • Passphrase. Enter a word or group of printable characters in the Passphrase box and click the Generate button. • Manual. 64-bit WEP: Enter 10 hexadecimal digits (any combination of 0-9, a-f, or A-F).
DG834G Reference Manual 6. Enter the encryption keys. You can manually or automatically program the four data encryption keys. These values must be identical on all computers and Access Points in your network. • • Automatic — enter a word or group of printable characters in the Passphrase box and click the Generate button. The four key boxes will be automatically populated with key values. Manual — enter hexadecimal digits (any combination of 0-9, a-f, or A-F).
DG834G Reference Manual How to Configure WPA-802.1x Note: Not all wireless adapters support WPA. Consult the product document for your wireless adapter for instructions on configuring WPA settings. To configure WPA-802.1x, follow these steps: 1. Log in at the default LAN address of http://192.168.0.1, with the default user name of admin and default password of password, or using whatever LAN address and password you have set up. 2.
DG834G Reference Manual 4-16 Wireless Configuration v3.
Chapter 5 Protecting Your Network This chapter describes how to use the basic firewall features of the 54 Mbps Wireless ADSL Modem Router Model DG834G to protect your network. It also describes how to configure Trend Micro Home Network Security. Protecting Access to Your 54 Mbps Wireless ADSL Modem Router Model DG834G For security reasons, the ADSL modem router has its own user name and password.
DG834G Reference Manual 2. From the Main Menu of the browser interface, under the Maintenance heading, select Set Password to bring up the menu shown. Figure 5-2 3. To change the password, first enter the old password, and then enter the new password twice. 4. Click Apply to save your changes. Note: After changing the password, you will be required to log in again to continue the configuration.
DG834G Reference Manual Blocking Keywords, Sites, and Services The ADSL modem router provides a variety of options for blocking Internet based content and communications services. With its content filtering feature, the Wireless ADSL Modem Router prevents objectionable content from reaching your PCs. The ADSL modem router allows you to control access to Internet content by screening for keywords within Web addresses. Key content filtering options include: • Keyword blocking of HTTP traffic.
DG834G Reference Manual 2. Select the Block Sites link of the Security menu. Figure 5-3 3. To enable keyword blocking, select one of the following: • Per Schedule—to turn on keyword blocking according to the settings on the Schedule page. • Always—to turn on keyword blocking all of the time, independent of the Schedule page. 4. Enter a keyword or domain in the Keyword box, click Add Keyword, then click Apply.
DG834G Reference Manual You can specify one trusted user, which is a computer that will be exempt from blocking and logging. Since the trusted user will be identified by an IP address, you should configure that computer with a fixed IP address. 7. Click Apply to save your settings. Firewall Rules Firewall rules are used to block or allow specific traffic passing through from one side of the router to the other.
DG834G Reference Manual To access the rules configuration of the DG834G, click the Firewall Rules link on the main menu, then click Add for either an Outbound or Inbound Service. Figure 5-4 • • • To edit an existing rule, select its button on the left side of the table and click Edit. To delete an existing rule, select its button on the left side of the table and click Delete. To move an existing rule to a different position in the table, select its button on the left side of the table and click Move.
DG834G Reference Manual Remember that allowing inbound services opens holes in your firewall. Only enable those ports that are necessary for your network. Following are two application examples of inbound rules: Inbound Rule Example: A Local Public Web Server If you host a public Web server on your local network, you can define a rule to allow inbound Web (HTTP) requests from any outside IP address to the IP address of your Web server at any time of day.
DG834G Reference Manual • • WAN Users These settings determine which packets are covered by the rule, based on their source (WAN) IP address. Select the desired option: – Any — all IP addresses are covered by this rule. – Address range — if this option is selected, you must enter the Start and Finish fields. – Single address — enter the required address in the Start field. Log You can select whether the traffic will be logged.
DG834G Reference Manual Inbound Rule Example: Allowing Videoconferencing If you want to allow incoming videoconferencing to be initiated from a restricted range of outside IP addresses, such as from a branch office, you can create an inbound rule. In the example shown here, CU-SeeMe connections are allowed only from a specified range of external IP addresses. In this case, we have also specified logging of any incoming CU-SeeMe requests that do not match the allowed parameters.
DG834G Reference Manual Outbound Rules (Service Blocking) The DG834G allows you to block the use of certain Internet services by computers on your network. This is called service blocking or port filtering.
DG834G Reference Manual The parameters are: • Service From this list, select the application or service to be allowed or blocked. The list already displays many common services, but you are not limited to these choices. Use the Add Custom Service feature to add any additional services or applications that do not already appear. • Action Choose how you want this type of traffic to be handled.
DG834G Reference Manual Order of Precedence for Rules As you define new rules, they are added to the tables in the Rules menu, as shown: Figure 5-8 For any traffic attempting to pass through the firewall, the packet information is subjected to the rules in the order shown in the Rules Table, beginning at the top and proceeding to the default rules at the bottom. In some cases, the order of precedence of two or more rules may be important in determining the disposition of a packet.
DG834G Reference Manual Although the DG834G already holds a list of many service port numbers, you are not limited to these choices. Use the procedure below to create your own service definitions. How to Define Services 1. Log in to the ADSL modem router at its default LAN address of http://192.168.0.1 with its default User Name of admin, default password of password, or using whatever Password and LAN address you have chosen for the ADSL modem router. 2.
DG834G Reference Manual Setting Times and Scheduling Firewall Services The Wireless ADSL Modem Router uses the Network Time Protocol (NTP) to obtain the current time and date from one of several Network Time Servers on the Internet. How to Set Your Time Zone In order to localize the time for your log entries, you must specify your Time Zone: 1. Log in to the ADSL modem router at its default LAN address of http://192.168.0.
DG834G Reference Manual Select the Adjust for daylight savings time check box if your time zone is currently in daylight savings time. Note: If your region uses Daylight Savings Time, you must manually select Adjust for Daylight Savings Time on the first day of Daylight Savings Time, and clear it at the end. Enabling Daylight Savings Time will cause one hour to be added to the standard time. 4. The ADSL modem router has a list of NETGEAR NTP servers.
DG834G Reference Manual Note: The 54 Mbps Wireless ADSL Modem Router Model DG834G supports Home Network Security. To take advantage of this feature you must register an account with Trend Micro. For more information, refer to the Home Network Security Quick Start Guide on the NETGEAR Resource CD, or to http://www.trendmicro.com/offers/netgear. The Trend Micro software requires Microsoft Internet Explorer 5.5 or higher.
DG834G Reference Manual To install Home Network Security, click the Trend Micro banner and then follow the on-screen instructions. For assistance, refer to the Home Network Security Quick Start Guide included on the NETGEAR Resource CD. (You can download this document and the Home Network Security User’s Guide at http://www.trendmicro.com/en/support/tmss/netgear.) • Enable Trend Micro Security Services.
DG834G Reference Manual Parental Controls Settings Click Parental Controls under Content Filtering on the Main menu to get the Trend Micro Parental Controls menu shown below: Click this banner to install the Trend Micro dashboard and set up your Trend Micro account. Figure 5-13: Trend Micro Parental Controls menu To enable Parental Controls: • Click Always to turn on Parental Controls all the time. • Click Never to turn off Parental Controls.
DG834G Reference Manual Note: When in Per-User mode, everyone accessing the Internet through the router is required to log in. To configure General mode: 1. Enter a password in the Parental Controls Bypass Password box, re-enter it in the Confirm password box, and then click Apply. This password allows users to access pages that are blocked by Parental Controls. 2.
DG834G Reference Manual 2. Make the desired changes, and then click Apply. To delete a user, select the user’s name in the User Account Information table and then click Delete. Parental Controls Logs Click Parental Controls Logs to view attempts to access restricted sites, and actual accesses. Blocking criteria for potentially offensive categories Trend Micro has defined twelve potentially offensive categories of Web sites.
DG834G Reference Manual – Nudity: Sites containing nude or seminude depictions of the human body. Such depictions need not be sexual in intent or effect. May include sites containing nude paintings or photo galleries of an artistic nature. This category includes nudist or naturist sites. – Pornography: Sites that contain sexually explicit material.
DG834G Reference Manual 5-22 Protecting Your Network v3.
Chapter 6 Managing Your Network This chapter describes how to perform network management tasks with your 54 Mbps Wireless ADSL Modem Router Model DG834G. Backing Up, Restoring, or Erasing Your Settings The configuration settings of the Wireless ADSL Modem Router are stored in a configuration file in the ADSL modem router. This file can be backed up to your computer, restored, or reverted to factory default settings. The procedures below explain how to do these tasks.
DG834G Reference Manual How to Restore the Configuration from a File 1. Log in to the ADSL modem router at its default LAN address of http://192.168.0.1 with its default User Name of admin, default password of password, or using whatever User Name, Password and LAN address you have chosen for the ADSL modem router. 2. From the Maintenance heading of the Main Menu, select the Settings Backup menu. 3. Enter the full path to the file on your network or click the Browse button to locate the file. 4.
DG834G Reference Manual How to Upgrade the ADSL Modem Router Firmware Note: NETGEAR recommends that you back up your configuration before doing a firmware upgrade. After the upgrade is complete, you may need to restore your configuration settings. 1. Download and unzip the new software file from NETGEAR. The Web browser used to upload new firmware into the ADSL modem router must support HTTP uploads. NETGEAR recommends using Microsoft Internet Explorer 5.0 or above, or Netscape Navigator 4.7 or above. 2.
DG834G Reference Manual Viewing ADSL Modem Router Status and Usage Statistics From the Main Menu, under Maintenance, click ADSL Modem Router Status to view this screen. Figure 6-3 The ADSL Modem Router Status menu provides status and usage information. This screen shows the following parameters: Table 6-1. Menu 3.2 - ADSL Modem Router Status Fields Field Description Account Name The Host Name assigned to the ADSL modem router in the Basic Settings menu.
DG834G Reference Manual Table 6-1. Menu 3.2 - ADSL Modem Router Status Fields Field Description MAC Address This field displays the Ethernet MAC address being used by the Internet (ADSL) port of the ADSL modem router. IP Address This field displays the IP address being used by the Internet (ADSL) port of the ADSL modem router. If no address is shown, the ADSL modem router cannot connect to the Internet. DHCP If None, the ADSL modem router will use a fixed IP address on the ADSL.
DG834G Reference Manual Table 6-1. Menu 3.2 - ADSL Modem Router Status Fields Field Description VPI The Virtual Path Identifier setting. VCI The Virtual Channel Identifier setting. Click the Show Statistics button to display ADSL modem router usage statistics, as shown below: Figure 6-4 This screen shows the following statistics:. Table 6-1. Router Statistics Fields Field Description WAN or LAN Port The statistics for the WAN (Internet) and LAN ports. Status The link status of the port.
DG834G Reference Manual Click the Connection Status button to display ADSL modem router connection status, as shown. Figure 6-5 Clicking the Renew button updates the status information. This screen shows the following statistics: Table 6-1. Connection Status Fields for Dynamic IP Field Description IP Address The IP Address assigned to the WAN port by the ADSL Internet Service Provider. Subnet Mask The Network Mask assigned to the WAN port by the ADSL Internet Service Provider.
DG834G Reference Manual An alternate view of the Connection Status screen is shown below: Figure 6-6 Clicking the Renew button updates the status information. This screen shows the following statistics: Table 6-1. Connection Status Fields for PPPoA Field Description Connection Time The time elapsed since the last connection to the Internet via the ADSL port. Connecting to Sender The connection status.
DG834G Reference Manual Viewing Attached Devices The Attached Devices menu contains a table of all IP devices that the ADSL modem router has discovered on the local network. From the Main Menu of the browser interface, under the Maintenance heading, select Attached Devices to view the table, shown: Figure 6-7 For each device, the table shows the IP address, Device Name if available, and the Ethernet MAC address.
DG834G Reference Manual An example of the logs file is shown below. Figure 6-8 Log entries are described in Table 6-1 below: Table 6-1. Security Log entry descriptions Field Description Date and Time The date and time the log entry was recorded. 6-10 Managing Your Network v3.
DG834G Reference Manual Table 6-1. Security Log entry descriptions Field Description Description or Action The type of event and what action was taken if any. Source IP The IP address of the initiating device for this log entry. Source port and interface The service port number of the initiating device, and whether it originated from the LAN or WAN Destination The name or IP address of the destination device or Web site.
DG834G Reference Manual Saving Log Files on a Server You can choose to write the logs to a computer running a syslog program. To activate this feature, select to Broadcast on Lan or enter the IP address of the server where the Syslog file will be written. Examples of Log Messages Following are examples of log messages. In all cases, the log entry shows the timestamp as: Day, Year-Month-Date Hour:Minute:Second.
DG834G Reference Manual Enabling Security Event E-mail Notification In order to receive logs and alerts by e-mail, you must provide your e-mail information in the Email subheading: Figure 6-9 • Turn e-mail notification on. Select this check box if you want to receive e-mail logs and alerts from the ADSL modem router. • Send alerts and logs via email. Enter the name or IP address of your ISP’s outgoing (SMTP) mail server (such as mail.myISP.com).
DG834G Reference Manual – Day for sending log Specifies which day of the week to send the log. Relevant when the log is sent weekly or daily. – Time for sending log Specifies the time of day to send the log. Relevant when the log is sent daily or weekly. If the Weekly, Daily or Hourly option is selected and the log fills up before the specified period, the log is automatically e-mailed to the specified e-mail address. After the log is sent, it is cleared from the ADSL modem router’s memory.
DG834G Reference Manual From the Main Menu of the browser interface, under the Maintenance heading, select the ADSL Modem Router Diagnostics heading to display the menu shown. Figure 6-10 Enabling Remote Management Using the Remote Management page, you can allow a user or users on the Internet to configure, upgrade and check the status of your 54 Mbps Wireless ADSL Modem Router Model DG834G. Tip: Be sure to change the ADSL modem router's default password to a very secure password.
DG834G Reference Manual 3. Select the Turn Remote Management On check box. 4. Specify what external addresses will be allowed to access the ADSL modem router’s remote management. For security, restrict access to as few external IP addresses as practical: • To allow access from any IP address on the Internet, select Everyone. • To allow access from a range of IP addresses on the Internet, select IP address range. Enter a beginning and ending IP address to define the allowed range.
Chapter 7 Advanced Configuration This chapter describes how to configure the advanced features of your 54 Mbps Wireless ADSL Modem Router Model DG834G.
DG834G Reference Manual Setting Up A Default DMZ Server The Default DMZ Server feature is helpful when using some online games and videoconferencing applications that are incompatible with NAT. The ADSL modem router is programmed to recognize some of these applications and to work properly with them, but there are other applications that may not function well. In some cases, one local computer can run the application properly if that computer’s IP address is entered as the Default DMZ Server.
DG834G Reference Manual 2. From the Main Menu, under Advanced, click the WAN Setup link to view the page shown: Figure 7-1 3. Select the Default DMZ Server check box. 4. Type the IP address for that server. 5. Click Apply to save your changes. Connect Automatically, as Required Normally, this option should be enabled, so that an Internet connection will be made automatically, whenever Internet-bound traffic is detected. If this causes high connection costs, you can disable this setting.
DG834G Reference Manual Respond to Ping on Internet WAN Port If you want the ADSL modem router to respond to a 'ping' from the Internet, select the ‘Respond to Ping on Internet WAN Port’ check box. This should only be used as a diagnostic tool, since it allows your ADSL modem router to be discovered. Do not select this box unless you have a specific reason to do so. MTU Size The normal MTU (Maximum Transmit Unit) value for most Ethernet networks is 1500 Bytes, or 1492 Bytes for PPPoE connections.
DG834G Reference Manual These addresses are part of the Internet Engineering Task Force (IETF)-designated private address range for use in private networks, and should be suitable in most applications. If your network has a requirement to use a different IP addressing scheme, you can make those changes in this menu. Figure 7-2 The LAN TCP/IP Setup parameters are: • IP Address This is the LAN IP address of the ADSL modem router.
DG834G Reference Manual • RIP Direction RIP (Router Information Protocol) allows a ADSL modem router to exchange routing information with other routers. The RIP Direction selection controls how the ADSL Modem Router sends and receives RIP packets. Both is the default. — When set to Both or Out Only, the ADSL modem router will broadcast its routing table periodically. — When set to Both or In Only, it will incorporate the RIP information that it receives.
DG834G Reference Manual Use Router as DHCP server If another device on your network will be the DHCP server, or if you will manually configure the network settings of all of your computers, clear the ‘Use router as DHCP server’ check box. Otherwise, leave it selected. Specify the pool of IP addresses to be assigned by setting the Starting IP Address and Ending IP Address. These addresses should be part of the same IP address subnet as the router’s LAN IP address.
DG834G Reference Manual 4. Click Apply to enter the reserved address into the table. Note: The reserved address will not be assigned until the next time the computer contacts the router's DHCP server. Reboot the computer or access its IP configuration and force a DHCP release and renew. To edit or delete a reserved address entry: 1. Click the button next to the reserved address you want to edit or delete. 2. Click Edit or Delete. How to Configure LAN TCP/IP Settings 1.
DG834G Reference Manual Configuring Dynamic DNS If your network has a permanently assigned IP address, you can register a domain name and have that name linked with your IP address by public Domain Name Servers (DNS). However, if your Internet account uses a dynamically assigned IP address, you will not know in advance what your IP address will be, and the address can change frequently.
DG834G Reference Manual 2. From the Main Menu of the browser interface, under Advanced, select Dynamic DNS to display the page below. Figure 7-4 3. Access the Web site of one of the dynamic DNS service providers whose names appear in the ‘Service Provider’ box, and register for an account. For example, for dyndns.org, go to www.dyndns.org. 4. Select the “Use a dynamic DNS service” check box. 5. Select the name of your dynamic DNS Service Provider. 6.
DG834G Reference Manual Using Static Routes Static Routes provide additional routing information to your router. Under normal circumstances, the router has adequate routing information after it has been configured for Internet access, and you do not need to configure additional static routes. You must configure static routes only for unusual cases such as multiple routers or multiple IP subnets located on your network.
DG834G Reference Manual How to Configure Static Routes 1. Log in to the router at its default LAN address of http://192.168.0.1 with its default User Name of admin, default password of password, or using whatever User Name, Password and LAN address you have chosen for the router. 2. From the Main Menu of the browser interface, under Advanced, click Static Routes to view the Static Routes menu, shown in Figure 7-5. Figure 7-5 3. To add or edit a Static Route: a.
DG834G Reference Manual d. Select Active to make this route effective. e. Type the Destination IP Address of the final destination. f. Type the IP Subnet Mask for this destination. If the destination is a single host, type 255.255.255.255. g. Type the Gateway IP Address, which must be a router on the same LAN segment as the router. h. Type a number between 1 and 15 as the Metric value. This represents the number of routers between your network and the destination.
DG834G Reference Manual • Advertisement Period: The Advertisement Period is how often the Router will advertise (broadcast) its UPnP information. This value can range from 1 to 1440 minutes. The default period is for 30 minutes. Shorter durations will ensure that control points have current device status at the expense of additional network traffic. Longer durations may compromise the freshness of the device status but can significantly reduce network traffic.
Chapter 8 Virtual Private Networking This chapter describes how to use the virtual private networking (VPN) features of the Wireless ADSL Modem Router. VPN communications paths are called tunnels. VPN tunnels provide secure, encrypted communications between your local network and a remote network or computer. See “Virtual Private Networking (VPN):” on page A-1 to learn more about VPN.
DG834G Reference Manual Overview of VPN Configuration Two common scenarios for configuring VPN tunnels are between a remote personal computer and a network gateway and between two or more network gateways. The DG834G supports both of these types of VPN configurations. The Wireless ADSL Modem Router supports up to five concurrent tunnels. Client-to-Gateway VPN Tunnels Client-to-Gateway VPN Tunnels provide secure access from a remote PC, such as a telecommuter connecting to an office network.
DG834G Reference Manual Gateway-to-Gateway VPN Tunnels • Gateway-to-Gateway VPN Tunnels provide secure access between networks, such as a branch or home office and a main office. DG834G VPN Firewall VPN Tunnel A DG834G VPN Firewall B PCs PCs Figure 8-2 A VPN between two or more NETGEAR VPN-enabled routers is a good way to connect branch or home offices and business partners over the Internet. VPN tunnels also enable access to network resources across the Internet.
DG834G Reference Manual Table 8-1.
DG834G Reference Manual • What method will you use to configure your VPN tunnels? — The VPN Wizard using VPNC defaults (see Table 8-2) — The typical automated Internet Key Exchange (IKE) setup (see “Using Auto Policy to Configure VPN Tunnels” on page 8-36) — A Manual Keying setup in which you must specify each phase of the connection (see “Using Manual Policy to Configure VPN Tunnels” on page 8-48)? Table 8-2.
DG834G Reference Manual • Use the VPN Wizard to configure a VPN tunnel (recommended for most situations): — See “How to Set Up a Client-to-Gateway VPN Configuration” on page 8-6. — See “How to Set Up a Gateway-to-Gateway VPN Configuration” on page 8-20. • See “Using Auto Policy to Configure VPN Tunnels” on page 8-36 when the VPN Wizard and its VPNC defaults (see Table 8-2 on page 8-5) are not appropriate for your special circumstances, but you want to automate the Internet Key Exchange (IKE) setup.
DG834G Reference Manual • “Step 1: Configuring the Client-to-Gateway VPN Tunnel on the DG834G” on page -7 uses the VPN Wizard to configure the VPN tunnel between the remote PC and network gateway. • “Step 2: Configuring the NETGEAR ProSafe VPN Client on the Remote PC” on page -12 configures the NETGEAR ProSafe VPN Client endpoint.
DG834G Reference Manual Table 8-1.
DG834G Reference Manual 1. Log in to the DG834G at its LAN address of http://192.168.0.1 with its default user name of admin and password of password. Click the VPN Wizard link in the main menu to display this screen. Click Next to proceed. Figure 8-4 2. Fill in the Connection Name and the pre-shared key, select the type of target end point, and click Next to proceed. Enter the new Connection Name: (e.g., RoadWarrior) Enter the pre-shared key: (e.g.
DG834G Reference Manual The Summary screen below displays. Figure 8-6 8-10 Virtual Private Networking v3.
DG834G Reference Manual To view the VPNC recommended authentication and encryption settings used by the VPN Wizard, click the “here” link. Click Back to return to the Summary screen. 1 hour Figure 8-7 3. Click Done on the Summary screen to complete the configuration procedure. The VPN Policies menu below displays showing that the new tunnel is enabled. Figure 8-8 To view or modify the tunnel settings, select the radio button next to the tunnel entry and click Edit. Virtual Private Networking 8-11 v3.
DG834G Reference Manual Note: Refer to “Using Auto Policy to Configure VPN Tunnels” on page 8-36 to enable the IKE keepalive capability on an existing VPN tunnel. Step 2: Configuring the NETGEAR ProSafe VPN Client on the Remote PC This procedure describes how to configure the NETGEAR ProSafe VPN Client. We will assume the PC running the client has a dynamically assigned IP address. The PC must have the NETGEAR ProSafe VPN Client program installed that supports IPSec. Go to the NETGEAR website (http://www.
DG834G Reference Manual • From the Edit menu of the Security Policy Editor, click Add, then Connection. Figure 8-9 A “New Connection” listing appears in the list of policies. Rename the “New Connection” so that it matches the Connection Name you entered in the VPN Settings of the DG834G on LAN A.
DG834G Reference Manual • • • • • Select All in the Protocol menu to allow all traffic through the VPN tunnel. Select the Connect using Secure Gateway Tunnel check box. Select IP Address in the ID Type menu below the check box. Enter the public WAN IP Address of the DG834G in the field directly below the ID Type menu. In this example, 22.23.24.25 would be used. The resulting Connection Settings are shown in Figure 8-10. 3. Configure the Security Policy in the NETGEAR ProSafe VPN Client software.
DG834G Reference Manual • In the Network Security Policy list on the left side of the Security Policy Editor window, click on My Identity. Figure 8-11 • • • • Choose None in the Select Certificate menu. Select IP Address in the ID Type menu. If you are using a virtual fixed IP address, enter this address in the Internal Network IP Address box. Otherwise, leave this box empty. In the Internet Interface box, select the adapter you use to access the Internet.
DG834G Reference Manual 5. Configure the VPN Client Authentication Proposal. In this step, you will provide the type of encryption (DES or 3DES) to be used for this connection. This selection must match your selection in the DG834G configuration. • • In the Network Security Policy list on the left side of the Security Policy Editor window, expand the Security Policy heading by double clicking its name or clicking on the “+” symbol.
DG834G Reference Manual • Expand the Key Exchange subheading by double clicking its name or clicking on the “+” symbol. Then select Proposal 1 below Key Exchange. Figure 8-14 • • • • • • • In the SA Life menu, select Unspecified. In the Compression menu, select None. Check the Encapsulation Protocol (ESP) checkbox. In the Encrypt Alg menu, select the type of encryption to correspond with what was configured for the Encryption Protocol in the DG834G in Table 8-1 on page 8-8.
DG834G Reference Manual 8. Check the VPN Connection. To check the VPN Connection, you can initiate a request from the remote PC to the DG834G’s network by using the “Connect” option in the NETGEAR ProSafe menu bar. The NETGEAR ProSafe client will report the results of the attempt to connect. Since the remote PC has a dynamically assigned WAN IP address, it must initiate the request. To perform a ping test using our example, start from the remote PC: a. Establish an Internet connection from the PC. b.
DG834G Reference Manual Information on the progress and status of the VPN client connection can be viewed by opening the NETGEAR ProSafe Log Viewer. 1. To launch this function, click on the Windows Start button, then select Programs, then NETGEAR ProSafe VPN Client, then Log Viewer. 2.
DG834G Reference Manual • • • The DG834G has a public IP WAN address of 22.23.24.25. The DG834G has a LAN IP address of 192.168.3.1. The VPN client PC has a dynamically assigned address of 192.168.2.2. While the connection is being established, the Connection Name field in this menu will say “SA” before the name of the connection. When the connection is successful, the “SA” will change to the yellow key symbol shown in the illustration above.
DG834G Reference Manual Table 8-1.
DG834G Reference Manual Figure 8-20: VPN Wizard Start Screen 2. Fill in the Connection Name and the pre-shared key, select the type of target end point, and click Next to proceed. Enter the new Connection Name: (e.g., GtoG) Enter the pre-shared key: (e.g., 12345678) Select the radio button: A remote VPN Gateway Figure 8-21: Connection Name and Remote IP Type 8-22 Virtual Private Networking v3.
DG834G Reference Manual 3. Fill in the IP Address or FQDN for the target VPN endpoint WAN connection and click Next. Enter the WAN IP address of the remote VPN gateway: (e.g., 22.23.24.25) Figure 8-22: Remote IP 4. Identify the IP addresses at the target endpoint which can use this tunnel, and click Next. Enter the LAN IP settings of the remote VPN gateway: • IP Address (e.g., 192.168.3.1) • Subnet Mask (e.g., 255.255.255.
DG834G Reference Manual Figure 8-24: VPN Wizard Summary To view the VPNC recommended authentication and encryption settings used by the VPN Wizard, click the “here” link (see Figure 8-24). Click Back to return to the Summary screen. 8-24 Virtual Private Networking v3.
DG834G Reference Manual 1 hour Figure 8-25: VPN Recommended Settings 5. Click Done on the Summary screen (see Figure 8-24) to complete the configuration procedure. The VPN Settings menu below displays showing that the new tunnel is enabled. Figure 8-26: VPN Policies Note: Refer to “Using Auto Policy to Configure VPN Tunnels” on page -36 to enable the IKE keepalive capability on an existing VPN tunnel. Virtual Private Networking 8-25 v3.
DG834G Reference Manual 6. Repeat for the DG834G on LAN B and pay special attention to use the following network settings as appropriate. • WAN IP of the remote VPN gateway (e.g., 14.15.16.17) • LAN IP settings of the remote VPN gateway: — IP Address (e.g, 192.168.0.1) — Subnet Mask (e.g., 255.255.255.0) — Preshared Key (e.g., 12345678) 7.
DG834G Reference Manual Figure 8-28: Current VPN Tunnels (SAs) Screen c. Look at the VPN Status/Log screen (Figure 8-27) to verify that the tunnel is connected. VPN Tunnel Control Activating a VPN Tunnel There are three ways to activate a VPN tunnel: • • • Use the VPN Status page. Activate the VPN tunnel by pinging the remote endpoint. Start using the VPN tunnel. Note: Refer to “Using Auto Policy to Configure VPN Tunnels” on page -36 to enable the IKE keepalive capability on an existing VPN tunnel.
DG834G Reference Manual 2. Open the DG834G management interface and click on VPN Status to get the VPN Status/Log screen (Figure 8-29). Figure 8-29: VPN Status/Log Screen 3. Click on VPN Status (Figure 8-29) to get the Current VPN Tunnels (SAs) screen (Figure 8-30). Click on Connect for the VPN tunnel you want to activate. Figure 8-30: Current VPN Tunnels (SAs) Screen Activate the VPN Tunnel by Pinging the Remote Endpoint Note: This section uses 192.168.3.
DG834G Reference Manual To activate the VPN tunnel by pinging the remote endpoint (e.g., 192.168.3.1), do the following steps depending on whether your configuration is client-to-gateway or gateway-to-gateway: • Client-to-Gateway Configuration—to check the VPN Connection, you can initiate a request from the remote PC to the DG834G’s network by using the “Connect” option in the NETGEAR ProSafe menu bar. The NETGEAR ProSafe client will report the results of the attempt to connect.
DG834G Reference Manual Once the connection is established, you can open the browser of the PC and enter the LAN IP address of the remote DG834G. After a short wait, you should see the login screen of the ADSL Modem Router (unless another PC already has the DG834G management interface open). • Gateway-to-Gateway Configuration—test the VPN tunnel by pinging the remote network from a PC attached to the DG834G. a. Open command prompt (i.e., Start -> Run -> cmd). b. ping 192.168.3.1.
DG834G Reference Manual Figure 8-34: VPN Status/Log Screen 3. Click on VPN Status (Figure 8-29) to get the Current VPN Tunnels (SAs) screen (Figure 8-30). This table lists the following data for each active VPN Tunnel. • SPI—each SA has a unique SPI (Security Parameter Index) for traffic in each direction. For "Manual" key exchange, the SPI is specified in the Policy definition. For "Automatic" key exchange, the SPI is generated by the IKE protocol.
DG834G Reference Manual Figure 8-35: Current VPN Tunnels (SAs) Screen Deactivating a VPN Tunnel Sometimes a VPN tunnel must be deactivated for testing purposes. There are two ways to deactivate a VPN tunnel: • • Policy table on VPN Policies page VPN Status page Using the Policy Table on the VPN Policies Page to Deactivate a VPN Tunnel To use the VPN Policies page to deactivate a VPN tunnel, perform the following steps: 1. Log in to the ADSL Modem Router. 8-32 Virtual Private Networking v3.
DG834G Reference Manual 2. Open the DG834G management interface and click on VPN Policies to get the VPN Policies screen (Figure 8-37). Figure 8-36: VPN Policies 3. Clear the Enable check box for the VPN tunnel you want to deactivate and click Apply. (To reactivate the tunnel, check the Enable box and click Apply.) Using the VPN Status Page to Deactivate a VPN Tunnel To use the VPN Status page to deactivate a VPN tunnel, perform the following steps: 1. Log in to the ADSL Modem Router.
DG834G Reference Manual 2. Open the DG834G management interface and click on VPN Status to get the VPN Status/Log screen (Figure 8-37). Figure 8-37: VPN Status/Log Screen 3. Click VPN Status (Figure 8-37) to get the Current VPN Tunnels (SAs) screen (Figure 8-38). Click Drop for the VPN tunnel you want to deactivate. Figure 8-38: Current VPN Tunnels (SAs) Screen 8-34 Virtual Private Networking v3.
DG834G Reference Manual Note: When NETBIOS is enabled (which it is in the VPNC defaults implemented by the VPN Wizard), automatic traffic will reactivate the tunnel. To prevent reactivation from happening, either disable NETBIOS or disable the policy for the tunnel (see “Using the Policy Table on the VPN Policies Page to Deactivate a VPN Tunnel” on page -32). Deleting a VPN Tunnel To delete a VPN tunnel: 1. Log in to the ADSL Modem Router. 2.
DG834G Reference Manual • Manual Policy—for a Manual Keying setup in which you must specify each phase of the connection, see “Using Manual Policy to Configure VPN Tunnels” on page -48. Manual Policy does not use IKE. Rather, you manually enter all the authentication and key parameters.
DG834G Reference Manual Figure 8-40: DG834G VPN Tunnel Auto Policy Configuration Menu Virtual Private Networking 8-37 v3.
DG834G Reference Manual The DG834G VPN tunnel network connection fields are defined as follows: General These settings identify this policy and determine its major characteristics. • Policy Name—Enter a unique name to identify this policy. This name is not supplied to the remote VPN endpoint. It is used only to help you manage the policies. • Remote VPN Endpoint—If the remote endpoint has a dynamic IP address, select "Dynamic IP address". No "Address Data" input is required.
DG834G Reference Manual Remote LAN This identifies which PCs on the remote LAN are covered by this policy. For each selection, data must be provided as follows: • Single PC - no Subnet—select this option if there is no LAN (only a single PC) at the remote endpoint. If this option is selected, no additional data is required. The typical application is a PC running the VPN client at the remote end. • Single address—Enter an IP address in the "Single/Start IP address" field.
DG834G Reference Manual Local Identity Data—enter the data for the selection above. (If "WAN IP Address" is selected, no input is required.) Remote Identity Type—select the desired option to match the "Local Identity Type" setting on the remote VPN endpoint. • IP Address—the Internet IP address of the remote VPN endpoint. • Fully Qualified Domain Name—the Domain name of the remote VPN endpoint. • Fully Qualified User Name—the name, E-mail address, or other ID of the remote VPN endpoint.
DG834G Reference Manual This setting applies to both IKE and IPSec SAs. When configuring the remote endpoint to match this setting, you may have to specify the "Key Group" used. For this device, the "Key Group" is the same as the "DH Group" setting in the IKE section. Example of Using Auto Policy A VPN Tunnel 14.15.16.17 DG834G VPN Firewall B 22.23.24.25 DG834G VPN Firewall 192.168.3.1 192.168.0.1 PCs PCs Figure 8-41: Gateway-to-Gateway VPN Tunnel 1.
DG834G Reference Manual Table 8-1.
DG834G Reference Manual 2. Open the DG834G on LAN A management interface and click on VPN Policies. Figure 8-42: VPN Policies Screen 3. Click Add Auto Policy. 4. Enter policy settings (see Figure 8-43). • General — Policy Name = GtoG — Remote VPN Endpoint Address Type = Fixed IP Address — Remote VPN Endpoint Address Data = 22.23.24.25 • Local LAN – use default setting • Remote LAN — IP Address = select Subnet address from the pulldown menu. — Start IP address = 192.168.3.1 — Subnet Mask = 255.255.
DG834G Reference Manual — Remote Identity Type = use default setting • Parameters — Encryption Algorithm = 3DES — Authentication Algorithm = MD5 — Pre-shared Key = 12345678 8-44 Virtual Private Networking v3.
DG834G Reference Manual Figure 8-43: VPN Auto Policies Screen Virtual Private Networking 8-45 v3.
DG834G Reference Manual 5. Click Apply. The Get VPN Policies web page is displayed. Figure 8-44: VPN Policies Screen 6. Repeat for the DG834G on LAN B and pay special attention to use the following network settings as appropriate. • General, Remote Address Data (e.g., 14.15.16.17) • Remote LAN, Start IP Address — IP Address (e.g, 192.168.0.1) — Subnet Mask (e.g., 255.255.255.0) — Preshared Key (e.g., 12345678) 7.
DG834G Reference Manual Figure 8-45: VPN Status/Log Screen b. Click VPN Status (Figure 8-45) to display the Current VPN Tunnels (SAs) screen (Figure 8-46). Click on Connect for the VPN tunnel you want to activate. Figure 8-46: Current VPN Tunnels (SAs) Screen c. Review the VPN Status/Log screen (Figure 8-45) to verify that the tunnel is connected. Virtual Private Networking 8-47 v3.
DG834G Reference Manual Using Manual Policy to Configure VPN Tunnels As an alternative to IKE, you may use Manual Keying, in which you must specify each phase of the connection. A "Manual" VPN policy requires all settings for the VPN tunnel to be manually input at each end (both VPN endpoints). Click the VPN Policies link of the main menu, and then click the Add Manual Policy radio button to display the Manual Keys menu shown in Figure 8-47.
DG834G Reference Manual • Policy Name—enter a unique name to identify this policy. This name is not supplied to the remote VPN endpoint. It is used only to help you manage the policies. • Remote VPN Endpoint—select the desired option (IP address or Fully Qualified Domain Name) and enter the address of the remote VPN endpoint to which you wish to connect. Note: The remote VPN endpoint must have this VPN Gateway's address entered as its "Remote VPN Endpoint".
DG834G Reference Manual • Subnet address—enter an IP address in the "Single/Start IP address" field, and the desired network mask in the "Subnet Mask" field. The remote VPN endpoint must have these IP addresses entered as its "Local" addresses. ESP Configuration ESP (Encapsulating Security Payload) provides security for the payload (data) sent through the VPN tunnel. SPI—enter the required security policy indexes (SPIs). Each policy must have unique SPIs.
Chapter 9 Troubleshooting This chapter gives information about troubleshooting your 54 Mbps Wireless ADSL Modem Router Model DG834G. After each problem description, instructions are provided to help you diagnose and solve the problem. For the common problems listed, go to the section indicated. • Is the router on? • Have I connected the router correctly? Go to “Basic Functioning” on page -1. • I can’t access the router’s configuration with my browser.
DG834G Reference Manual If a port’s LED is lit, a link has been established to the connected device. If a LAN port is connected to a 100 Mbps device, verify that the port’s LED is green. If the port is 10 Mbps, the LED will be amber. If any of these conditions does not occur, refer to the appropriate following section.
DG834G Reference Manual • Make sure that power is turned on to the connected hub or workstation. • Be sure you are using the correct cable: — When connecting the router’s WAN ADSL port, use the cable that was supplied with the DG834G.
DG834G Reference Manual • Click the Refresh or Reload button in the Web browser. The changes may have occurred, but the Web browser may be caching the old configuration. Troubleshooting the ISP Connection If your router is unable to access the Internet, you should check the ADSL connection, then the WAN TCP/IP connection. ADSL link If your router is unable to access the Internet, you should first determine whether you have an ADSL link with the service provider.
DG834G Reference Manual If disconnecting telephones does not result in a green WAN LED the problem may be one of the following: • Check that the telephone company has made the connection to your line and tested it. • Verify that you are connected to the correct telephone line. If you have more than one phone line, be sure that you are connected to the line with the ADSL service. It may be necessary to use a swapper if you ADSL signal is on pins 1 and 4 or the RJ-11 jack.
DG834G Reference Manual • Your ISP only allows one Ethernet MAC address to connect to Internet, and may check for your computer’s MAC address. In this case: Inform your ISP that you have bought a new network device, and ask them to use the router’s MAC address. OR Configure your router to spoof your computer’s MAC address. This can be done in the Basic Settings menu. Refer to “Manually Configuring Your Internet Connection” on page 3-14.
DG834G Reference Manual A DNS server is a host on the Internet that translates Internet names (such as www addresses) to numeric IP addresses. Typically your ISP will provide the addresses of one or two DNS servers for your use. If you entered a DNS address during the ADSL modem router’s configuration, reboot your computer and verify the DNS address as described in “Preparing a Computer for Network Access:” in Appendix A.
DG834G Reference Manual Request timed out If the path is not functioning correctly, you could have one of the following problems: • Wrong physical connections — Make sure the LAN port LED is on. If the LED is off, follow the instructions in “LAN or WAN Port LEDs Not On” on page 9-2. — Check that the corresponding Link LEDs are on for your network interface card and for the hub ports (if any) that are connected to your workstation and router.
DG834G Reference Manual — Your ISP could be rejecting the Ethernet MAC addresses of all but one of your PCs. Many broadband ISPs restrict access by only allowing traffic from the MAC address of your broadband modem, but some ISPs additionally restrict access to the MAC address of a single PC connected to that modem. If this is the case, you must configure your router to “clone” or “spoof” the MAC address from the authorized PC. Refer to “Manually Configuring Your Internet Connection” on page 3-14.
DG834G Reference Manual • Time is off by one hour Cause: The router does not automatically sense Daylight Savings Time. In the E-mail menu, check or uncheck the box marked “Adjust for Daylight Savings Time”. 9-10 Troubleshooting v3.
Appendix A Technical Specifications This appendix provides technical specifications for the 54 Mbps Wireless ADSL Modem Router Model DG834G.
DG834G Reference Manual A-2 Technical Specifications v3.
Appendix B Related Documents This appendix provides links to reference documents you can use to gain a more complete understanding of the technologies used in your NETGEAR product. Document Link Internet Networking and TCP/IP Addressing: http://documentation.netgear.com/reference/enu/tcpip/index.htm Wireless Communications: http://documentation.netgear.com/reference/enu/wireless/index.htm Preparing a Computer for Network Access: http://documentation.netgear.com/reference/enu/wsdhcp/index.
DG834G Reference Manual B-2 Related Documents BETA
Appendix C NETGEAR VPN Configuration DG834G to FVL328 This appendix is a case study on how to configure a secure IPSec VPN tunnel from a NETGEAR DG834G to a FVL328. This case study follows the VPN Consortium interoperability profile guidelines (found at http://www.vpnc.org/InteropProfiles/Interop-01.html). Configuration Profile The configuration in this document follows the addressing and configuration mechanics defined by the VPN Consortium.
DG834G Reference Manual Table C-1. Profile Summary VPN Consortium Scenario: Scenario 1 Type of VPN LAN-to-LAN or Gateway-to-Gateway (not PC/Client-to-Gateway) Security Scheme: IKE with Preshared Secret/Key (not Certificate-based) Date Tested: June 2004 Model/Firmware Tested: NETGEAR-Gateway A DG834G firmware version V2.10.17 NETGEAR-Gateway B FVL328 with firmware version V2.0_07 IP Addressing: NETGEAR-Gateway A Static IP address NETGEAR-Gateway B Static IP address 10.5.6.
DG834G Reference Manual The LAN Addresses used in this example are as follows. • DG834G WAN IP = 14.15.16.17 LAN IP = 10.5.6.1 LAN Subnet Mask = 255.255.255.0 • FVL328 WAN IP = 22.23.24.25 LAN IP = 172.23.9.1 LAN Subnet Mask = 255.255.255.0 a. In Step 1, enter toFVL328 for the Connection Name. b. In Step 2, enter 22.23.24.25 for the remote WAN's IP address. c. In Step 3, enter the following: • • IP Address = 172.23.9.1 Subnet Mask = 255.255.255.0 NETGEAR VPN Configuration C-3 v3.
DG834G Reference Manual Click VPN Policies under Advanced - VPN to invoke this screen toFVL328 10.5.6.1 172.23.9.1 toFVL328 22.23.24.25 10 5 6 172 23 9 Figure C-2: Viewing and editing the VPN parameters of the DG834G at gateway A C-4 NETGEAR VPN Configuration v3.
DG834G Reference Manual 2. Configure the FVL328 as in the Gateway-to-Gateway procedures for the VPN Wizard (see “How to Set Up a Gateway-to-Gateway VPN Configuration“ on page -20), being certain to use appropriate network addresses for the environment. a. In Step 1, enter toDG834 for the Connection Name b. In Step 2, enter 14.15.16.17 for the remote WAN's IP address c. In Step 3, enter the following: • • IP Address = 10.5.6.1 Subnet Mask = 255.255.255.0 NETGEAR VPN Configuration C-5 v3.
DG834G Reference Manual toDG834 toDG834 22.23.24.25 14.15.16.17 Click IKE Policies under VPN to invoke this screen 22.23.24.25 14.15.16.17 toDG834 172.23.9.1 10.5.6.1 Click VPN Policies under VPN to invoke this screen toDG834 toDG834 14.15.16.17 172 23 9 10 5 6 1 Figure C-3: Viewing and editing the VPN parameters of the FVL328 at gateway B C-6 NETGEAR VPN Configuration v3.
DG834G Reference Manual 3. Test the VPN tunnel by pinging the remote network from a PC attached to the DG834G. a. Open the command prompt (Start -> Run -> cmd) b. ping 172.23.9.1 Figure C-4: ping 172.23.9.1 Note: The pings may fail the first time. If this happens, try the pings a second time.
DG834G Reference Manual Table C-1. Profile Summary VPN Consortium Scenario: Scenario 1 Type of VPN LAN-to-LAN or Gateway-to-Gateway (not PC/Client-to-Gateway) Security Scheme: IKE with Preshared Secret/Key (not Certificate-based) Date Tested: June 2004 Model/Firmware Tested: NETGEAR-Gateway A DG834G firmware version V2.10.17 NETGEAR-Gateway B FVL328 with firmware version V2.0_07 IP Addressing: NETGEAR-Gateway A Fully Qualified Domain Name (FQDN) NETGEAR-Gateway B FDQN 10.5.6.
DG834G Reference Manual A Dynamic DNS (DDNS) service allows a user whose public IP address is dynamically assigned to be located by a host or domain name. It provides a central public database where information (such as email addresses, host names and IP addresses) can be stored and retrieved. Now, a gateway can be configured to use a 3rd party service in lieu of a permanent and unchanging IP address to establish bi-directional VPN connectivity. To use DDNS, you must register with a DDNS service provider.
DG834G Reference Manual Figure C-6: Dynamic DNS Setup Screen b. Configure this screen with appropriate account and hostname settings and then click Apply. • • • • c. Check the box Use a Dynamic DNS Service. Host Name = dg834g.dyndns.org User Name = Password = Click Show Status. The resulting screen should show Update OK: good (see Figure C-7). Figure C-7: Status Screen C-10 NETGEAR VPN Configuration v3.
DG834G Reference Manual 4. On the FVL328, configure the Dynamic DNS settings. Assume a properly configured DynDNS account. a. Browse to the Dynamic DNS Setup Screen (see Figure C-8) in the Advanced menu. Figure C-8: Dynamic DNS Setup Screen b. Select the DynDNS.org radio button (see Figure C-8), configure with appropriate account and hostname settings (see Figure C-9), and then click Apply. • • • Host and Domain Name = fvl328.dyndns.
DG834G Reference Manual Figure C-9: Dynamic DNS Setup Screen c. Click Show Status. The resulting screen should show Update OK: good (see Figure C-10). C-12 NETGEAR VPN Configuration v3.
DG834G Reference Manual Figure C-10: Status Screen 5. Configure the DG834G as in the Gateway-to-Gateway procedures using the VPN Wizard (see “How to Set Up a Gateway-to-Gateway VPN Configuration“ on page -20), being certain to use appropriate network addresses for the environment. The LAN Addresses used in this example are as follows. • DG834G LAN IP = 10.5.6.1 LAN Subnet Mask = 255.255.255.0 • FVL328 LAN IP = 172.23.9.1 LAN Subnet Mask = 255.255.255.0 a.
DG834G Reference Manual a. In Step 1, enter toDG834 for the Connection Name. b. In Step 2, enter dg834g.dyndns.org for the remote WAN's IP address. c. In Step 3, enter the following: • • 7. IP Address = 10.5.6.1 Subnet Mask = 255.255.255.0 Test the VPN tunnel by pinging the remote network from a PC attached to the DG834G. a. Open the command prompt (Start -> Run -> cmd) b. ping 172.23.9.1 Figure C-11: ping 172.23.9.1 Note: The pings may fail the first time.
DG834G Reference Manual Table C-1. Configuration summary (telecommuter example) VPN Consortium Scenario: Scenario 1 Type of VPN: PC/client-to-gateway, with client behind NAT router Security Scheme: IKE with Preshared Secret/Key (not Certificate-based) Date Tested: May 2005 Model/Firmware Tested: Gateway DG834G firmware version v2.10.20 Client NETGEAR ProSafe VPN Client v10.5.1 (build 8) IP Addressing: Gateway Fully Qualified Domain Name (FQDN) Client Dynamic 192.168.0.
DG834G Reference Manual Step 1: Configuring the Client-to-Gateway VPN Tunnel on the VPN Router at the Employer’s Main Office Follow this procedure to configure a client-to-gateway VPN tunnel by filling out the VPN Auto Policy screen. 1. Log in to the VPN router at its LAN address of http://192.168.0.1 with its default user name of admin and password of password. Click the VPN Policies link in the main menu to display the VPN Policies screen. Click Add Auto Policy to proceed and enter the information.
DG834G Reference Manual fromDG834G (in the example) Dynamic IP address IKE Keep Alive is optional; must match Remote LAN IP Address when enabled (remote PC must respond to pings) Subnet address 192.168.0.1 (in this example) 255.255.255.0 Single address 192.168.2.3 (in this example) (Remote NAT router must have Address Reservation set and VPN Passthrough enabled) Main Mode Fully Qualified Domain Name fromDG834G.com (in this example) Fully Qualified Domain Name toDG834G.
DG834G Reference Manual 2. Click Apply when done to get the VPN Policies screen. Figure C-14: VPN Policies screen To view or modify the tunnel settings, select the radio button next to the tunnel entry and click Edit. Step 2: Configuring the NETGEAR ProSafe VPN Client on the Remote PC at the Telecommuter’s Home Office This procedure describes how to configure the 54 Mbps Wireless ADSL Modem Router Model DG834G. We will assume the PC running the client has a dynamically assigned IP address.
DG834G Reference Manual 2. b. If you do not have a modem or dial-up adapter installed in your PC, you may see the warning message stating “The NETGEAR ProSafe VPN Component requires at least one dial-up adapter be installed.” You can disregard this message. c. Install the IPSec Component. You may have the option to install either the VPN Adapter or the IPSec Component or both. The VPN Adapter is not necessary. d. The system should show the ProSafe icon ( e.
DG834G Reference Manual ntgr Figure C-16: Security Policy Editor Connection settings 3. c. Select Secure in the Connection Security check box. d. Select IP Subnet in the ID Type menu. e. In this example, type 192.168.0.1 in the Subnet field as the network address of the DG834G. f. Enter 255.255.255.0 in the Mask field as the LAN Subnet Mask of the DG834G. g. Select All in the Protocol menu to allow all traffic through the VPN tunnel. h.
DG834G Reference Manual Figure C-17: Security Policy Editor security policy c. 4. Select the Main Mode in the Select Phase 1 Negotiation Mode check box. Configure the VPN Client Identity. In this step, you will provide information about the remote VPN client PC. You will need to provide: — The Pre-Shared Key that you configured in the DG834G. — Either a fixed IP address or a “fixed virtual” IP address of the VPN client PC. a.
DG834G Reference Manual Figure C-18: Security Policy Editor my identity b. Choose None in the Select Certificate menu. c. Select Domain Name in the ID Type menu and enter toDG834G.com (in this example) in the box below it. Choose Disabled in the Virtual Adapter menu. d. In the Internet Interface box, select Intel PRO/100VE Network Connection (in this example, your Ethernet adapter may be different) in the Name menu and enter 192.168.2.3 (in this example) in the IP Addr box. e.
DG834G Reference Manual Figure C-19: Security Policy Editor pre-shared key 5. Configure the VPN Client Authentication Proposal. In this step, you will provide the type of encryption (DES or 3DES) to be used for this connection. This selection must match your selection in the VPN router configuration. a. In the Network Security Policy list on the left side of the Security Policy Editor window, expand the Security Policy heading by double clicking its name or clicking on the “+” symbol. b.
DG834G Reference Manual 6. c. In the Authentication Method menu, select Pre-Shared key. d. In the Encrypt Alg menu, select the type of encryption. In this example, use Triple DES. e. In the Hash Alg menu, select SHA-1. f. In the SA Life menu, select Unspecified. g. In the Key Group menu, select Diffie-Hellman Group 2. Configure the VPN Client Key Exchange Proposal. In this step, you will provide the type of encryption (DES or 3DES) to be used for this connection.
DG834G Reference Manual 7. f. In the Hash Alg menu, select SHA-1. g. In the Encapsulation menu, select Tunnel. h. Leave the Authentication Protocol (AH) checkbox unchecked. Save the VPN Client settings. From the File menu at the top of the Security Policy Editor window, select Save. After you have configured and saved the VPN client information, your PC will automatically open the VPN connection when you attempt to access any IP addresses in the range of the remote VPN router’s LAN. 8.
DG834G Reference Manual a. Establish an Internet connection from the PC. b. On the Windows taskbar, click the Start button, and then click Run. c. Type ping -t 192.168.0.1, and then click OK. Figure C-23: Running a ping test to the LAN from the PC This will cause a continuous ping to be sent to the VPN router. After between several seconds and two minutes, the ping response should change from timed out to reply.
DG834G Reference Manual 1. To launch this function, click on the Windows Start button, then select Programs, then 54 Mbps Wireless ADSL Modem Router Model DG834G, then Log Viewer. Note: Use the active VPN tunnel information and pings to determine whether a failed connection is due to the VPN tunnel or some reason outside the VPN tunnel. 2.
DG834G Reference Manual Note: While your PC is connected to a remote LAN through a VPN, you might not have normal Internet access. If this is the case, you will need to close the VPN connection in order to have normal Internet access. Viewing the VPN Router’s VPN Status and Log Information To view information on the status of the VPN client connection, open the VPN router’s VPN Status screen by following the steps below: 1.
DG834G Reference Manual Current VPN Tunnels (SAs) screen NETGEAR VPN Configuration C-29 v3.
DG834G Reference Manual C-30 NETGEAR VPN Configuration v3.