UMX25 U-CONTROL User’s Manual Version 1.
U-CONTROL UMX25 IMPORTANT SAFETY PRECAUTIONS DETAILED SAFETY INSTRUCTIONS: 1) Read these instructions. 2) Keep these instructions. 3) Heed all warnings. 4) Follow all instructions. CAUTION: To reduce the risk of electric shock, do not remove the cover (or back). No user-serviceable parts inside; refer servicing to qualified personnel. Only qualified personnel may perform repairs.
U-CONTROL UMX25 U-CONTROL The Ultimate Studio in a Box: 25-Key USB/MIDI Controller Keyboard with USB/Audio Interface, 50 Software Instruments and Ableton® Live Lite 4 BEHRINGER Edition UMX25 V Unleash your creativity and play 50 virtual instruments and synthesizers, take off with an unlimited number of sound creations. Download more free instrument plug-ins and host software from www.behringer.
U-CONTROL UMX25 FOREWORD TABLE OF CONTENTS Dear Customer, welcome to the team of BEHRINGER users, and thank you very much for expressing your confidence in us by purchasing the U-CONTROL.
U-CONTROL UMX25 1. INTRODUCTION Thank you for showing your confidence in BEHRINGER products by purchasing the UMX25. The UMX25 is an extremely flexible master keyboard with a controller unit that can be used for a wide array of applications.
U-CONTROL UMX25 1.1.3 Online registration V Please, do remember to register your new BEHRINGER equipment right after your purchase by visiting www.behringer.com (alternatively www.behringer.de) and kindly read the terms and conditions of our warranty carefully. Remotely controlling software mixers (volume, panorama, mute functions, etc.) V Remotely controlling transport functions (playback, forward, stop etc.) on sequencers, hard disk recorders, drum computers etc.
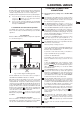
U-CONTROL UMX25 What settings do I have to make? Where? How? Basically, which control element generates which controller must be set on the UMX25, and how arriving controller commands should be interpreted must be set on the receiving device. Regarding controller assignment, there are two possible principles: V You use the preset controller configuration set in the factory (see fig. 3.1, ). In this case, you only need to make the assignments on the receiving device.
U-CONTROL UMX25 Fig. 3.1: Top view Keyboard legend: Informs you about the special functions performed by individual keys on the keyboard. The individual elements of the keyboard legend are described in detail in chapter “4 OPERATION”. to 0 (typical piano sustain pedal behavior). Apart from that the pedal assignment is the same as the button assignment, i.e. you can assign any MIDI controller to it. The POWER switch is used to switch the unit on and off.
U-CONTROL UMX25 The following control element assignments including channel information can be permanently stored in the USER MEMORY: 5) - FOOT SWITCH connector Now define the SINGLE CHANNEL by entering a number between 1 and 16 using the number keys. If you enter a number greater than 16, your entry will be rejected. - VOLUME/DATA fader Example: - If you want to enter channel 11, press keys .
U-CONTROL UMX25 3) Release the ASSIGN button. The device automatically enters Play mode again. The SNAPSHOT instruction is sent immediately after playing the keyboard. a) If you are sure to select only one of 128 different programs, you can effect program changes in ASSIGN mode as shown below. However, if the number of 128 is exceeded, you will have to use the procedure described in section b). button and keep it pressed. 1) Press the 4.2.6 LOCAL OFF 2) Press the SINGLE key.
U-CONTROL UMX25 As long as you have not assigned a particular function to this button in ASSIGN mode, it will not send any data. In steps 5 and 6 you have defined the bank from which the desired program will be selected. Now define the program itself: 8) Press the button followed by the number keys on the keyboard to enter the program number of your choice. Only values between 0 and 127 can be entered. Higher values are ignored by the device. That’s all! 9) Confirm your selection with .
U-CONTROL UMX25 2) Press the one of the two OCTAVE SHIFT buttons to which you want to assign a controller. 3) Release the ASSIGN button. 4) Press the number keys on the keyboard to enter the controller number of your choice (as described in chapter 4.2.1). 5) . To discard your Confirm your selection with assignments either press the button or the ASSIGN button again. In either case the ASSIGN LED goes out. 4.2.
U-CONTROL UMX25 6. APPENDIX Tab. 6.1: MIDI-Controller overview 6.
U-CONTROL UMX25 7. WARRANTY § 1 OTHER WARRANTY RIGHTS AND NATIONAL LAW 1. This warranty does not exclude or limit the buyer’s statutory rights provided by national law, in particular, any such rights against the seller that arise from a legally effective purchase contract. 2. The warranty regulations mentioned herein are applicable unless they constitute an infringement of national warranty law. 2.