
Operating instructions


Attention
Do not hammer or drop the tubular drive into the barrel! The curtain can only be secured using springs or anti-
lifting devices.
Mounting the drive in the tube
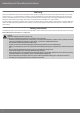
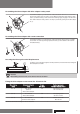
For profile tubes:
In the case of some drive adapters, tolerances of the groove widths in different bar‐
rels can be offset by rotating the drive adapter into a different groove recess. These
groove recesses have different sizes and allow the drive to fit exactly.
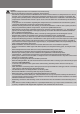
For round tubes:
First notch the tube on the motor side, so the lug of the thrust ring can also be pushed
into the tube. There must be no play between the lug of the thrust ring and the tube.
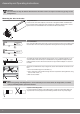
Assemble the tubular drive with the relevant thrust ring (1) and drive adapter (2). In‐
sert the tubular drive with the pre-assembled thrust ring and drive adapter into the
tube to achieve a form fit. Ensure that the thrust ring and drive adapter are secure in
the tube.
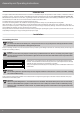
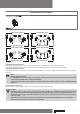
Mount the assembled unit comprising barrel, tubular drive and idler on the box as fol‐
lows.
1.First insert the bearing pin into the idler (1.).
2.Then, mount the crank handle housing onto the respective fastening element using
at least 2 M6 screws (2.).
3.Now secure the idler.
Note
When using springs/anti-lifting devices, we recommend you use at least three; for longer tubes, use three
springs/anti-lifting devices per meter of barrel.
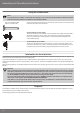
Lay the connecting cable
Lay the connecting cable up to the tubular drive, and fix The connecting cable and
any antennae must not project into the winding chamber. Cover any sharp edges.
Assembly and Operating Instructions
8