
Operating instructions
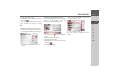
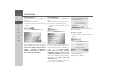
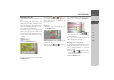
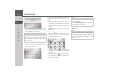
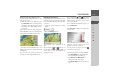
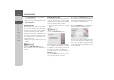
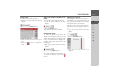

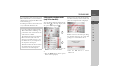
Table Of Contents
- Index
- Safety information
- The Navigation device
- OVERVIEW OF SCOPE OF SUPPLY
- OVERVIEW OF NAVIGATION DEVICE
- General operation
- Maintenance and care
- Battery quality declaration
- Display quality declaration
- Start-up
- Power supply
- TMC antenna (depending on the model)
- GPS-antenna
- Cable for vehicle integration (depending on the model, optional)
- Memory card
- Unit bracket
- Switching the Navigation device on/off
- Basic information about the touch screen
- Basic information about the menus
- Radio remote control
- Content Manager
- Transferring music tracks, pictures and videos
- Faults
- Navigation mode
- What is navigation?
- Selecting navigation
- Last destinations list
- The New or New Destination Menu (depending on device)
- Navigation settings
- Traffic announcements using TMC (depending on the model)
- The map display
- Calling up the map display
- Structure of the map display
- Using the map display
- Map display options
- Point of interest on the route
- TMC on the route (depending on the model)
- Cancel route guidance
- Changing route options
- Block route
- Switching the map mode
- Changing the map orientation
- Route calculator (depending on the model)
- Setting day/night display
- Selecting/setting the vehicle profile
- Entering a destination
- Enter/delete waypoint
- Displaying the entire route
- Displaying the destination list
- Skipping destination
- Displaying current position
- Saving a position
- Calling up the telephone (depending on the model)
- Switching off the display
- Defining fast access buttons
- TELEPHONE MODE
- Extras
- Settings
- Specialist words
- Keywords
- MODEL OVERVIEW AND TECHNICAL SPECIFICATIONS
- NOTICE

95
NAVIGATION MODE >>>
> D
> GB
> F
> I
> E
> PL
> CZ
> H
> RU
Displaying/selecting different routes
You can use the Navigation device to dis-
play various routes.
> With the entire route displayed, press
the
Alternative button. This function
can also be selected in the options of the
map display, See “Map display options”
on page 82.
After a short time, the map will appear.
The individual routes are calculated one
after another and marked on the map.
The area on the right-hand side shows the
colour key for the individual routes, the
mileage for each route and the estimated
driving time.
You can select the route you want by
pressing one of the right-hand buttons.
Displaying the destination list
If a planned route with a number of desti-
nations is active, you can display the entire
route with all the destinations on the map
or in a list.
> Open the options menu for the map
display.
> Press the
Itinerary button.
The planned route is displayed on the
map.
By pressing the or button you
can simulate the entire route quickly or
slowly. You can stop the simulation by
tapping the screen.
You can use the and buttons in
the bottom line to scroll through the indi-
vidual stages in the route. As you scroll,
each stage is shown.
You can block the displayed stage by se-
lecting
Clear form.
Press
List view to display the stages in the
route as a list.
The individual stages in the route are dis-
played as a list. To return to the route
guidance, press the top button.
To edit one of the stages, press the
button next to the stage.
The following options are then available:
•Use
Show details to display informa-
tion regarding the selected stage.
•Use
Move up and Move down to
change the order of the stages.
•Use
Delete stage to delete the selected
stage.