
Operating instructions
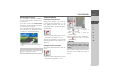
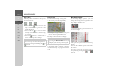
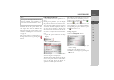
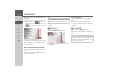
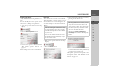
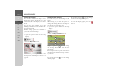
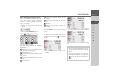
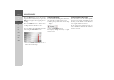
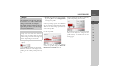
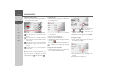
Table Of Contents
- Index
- Safety information
- The Navigation device
- OVERVIEW OF SCOPE OF SUPPLY
- OVERVIEW OF NAVIGATION DEVICE
- General operation
- Maintenance and care
- Battery quality declaration
- Display quality declaration
- Start-up
- Power supply
- TMC antenna (depending on the model)
- GPS-antenna
- Cable for vehicle integration (depending on the model, optional)
- Memory card
- Unit bracket
- Switching the Navigation device on/off
- Basic information about the touch screen
- Basic information about the menus
- Radio remote control
- Content Manager
- Transferring music tracks, pictures and videos
- Faults
- Navigation mode
- What is navigation?
- Selecting navigation
- Last destinations list
- The New or New Destination Menu (depending on device)
- Navigation settings
- Traffic announcements using TMC (depending on the model)
- The map display
- Calling up the map display
- Structure of the map display
- Using the map display
- Map display options
- Point of interest on the route
- TMC on the route (depending on the model)
- Cancel route guidance
- Changing route options
- Block route
- Switching the map mode
- Changing the map orientation
- Route calculator (depending on the model)
- Setting day/night display
- Selecting/setting the vehicle profile
- Entering a destination
- Enter/delete waypoint
- Displaying the entire route
- Displaying the destination list
- Skipping destination
- Displaying current position
- Saving a position
- Calling up the telephone (depending on the model)
- Switching off the display
- Defining fast access buttons
- TELEPHONE MODE
- Extras
- Settings
- Specialist words
- Keywords
- MODEL OVERVIEW AND TECHNICAL SPECIFICATIONS
- NOTICE

83
NAVIGATION MODE >>>
> D
> GB
> F
> I
> E
> PL
> CZ
> H
> RU
Four fast access buttons are shown on the
left-hand side of the options menu. You
can assign these buttons different key
functions from the options menu as de-
scribed in “Defining fast access buttons”
on page 97.
The options menu is exited either by se-
lecting a function or by pressing the
button.
Point of interest on the route
(Only available when route guidance is ac-
tive.)
During route guidance, you can display
the points of interest located on the route.
You can specify which categories of points
of interest should be displayed, and you
can also choose whether to display only
the nearest POIs, all the POIs on the en-
tire route, or only POIs near the destina-
tion.
> Open the options menu for the map
display.
> Press the
POI on route button.
The nearest points of interest for the three
selected categories are displayed.
The first distance indicated shows the dis-
tance to the point of interest. The indica-
tion on the right shows the detour re-
quired to reach the point of interest.
The symbols on the right let you see at a
glance if the detour for driving to the re-
spective point of interest is small ( ),
medium ( ) or large ( ).
Press one of the points of interests to start
route guidance to it. To display informa-
tion regarding the point of interest, press
the button next to it.
Setting categories
> Press the
Categories: button.
> Press the button for the category you
wish to change.
> Then select the desired category.
> Confirm your changes by pressing the
OK button.
Note:
The scope of the displayed functions de-
pends on whether route guidance or a
route with several destinations is active.