
Operating instructions
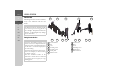
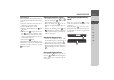
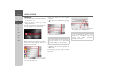
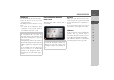
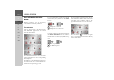
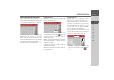
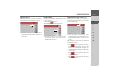
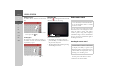
Table Of Contents
- Index
- Safety information
- The Navigation device
- OVERVIEW OF SCOPE OF SUPPLY
- OVERVIEW OF NAVIGATION DEVICE
- General operation
- Maintenance and care
- Battery quality declaration
- Display quality declaration
- Start-up
- Power supply
- TMC antenna (depending on the model)
- GPS-antenna
- Cable for vehicle integration (depending on the model, optional)
- Memory card
- Unit bracket
- Switching the Navigation device on/off
- Basic information about the touch screen
- Basic information about the menus
- Radio remote control
- Content Manager
- Transferring music tracks, pictures and videos
- Faults
- Navigation mode
- What is navigation?
- Selecting navigation
- Last destinations list
- The New or New Destination Menu (depending on device)
- Navigation settings
- Traffic announcements using TMC (depending on the model)
- The map display
- Calling up the map display
- Structure of the map display
- Using the map display
- Map display options
- Point of interest on the route
- TMC on the route (depending on the model)
- Cancel route guidance
- Changing route options
- Block route
- Switching the map mode
- Changing the map orientation
- Route calculator (depending on the model)
- Setting day/night display
- Selecting/setting the vehicle profile
- Entering a destination
- Enter/delete waypoint
- Displaying the entire route
- Displaying the destination list
- Skipping destination
- Displaying current position
- Saving a position
- Calling up the telephone (depending on the model)
- Switching off the display
- Defining fast access buttons
- TELEPHONE MODE
- Extras
- Settings
- Specialist words
- Keywords
- MODEL OVERVIEW AND TECHNICAL SPECIFICATIONS
- NOTICE

29
GENERAL OPERATION >>>
> D
> GB
> F
> I
> E
> PL
> CZ
> H
> RU
Other character sets
Different character sets can be selected for
the keyboard of the Navigation device.
> Press the button marked with an arrow
repeatedly until the desired character set
is selected.
Entering numbers
Switch to the numbers keyboard in order
to enter figures.
> Press the button.
The numbers keyboard is displayed.
> In order to return again to the keyboard
for entering letters, press the button
marked with an arrow.
Switching between upper and lower case
During free text entry, it is possible to
switch between upper/lower case and the
automatic function.
> Press repeatedly on the button in the
top right-hand corner of the display un-
til the desired method of entry is acti-
vated.
The inscription on the button symbolises
the method of entry.
• The button represents automat-
ic mode. This means that, on entry, the
first letter is automatically in upper case
and subsequently changes automatically
to lower case.
• The button represents the entry
of upper case letters.
• The button represents the entry
of lower case letters.