
Operating instructions
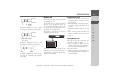
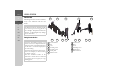
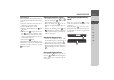
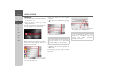
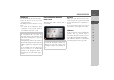
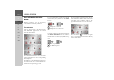
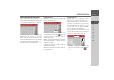
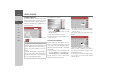
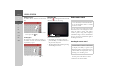
Table Of Contents
- Index
- Safety information
- The Navigation device
- OVERVIEW OF SCOPE OF SUPPLY
- OVERVIEW OF NAVIGATION DEVICE
- General operation
- Maintenance and care
- Battery quality declaration
- Display quality declaration
- Start-up
- Power supply
- TMC antenna (depending on the model)
- GPS-antenna
- Cable for vehicle integration (depending on the model, optional)
- Memory card
- Unit bracket
- Switching the Navigation device on/off
- Basic information about the touch screen
- Basic information about the menus
- Radio remote control
- Content Manager
- Transferring music tracks, pictures and videos
- Faults
- Navigation mode
- What is navigation?
- Selecting navigation
- Last destinations list
- The New or New Destination Menu (depending on device)
- Navigation settings
- Traffic announcements using TMC (depending on the model)
- The map display
- Calling up the map display
- Structure of the map display
- Using the map display
- Map display options
- Point of interest on the route
- TMC on the route (depending on the model)
- Cancel route guidance
- Changing route options
- Block route
- Switching the map mode
- Changing the map orientation
- Route calculator (depending on the model)
- Setting day/night display
- Selecting/setting the vehicle profile
- Entering a destination
- Enter/delete waypoint
- Displaying the entire route
- Displaying the destination list
- Skipping destination
- Displaying current position
- Saving a position
- Calling up the telephone (depending on the model)
- Switching off the display
- Defining fast access buttons
- TELEPHONE MODE
- Extras
- Settings
- Specialist words
- Keywords
- MODEL OVERVIEW AND TECHNICAL SPECIFICATIONS
- NOTICE

23
GENERAL OPERATION >>>
> D
> GB
> F
> I
> E
> PL
> CZ
> H
> RU
On the windscreen
The unit holder can be attached directly
to the windscreen using the suction mech-
anism.
> Press the carrier plate onto the four re-
taining lugs of the unit holder.
> Select a suitable spot to attach.
> Unscrew the fastening screws and
a little.
> Press the base with its suction sur-
face against the windscreen. Turn
the unit holder such that the carrier
plate is positioned roughly in the de-
sired viewing direction.
> Press the lever down.
The holder has attached itself firmly to the
windscreen. It can now be adjusted with
precision. In order to remove it, operate
the lever again.
Adjusting the unit holder’s position
> Loosen the fastening screws and
until the carrier plate can be moved
without using excessive force.
> Move the carrier plate to the re-
quired position and hold it in this posi-
tion.
> Tighten the fastening screws and
sufficiently so that the Navigation
device is held securely in place when the
vehicle is in motion.
Attaching the Navigation device
> Position the Navigation device, with
the attachment point on the bottom of
the housing, onto the carrier plate .
> Without using excessive force, press the
Navigation device onto the carrier plate
. The Navigation device locks into
place.
Removing the Navigation device
Press the button on the top of the car-
rier plate . This unlocks the Navigation
device which can be removed from the
carrier plate.
Switching the Navigation device
on/off
Using the On/Off switch you can
switch the Navigation device on or off
completely.
Using the button on the top of the
Navigation device you can place the unit
in sleep mode or switch it on again from
sleep mode.
4
5
2
1
3
3
4
5
6
6
4
5
6
6
7
6
1
2
1
2