
Operating instructions
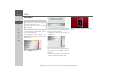
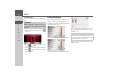
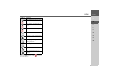
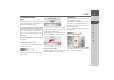
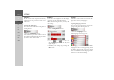
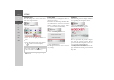
Table Of Contents
- Index
- Safety information
- The Navigation device
- OVERVIEW OF SCOPE OF SUPPLY
- OVERVIEW OF NAVIGATION DEVICE
- General operation
- Maintenance and care
- Battery quality declaration
- Display quality declaration
- Start-up
- Power supply
- TMC antenna (depending on the model)
- GPS-antenna
- Cable for vehicle integration (depending on the model, optional)
- Memory card
- Unit bracket
- Switching the Navigation device on/off
- Basic information about the touch screen
- Basic information about the menus
- Radio remote control
- Content Manager
- Transferring music tracks, pictures and videos
- Faults
- Navigation mode
- What is navigation?
- Selecting navigation
- Last destinations list
- The New or New Destination Menu (depending on device)
- Navigation settings
- Traffic announcements using TMC (depending on the model)
- The map display
- Calling up the map display
- Structure of the map display
- Using the map display
- Map display options
- Point of interest on the route
- TMC on the route (depending on the model)
- Cancel route guidance
- Changing route options
- Block route
- Switching the map mode
- Changing the map orientation
- Route calculator (depending on the model)
- Setting day/night display
- Selecting/setting the vehicle profile
- Entering a destination
- Enter/delete waypoint
- Displaying the entire route
- Displaying the destination list
- Skipping destination
- Displaying current position
- Saving a position
- Calling up the telephone (depending on the model)
- Switching off the display
- Defining fast access buttons
- TELEPHONE MODE
- Extras
- Settings
- Specialist words
- Keywords
- MODEL OVERVIEW AND TECHNICAL SPECIFICATIONS
- NOTICE

121
EXTRAS >>>
> D
> GB
> F
> I
> E
> PL
> CZ
> H
> RU
Displaying image information
> Show the image menu.
> Press the
EXIF button.
Information on the current image is dis-
played.
> Press the button to close the infor-
mation.
Slide show
In the slide show, all the pictures in the
current folder level are automatically dis-
played sequentially.
> Press
Slide show in the image viewer
menu.
The image display changes to full screen
display and initiates the slide show accord-
ing to the settings made, with the first im-
age in the current folder level.
The slide show will end once all images
have been displayed.
Press the button to stop the show be-
fore the end.
Settings
In the settings, you can choose the speed
at which the images are displayed, wheth-
er certain effects are used when a new im-
age is shown, and whether the images
should be loaded at a higher quality.
> Press
Slide show settings in the image
viewer menu.
> You can use
Interval time to set the dis-
play duration.
> In
Effects you can choose the transition
effects for the images.
> In
Load pictures in high quality
(slower)
you can choose whether imag-
es should be loaded at high resolution
() or not ().
Loading the images at high resolution
makes the display slower.
> Confirm your settings by pressing the
OK button.