
Operating instructions

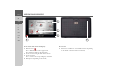


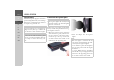
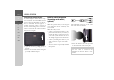
Table Of Contents
- Index
- Safety information
- The Navigation device
- OVERVIEW OF SCOPE OF SUPPLY
- OVERVIEW OF NAVIGATION DEVICE
- General operation
- Maintenance and care
- Battery quality declaration
- Display quality declaration
- Start-up
- Power supply
- TMC antenna (depending on the model)
- GPS-antenna
- Cable for vehicle integration (depending on the model, optional)
- Memory card
- Unit bracket
- Switching the Navigation device on/off
- Basic information about the touch screen
- Basic information about the menus
- Radio remote control
- Content Manager
- Transferring music tracks, pictures and videos
- Faults
- Navigation mode
- What is navigation?
- Selecting navigation
- Last destinations list
- The New or New Destination Menu (depending on device)
- Navigation settings
- Traffic announcements using TMC (depending on the model)
- The map display
- Calling up the map display
- Structure of the map display
- Using the map display
- Map display options
- Point of interest on the route
- TMC on the route (depending on the model)
- Cancel route guidance
- Changing route options
- Block route
- Switching the map mode
- Changing the map orientation
- Route calculator (depending on the model)
- Setting day/night display
- Selecting/setting the vehicle profile
- Entering a destination
- Enter/delete waypoint
- Displaying the entire route
- Displaying the destination list
- Skipping destination
- Displaying current position
- Saving a position
- Calling up the telephone (depending on the model)
- Switching off the display
- Defining fast access buttons
- TELEPHONE MODE
- Extras
- Settings
- Specialist words
- Keywords
- MODEL OVERVIEW AND TECHNICAL SPECIFICATIONS
- NOTICE

11
THE NAVIGATION DEVICE >>>
> D
> GB
> F
> I
> E
> PL
> CZ
> H
> RU
Cable for power supply from cigarette
lighter
This cable allows the unit to be connected
up to the car's cigarette lighter.
The power supply must satisfy the follow-
ing requirements:
•DC current 12/24volts
0.5 amps
Battery
When depleted, the integrated rechargea-
ble battery can be recharged by connect-
ing the Navigation device to the power
supply.
For this purpose, connect the unit via a car
power adapter to a 12/24 V socket in a ve-
hicle or via the optional mains power sup-
ply unit to the 230 V mains.
USB connection cable
With the USB connection cable provided,
it is possible to connect the Navigation de-
vice to a standard PC with a USB inter-
face. The integrated flash memory of the
navigation device and a micro SD card
that may eventually be inserted can then
be addressed by the PC like a removable
storage device.
Unit bracket
The Navigation device can be mounted in
the vehicle using the unit bracket.
Accessories
Mains power supply unit
This power supply allows connection of
the Navigation device to a mains outlet.
Requirements for power supply:
Alternating current
• 100-240 V
0.3 Amps
50-60 Hertz
External GPS antenna (for certain models only)
You can use an external antenna to im-
prove reception in vehicles where only
limited GPS reception is available (not in-
cluded in the scope of supply). Please con-
tact your local stockist for more informa-
tion.
Details of the connection can be found
under "Connecting up external antenna"
on page 20.
Cable for vehicle integration (for certain
models only)
With the optional cable you can integrate
your Navigation device seamlessly into
your vehicle. Details of the connection
can be found under "Cable for vehicle in-
tegration (depending on the model, op-
tional)" on page 20.
Note:
You can charge the Navigation device via
the car charger cable included in the
scope of delivery or via the optionally-
available mains power supply unit.
When the Navigation device is connect-
ed to a PC, it is supplied with power via
the PC and does not consume battery
power.