BECKER Operating instructions
Index >>> INDEX Index 2 >D Safety information 6 > GB The Navigation device Contents of the operating guide Use 8 8 8 >F Navigation Music* Pictures* Video* Telephone (selected models) >I >E > PL Unpacking the Navigation device Checking the delivery Delivery contents Complaints procedure Handling the packaging > CZ >H > RU Description of unit Basic device Cable for power supply from cigarette lighter Battery USB connection cable Unit bracket Accessories Mains power supply unit External GPS ant
INDEX Removing the remote control Connecting the remote control to the Navigation device Replacing the battery Operating the Navigation device using the remote control Content Manager Installing the Content Manager Starting the Content Manager 32 32 32 33 34 34 35 Transferring music tracks, pictures and videos Faults 36 36 Navigation mode What is navigation? Selecting navigation Home address Smart Guess Last destinations list The destination list Icons used 37 37 38 38 38 39 39 39 Operating the last
>>> INDEX Structure of the map display Map display without route guidance Map display with route guidance Spilt screen with route guidance Route guidance with arrow display Map display with Junction View >D > GB >F Using the map display Repeating the last announcement Changing the announcement volume Map zooming Moving the map >I >E Map display options > PL Point of interest on the route TMC on the route (depending on the model) Cancel route guidance Changing route options Block route Switching the
INDEX >>> Settings Selecting system settings 126 126 >D The system settings menu Operation 126 126 > GB Selection options Closing the settings menu 126 126 >F The individual menu items 127 Battery Day/night display Calibration Brightness Language Automatic on/off Sounds Setting the colour Factory settings Information My XTRAS Specialist words 127 127 128 128 128 129 129 130 130 130 131 132 Keywords 134 MODEL OVERVIEW AND TECHNICAL SPECIFICATIONS 137 NOTICE EU Declaration of Conformity Dis
>>> SAFETY INFORMATION Safety information >D ¤ > GB Safety information • The unit may only be operated if the traffic situation allows for this and if you are absolutely certain that you yourself, your fellow passengers or other road users will not be put at risk, encumbered or disturbed by this. >F • The rules of applicable road traffic acts must be observed at all times. Destinations may only be input when the vehicle is stationary. >I >E • The navigational system is only an aid.
SAFETY INFORMATION >>> • The mains voltages (V) indicated on the mains charger, the car charger adapter and the unit must not be exceeded. Failure to observe this can result in destruction of the unit and the charger as well as explosion of the rechargeable battery. >D • Never open the unit or the rechargeable battery. Any modification to the unit is also impermissible and renders the type approval invalid. >F > GB >I • Use only genuine BECKER original accessories.
>>> THE NAVIGATION DEVICE >D > GB >F >I >E > PL > CZ >H > RU 8 The Navigation device Contents of the operating guide Use Your Becker Navigation device is described in this user manual. This manual describes different types of models in one single document. For this reason some of the functions described here might not be available in your device. This Navigation device provides you with a powerful PND (Personal Navigation Device) for use in vehicles.
THE NAVIGATION DEVICE Music* Thanks to the integrated MP3-Player, you can listen to your favourite tracks when on the go. Pictures* The Navigation device has a Picture Viewer offering many functions for viewing pictures. Video* Navigation device features a video player for playing videos. Telephone (selected models) Your Navigation device is equipped with Bluetooth® wireless technology. Via Bluetooth®, you may connect to a cell phone that is equipped with Bluetooth® wireless technology.
>>> THE NAVIGATION DEVICE Complaints procedure >F Please contact your local stockist if you have any complaints. The device can also be sent directly to United Navigation in the original packing. >I Handling the packaging >E Keep the original packaging in a dry place, at least for the warranty period. >D > GB > PL Note: The packaging should be disposed of correctly in accordance with national disposal guidelines. The packaging must not be burnt.
THE NAVIGATION DEVICE Cable for power supply from cigarette lighter This cable allows the unit to be connected up to the car's cigarette lighter. The power supply must satisfy the following requirements: • DC current 12/24 volts 0.5 amps USB connection cable With the USB connection cable provided, it is possible to connect the Navigation device to a standard PC with a USB interface.
>>> THE NAVIGATION DEVICE >D > GB >F >I Headset (depending on the model) Standard headphones with a 3.5 mm connector or suitable adapter (not included) can be connected when using Navigation device. Information about documentation ¤ The Quick Start Guide is designed to provide a brief introduction to operating your Navigation device. The most important basic functions of the Navigation device are explained in the Quick Start Guide.
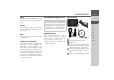
OVERVIEW OF SCOPE OF SUPPLY >>> >D 1 > GB 2 >F >I >E > PL > CZ >H 4 3 > RU Scope of supply 1 Basic device - PND (Personal Navigation Device) 2 USB connection cable 3 Unit holder with carrier plate (Design depending on the model) 4 Cable for power supply via the vehicle cigarette lighter (12/24 Volt) with integrated TMC-antenna (depending on the model) OVERVIEW OF SCOPE OF SUPPLY 13
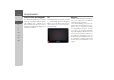
>>> OVERVIEW OF NAVIGATION DEVICE >D 2 > GB >F >I >E 3 > PL 4 > CZ >H 1 > RU Front of unit with controls and displays 1 Becker button ( ) Press = Back function in most applications Press and hold = Calls up the main menu 2 Touch screen showing the main menu selected 3 Touch screen key Press = activates the corresponding key command 4 Microphone (depending on the model) OVERVIEW OF NAVIGATION DEVICE 14 5 Rear of unit 5 Connection available for external GPS antenna (depending on the model, exter
OVERVIEW OF NAVIGATION DEVICE >>> >D > GB >F >I >E 1 2 3 4 5 > PL > CZ >H > RU Top of the unit 1 Switch-on and Switch-off (standby) Underside of the unit 2 Slot for Micro SD card 3 Mini USB connection / connection for power supply 4 3.
>>> GENERAL OPERATION Maintenance and care General operation >D >F The unit is maintenance-free. For proper care, a commercially available cleansing fluid for electrical devices may be applied using a soft damp cloth. >I ¤ > GB Danger! Danger to life by electrocution. Always switch off the unit and disconnect the mains power supply unit before cleaning the unit, supplied components, or accessories.
GENERAL OPERATION Battery quality declaration Display quality declaration The capacity of the rechargeable battery in your mobile navigation system decreases with every charging/discharging cycle. Improper storage at excessively high or low temperatures may also cause a gradual deterioration of capacity. Consequently, the operating time may be substantially reduced even in the case of a fully charged battery.
>>> GENERAL OPERATION Using the battery The internal power supply is via the integrated rechargeable battery. The rechargeable battery is maintenance-free and does not require any particular care. >D > GB >F Note: Note that if the battery is completely discharged, it may take up to a minute before the device can be switched on again. >I >E > PL Note: In the event of a defective battery, please contact your authorised dealer. Please do not attempt to remove the battery yourself.
GENERAL OPERATION Connection to the mains outlet ¤ Danger! Ensure that you do not have wet hands and that the power supply unit is dry. Only connect the power supply unit to a permissible mains power supply. Connecting power supply Connection to the public mains grid is achieved using the optionally available mains power supply unit.
>>> GENERAL OPERATION Connecting up external antenna To enable reception under adverse reception conditions, an external GPS antenna can be connected (depending on the model, not included). For this purpose, a closable connecting socket is located on the rear of the housing. If no external antenna is connected, this connection must always be closed again. >D > GB >F >I >E > PL > CZ >H > RU > Open the closure by pulling gently on the side.
GENERAL OPERATION L R GND Audio Required configuration of the 3.5 mm jack plug for connecting an audio cable. Memory card Inserting memory card Your Navigation device has a slot for a micro SD memory card. As the map data is stored in an internal memory on the Navigation device, the slot for a micro SD memory card is used for updates and for playing music*, viewing images* or watching videos*. The memory card can also be used for supplementing the map data.
>>> GENERAL OPERATION Unit bracket >D 3 1 7 7 1 The Navigation device can be attached directly to the windscreen with the unit holder. > GB >F Note: The Navigation device and unit bracket must not be exposed to long periods of direct sunlight. Temperatures inside the vehicle of +70 C and higher may damage parts of the bracket.
GENERAL OPERATION On the windscreen The unit holder can be attached directly to the windscreen using the suction mechanism. > Press the carrier plate onto the four retaining lugs of the unit holder. > Select a suitable spot to attach. > Unscrew the fastening screws 4 and 5 a little. > Press the base 2 with its suction surface 1 against the windscreen. Turn the unit holder such that the carrier plate is positioned roughly in the desired viewing direction. > Press the lever 3 down.
>>> GENERAL OPERATION Switching on > Set the On/Off switch on the underside of the unit to On. > Press the button on the top of the Navigation device. The unit is switched on. The manufacturer's logo appears on the touchscreen. >D > GB >F >I > Press the button for the required language. > The selection is confirmed by pressing OK. > If you agree to the request contained in this prompt, press the OK button. >E > PL > Then select the desired voice.
GENERAL OPERATION Switching off You can switch the unit off at any time. > Press the button on the top of the Navigation device. The Navigation device switches to sleep mode. > To switch off the Navigation device completely, set the On/Off switch on the underside of the unit to Off. Note: We recommend that you place the Navigation device in sleep mode in the event of short interruptions to operation (of up to a week).
>>> GENERAL OPERATION >D Basic information about the menus > GB >F During operations, you are assisted by various menus and entry windows. >I The main menu >E The top menu level is the main menu. The individual applications are started from the main menu. > PL > CZ >H You can tell whether a telephone is already connected by the symbol on the Phone button.
GENERAL OPERATION Entries made with the entry menu Some applications require entries to be made via the entry menu. The entry menu is operated in a similar way to a keypad. The character entered on the keypad is displayed in the top line of the entry menu. The central area is used to enter characters. Help functions are provided in the right line. Descriptions of how to operate the menu are provided below. Entering characters Characters are entered by pressing the keys in the central area.
>>> GENERAL OPERATION Scrolling through the lists If you have already entered some of the letters of the selection you want, you can use the selection list to display all the destinations containing the combination of letters in question. >D > GB >F The selection list appears. >I >E > PL > CZ > To call up the selection list, press the key. >H > RU Note: The quantity of selection options is displayed in the form of the number on the button.
GENERAL OPERATION Other character sets Different character sets can be selected for the keyboard of the Navigation device. Entering numbers Switch to the numbers keyboard in order to enter figures. > Press the button. The numbers keyboard is displayed. >>> Switching between upper and lower case During free text entry, it is possible to switch between upper/lower case and the automatic function.
>>> GENERAL OPERATION >D Deleting characters To delete the last character, use the back key. > GB The Becker key The key is integrated in the bottom left hand corner of the casing. >F >I >E > PL > To delete the character to the left of the cursor, press the key. > CZ >H Inserting spaces If you have an entry with two words, e.g. for names of towns, the words should be separated by a space. > RU > To enter a space, press the 30 key.
GENERAL OPERATION >>> This unlocks the base plate, which can now be removed. >D > GB >F >I > Insert the supplied battery (CR2032/ DL2032) into the battery compartment with the positive side facing up. > Press down the battery until it locks into place. Centre console Armrest > Position the base plate so that the word UP is pointing in the direction of travel. > Secure the base plate using the supplied screws or self-adhesive film. >E > Press the remote control onto the base plate.
>>> GENERAL OPERATION Removing the remote control You can remove the remote control again, to change the battery for example. >D > GB Connecting the remote control to the Navigation device Connecting for the first time > Switch on the Navigation device. >F 2 >I 3 >E 1 > PL > Hold the bottom part of the remote control and turn the remote control anti-clockwise until it becomes detached from the base plate. > CZ >H > RU > Press the button 1 on the remote control.
GENERAL OPERATION > Remove the old battery and replace it with a new type CR2032/DL2032 battery. > Place the remote control back onto the base plate. > Reconnect the remote control to the Navigation device as described above. Operating the Navigation device using the remote control You can control most functions and the main functions of the Navigation device using the remote control. It is provided with five buttons and a control ring.
>>> GENERAL OPERATION When using the remote control and, for example, using the control ring 6 to scroll through a menu, the active menu entry is highlighted. If you operate the Navigation device using the touchscreen again, the highlighting disappears. The highlighting also disappears after approx. 8 seconds if the remote control is not operated during this time. The example below shows the main menu with the TMC button highlighted.
GENERAL OPERATION > Click on Install to start the copying procedure. Click on Details to see the details during copying. The Content Manager is automatically started immediately after installation. Remove the check mark from the box if you do not want this. This completes the installation procedure. > Click on Finish to exit the installation program. Starting the Content Manager Execute the following actions to start the Content Manager: > Switch on the Navigation device .
>>> GENERAL OPERATION • Click on No to start the Content Manager with the version already installed. • If the new version is a critical update, the Exit button will be shown instead of the No button. You must install the new version, otherwise you have to exit the application. If you have not yet made a backup of the navigation unit, the Content Manager will ask you each time it starts whether you would like to make a complete or partial backup copy.
NAVIGATION MODE What is navigation? Navigation mode The term "navigation" (lat. navigare = to travel by sea) is generally understood to mean the location of a vehicle, the determination of the direction and distance from the desired destination and the determination of the required route. Stars, prominent landmarks, compass and satellites etc. are used as navigation aids. With the Navigation device, the location is determined by the GPS receiver.
>>> NAVIGATION MODE Selecting navigation >D Navigation mode is called up from the main menu. New destinations can be entered in the menu New or New destination (depending on the device). Destinations that have already been visited or saved can be selected in the menu My destinations. > GB >F >I >E > PL Note: The menu items Set current position and Select from last destinations (fast access mode) can also be used to select a destination.
NAVIGATION MODE Last destinations list The last destinations visited and saved destinations are displayed in the Last destinations list and can be selected directly. The menu for entering destinations or the function for entering addresses using speech can also be called up using the fast access function. The destination list The destination list displays, line by line, all destinations available for fast dialling. Each line of the destination list is divided into two fields.
>>> NAVIGATION MODE Operating the last destinations list >D Entering an address using speech Voice entry is activating by pressing the button. You can find out how to enter an address using speech under “Entering address by language (selected models)” on page 49. > GB >F >I Displaying or editing a destination Any destination stored in fast access mode can be displayed and edited. > Press the button to the left of the desired destination. > A selection menu appears.
NAVIGATION MODE Personal destinations Using the Personal destinations button you can call up GoogleTM points of interest that have been imported into the Navigation device and start route guidance to one. • See “Route planning” on page 55. Contacts Using the Contacts button you can call up Microsoft® Outlook® contacts that have been imported into the Navigation device and start route guidance to the address listed in the contact. • See “Selecting a destination from Contacts” on page 42.
>>> NAVIGATION MODE Select Delete entry if you wish to delete the destination from the list. Select Delete all entries if you wish to delete the entire list. Select Show details if you wish to display details about the destination. >D > GB >F >I >E > PL Selecting a destination from Contacts You can call up Microsoft® Outlook® contacts that have been imported into the Navigation device and start route guidance to one. Note: The Microsoft® Outlook® contacts are imported via the Content Manager.
NAVIGATION MODE The New or New Destination Menu (depending on device) 1 2 Press the Start button to begin route guidance to the address displayed for this contact straight away. You can also display the address shown for the contact on the map (On map), store it in fast access mode (Save), display the route to the destination (Show route) or call the number displayed if a phone number is provided (button with the symbol).
>>> NAVIGATION MODE Enter geo-coordinates The geographic coordinates for a destination can be entered and route guidance started via the Enter geo-coordinates button. • See “Coordinate entry” on page 59. >D > GB >F Entering the address The Enter address button in the destination input menu opens the menu for entering addresses. >I Select on map With Select on map, you can select a destination directly on the map and start route guidance. • See “Selecting a destination from the map” on page 58.
NAVIGATION MODE Note: If required, press the arrow keys on the right of the screen to scroll through all available countries of destination. The symbol indicates the countries for which an address can be entered using speech. (depending on the model) Selecting an address and starting route guidance You can enter the exact destination address in the address input menu.
>>> NAVIGATION MODE >D Note: If two words need to be entered you must separate them with the character . > GB When sufficient letters have been entered it will automatically switch to a list from which you can select the town. However, you can switch to the list before this by pressing the button. >F >I >E > PL Note: If you have entered a postcode, the name of the town will be hidden in the input menu to start with. If you then enter the street name, the name of the town will then also be displayed.
NAVIGATION MODE Using the street list Once a few letters of the desired street have been entered you can display a list of all the streets with the relevant letter combinations or this list will be displayed automatically. > Press the button on the right of the screen to call up the street list. You can scroll through the displayed list using the buttons. > Press the button containing the desired street.
>>> NAVIGATION MODE Displaying the route Once the address has been entered, the address input menu allows the route to the destination to be displayed on the map. > Press the Show route button to display the route on the map. The route is calculated. >D > GB >F >I Storing a destination In the address input menu, the Save button opens a menu where a name can be entered for the specified destination.
NAVIGATION MODE If the route guidance is already running and a waypoint has already been entered you will be asked whether the new destination should replace the old destination or the waypoint. > Select Replace stopover or Replace old destination. Note: If there is no GPS signal when the route is calculated, the following will be displayed: When a GPS signal is available, the route calculation will start automatically.
>>> NAVIGATION MODE >D If your entry is unique, after a short time the menu for entering addresses will be displayed with your entry filled in. If your entry was not unique or the Navigation device was not able to uniquely assign your entry, you will be shown appropriate lists. You can then select the address you want from these lists. Depending on your entry, lists with town names, lists with street names or combined lists with town and street names can be displayed.
NAVIGATION MODE Entries identified with the symbol open up a further list when they are selected. This can be necessary if, for example, the same town name occurs a number of times in the set country. Once you have selected the town or street you want in the lists, the menu for entering addresses is displayed after a short time with your entry filled in. You can then start route guidance, display the route or store the address as described on page 48.
>>> NAVIGATION MODE Point of interest near to an address > Press POI near location. Note: You can also press the All categories button. An input menu will then open and you can enter the name of a point of interest directly and confirm it. >D > GB >F For some categories, e.g. petrol stations, a further selection menu is displayed in which you can narrow down the choice further, e.g. by brand.
NAVIGATION MODE The points of interest categories available for the entered town are displayed. > Select the desired point of interest as described under “Point of interest in the vicinity” on page 51. > Press the Start button to begin route guidance to the point of interest straight away. However, you can also store your chosen point of interest in fast access mode (Save) or display the route to the point of interest (Show route).
>>> NAVIGATION MODE > Press the Start button to begin route guidance to the point of interest straight away. However, you can also display your chosen point of interest on the map (On map), store it in fast access mode (Save) or display the route to the point of interest (Show route). >D > GB >F >I Additional point of interest information Any additional information that is provided for a point of interest can also be displayed.
NAVIGATION MODE By pressing Add stage you can now add a stage to the route. After pressing Rename route you can give the route a new name. Pressing Delete route will allow you to delete the route from the stored routes. Route planning The route planning menu allows you to create and select individual routes. To do this, enter the individual destination points for the desired route. It is then possible to travel to these points consecutively without having to enter any further information.
>>> NAVIGATION MODE >D > GB >F >I > Select the start point or your current position as the start point for route guidance. >E > PL Note: If a start point is selected, this is only used to view a route. > CZ >H The individual stages are calculated. A map of the stages will then be displayed. > RU You can call up the route options using the Options button. You can optimise the order of the destinations to be travelled to by pressing the Optimise button.
NAVIGATION MODE Editing a route > Select the route you wish to edit. > Press the button in front of the stage you wish to edit. Option Move up Move down Delete stage > Press Add stage to enter further intermediate destinations as described above. > When you have entered all intermediate destinations, press the Done button. Replace stage >>> Meaning The stage is moved forwards by one position. The stage is moved backwards by one position. The stage is deleted from the route.
>>> NAVIGATION MODE Optimising a route If you have entered several destinations for a route, you can use the Navigation device to optimise the order of the destinations for the journey distance. The route stored is retained even after optimization, however. Call up the map display for the stages of the route. >D > GB >F >I >E Selecting a destination from the map You can select a destination straight from the map. > Press Enter destination in fast access mode.
NAVIGATION MODE > Press the Details button. Coordinate entry You can also enter your destination using geographic coordinates. > In the main menu, press the button New destination. Where available, the address of your chosen point is displayed. > Press the Start button to begin route guidance to your chosen destination straight away. You can also search for points of interest in the vicinity of your chosen point using the POI nearby button.
>>> NAVIGATION MODE Navigation settings >D The navigation settings contain all the settings that are relevant to the navigation functions. > GB >F Note: All your settings must be confirmed by pressing the OK button. Using the button, you can exit the current menu at any time without having changed anything. >I >E > PL > CZ This will take you to the navigation settings menu.
NAVIGATION MODE Setting Signposts Country info Junction View Meaning When this function is activated, you receive additional important information at traffic junctions about the sign you should follow. When this function is enabled, you will automatically receive generally applicable traffic information for the relevant country when you cross a national border (e.g. speed limits).
>>> NAVIGATION MODE Selecting the vehicle profile This setting influences the calculation of the expected time of arrival and blocks motorways for the bicycle setting, or in the case of lorry profiles (depending on the model), it blocks roads that do not meet the criteria entered. >D > GB >F >I Note: In the map display, roads that cannot be used according to the settings of the lorry profile are displayed with a light red contour (depending on the model).
NAVIGATION MODE Time-dependent route guidance If this function (Use traffic patterns) is switched on ( ), information (statistical information) on the possible speed on certain segments at certain times of the day is also taken into account in the route calculation, provided this is available. This provides a more accurately calculated arrival time and may even result in a different route being selected.
>>> NAVIGATION MODE Setting >D Auto-select station > GB >F >I >E > PL > CZ >H > RU Meaning Choose whether to run an automatic search for the station with the best reception (function switched on ). Press the arrow buttons to activate the automatic station search. The currently tuned TMC station is displayed in the adjacent field. This can only be set if the Auto-select station function is switched off.
NAVIGATION MODE >>> > Press the 3D Buildings button in the map mode menu and turn the function on or off . > Press the button 4 or 5 to select whether to use 2D or 3D mode. > Press the button 1 to select the entire map. >D > GB >F >I > Press the button 3 for arrow mode. >E > PL Map with 3D buildings activated. > CZ > Confirm your setting by pressing the OK button. To call up the extended settings, press the Advanced button. > Press the button 2 for a split screen.
>>> NAVIGATION MODE The following setting options are available in the extended settings: • Auto zoom You can select how the map changes when approaching an action point or at different speed. • Select POI categories You can select which symbols are displayed for points of interest on the map. • Street names 2D/Street names 3D You can select whether the street names should be displayed ( ) or not ( ) in 3D or 2D mode.
NAVIGATION MODE The Warnings button > You can then switch the display of entire categories on ( ) or off ( ). After pressing the button beside a category you can switch subcategories in further menus on or off. > Confirm all your settings by pressing the OK button. In the Warnings settings window you can select which warnings are to be displayed by the Navigation device or which warnings are to be output. > Press the Warnings button in the settings menu. The Warnings settings window appears.
>>> NAVIGATION MODE The Driver alerts button If this information is saved in the map material and is supported by your navigation device, you can display information signs, e.g. for dangerous bends or descending gradients. In addition, you can define whether the display of the sign is also to be accompanied by a warning sound. > Press the Driver alerts button in the settings menu. The Driver alerts settings window appears.
NAVIGATION MODE Setting Out of city The following settings are available. To select settings always press the field next to the setting that you wish to change. Setting Show signs In city Meaning Select whether speed limits are never displayed, always displayed or only displayed if the limit is exceeded. Select the amount over the speed limit at which you would like to receive an acoustic warning within built-up areas.
>>> NAVIGATION MODE • Volume You can select the standard volume for voice announcements for each start of the Navigation device, or switch off voice announcements completely. • Announce streets (available for >D > GB >F devices with TTS function only) Using the Announce streets button >I >E The Voice button In the Voice settings window you can set the voice that will make the navigation announcements for the language that has been set. > Press Voice in the settings menu.
NAVIGATION MODE The Format button The Time button In the Format settings window you can set the measurement units to be used for times and distances. > Press Format in the settings menu. You can select the time zone relevant for your location in the Time settings window. This setting is important for the correct calculation of the estimated time of arrival. > Press Time in the settings menu. The Format settings window appears.
>>> NAVIGATION MODE The Blocked roads button In the Blocked roads settings window you can unblock previously permanently blocked roads (See “Blocking route sections/roads” on page 93.) or modify the block (time and days of week of block). > Press the Blocked roads button in the settings menu. >D > GB >F >I >E > PL A window is displayed containing the roads that have previously been blocked. > CZ > Select the blocked road you want. > Press the Clear form button to delete the road from the list.
NAVIGATION MODE Note: Press the Block 24 h button to set a block for an entire day. Press the Use setting for... button to also use the block on other days. > Confirm your settings by pressing the OK button. The Reset button You can reset the navigation settings to their factory settings. The settings will then be reset. The fast access mode data, stored routes, blocked routes, voice and home address are retained. > Press the Reset button. > Press the Yes button.
>>> NAVIGATION MODE Note: As the traffic announcements are transmitted by radio stations, we cannot assume responsibility for the completeness or accuracy of the announcements. Austria: The location and event code was made available by ASFINAG and BMVIT. >D > GB >F >I >E > PL The Navigation device constantly checks whether there are any relevant announcements for the route that has been set. All traffic problems that have been received are shown on the map.
NAVIGATION MODE 4 Expected duration of the obstruction If a TMC message lies on your route, the message is indicated by the sign . Traffic announcements received via TMCpro are indicated by the symbol. >>> Reading a message > Press on the desired message in the list. The message display appears. >D > GB >F >I >E 4 1 2 3 The message list appears when you press. . You can scroll through the list using the arrow keys on the right-hand edge of the screen.
>>> NAVIGATION MODE >D Display the relevant road in the map > Press the button in the message display. The relevant road can be seen in the map. > GB >F >I Taking announcements into consideration when calculating routes Your Navigation device can take traffic announcements into consideration when calculating a route. You have the option of setting this function to automatic, manual or never under “The TMC button” on page 63.
NAVIGATION MODE > Now either press the OK button to use the alternative route or press the reject, button to continue using the existing route. The map display The map display is used primarily for route guidance. However, you can also use the map display without route guidance to show your current position and, for example, to receive warnings about exceeding the speed limit. Calling up the map display The map display is called up automatically when you start route guidance.
>>> NAVIGATION MODE 1 >D > GB 2 3 >F >I 4 5 6 7 >E > PL > CZ Speed limit on the road currently being driven on (display not available for all roads), signs for the driver alerts will also be displayed Zoom buttons Power level/telephone status (depending on the model) Button for calling up the options Vehicle position Current road Information box (if displayed) showing vehicle speed and altitude above sea level Power level/telephone status (depending on the model) 5 Button for calling up the options 6
NAVIGATION MODE Information is also displayed in the bottom left corner in the preview area. Models with TMC reception: The symbol below is displayed on the left of the preview area if there is a TMC announcement along your route. >>> Spilt screen with route guidance >D 1 15 14 9 13 8 > GB 2 3 >F 4 12 The next manoeuvre is displayed as an arrow, with a distance indication underneath it.
>>> NAVIGATION MODE >D 8 Next driving manoeuvre 9 Displays POIs on the route 10 Current road, or road to which the > GB next driving manoeuvre leads 11 Distance to next driving manoeuvre 12 Progress bar to illustrate the distance >F to the next driving manoeuvre >I 15 14 13 9 12 10 13 Displays TMC messages for the route >E 11 (depending on the model) > PL > CZ >H > RU 14 Calls up volume settings 15 Estimated time of arrival, remaining 1 journey time and remaining distance to the next des
NAVIGATION MODE Map display with Junction View You can display a detailed and realistic view of the lane situation at many motorway junctions. To do this, switch on the Junction View function as described under “The Guidance info button” on page 60. If you are then directed through a motorway junction by the Navigation device, you will see a corresponding display. Using the map display Repeating the last announcement During route guidance, the system announces important information, e. g.
>>> NAVIGATION MODE >D Map zooming The map can be zoomed into in steps via the zoom buttons. Moving the map You can move the map to any point. > To do this, press the map briefly. > GB Map display options In the map display options, you can change the settings for route guidance, the map display and the route. >F > Press zoom in to “zoom in on the map” and therefore to get closer to the details displayed. > Press zoom out to “zoom out from the map” and therefore to obtain a larger overview.
NAVIGATION MODE Note: The scope of the displayed functions depends on whether route guidance or a route with several destinations is active. Four fast access buttons are shown on the left-hand side of the options menu. You can assign these buttons different key functions from the options menu as described in “Defining fast access buttons” on page 97. The options menu is exited either by selecting a function or by pressing the button.
>>> NAVIGATION MODE Point of interest near destination/on entire route > In the point of interest on the route menu, press the button to show POIs near the destination, or the button for POIs on the entire route. >D > GB >F >I >E Note: Also displayed are the TMC messages that have led to a change in the route. > Open the options menu for the map display. > Press the TMC on route button. > PL > CZ > Select the desired category. > Then select the desired point of interest.
NAVIGATION MODE Changing route options (Only available when route guidance is active.) You can modify the route options (route selection etc.) during route guidance. > Open the options menu for the map display. > Press the Route options button. Block route You can block a stretch of road ahead. This determines a certain stretch of road that should not be used. Navigation device then attempts to calculate a diversion.
>>> NAVIGATION MODE Switching the map mode You can select whether the map is to be displayed in 3D or 2D mode, in a split screen with 3D or 2D display or in arrow mode. You can also select whether or not 3D buildings available in towns should be displayed in 3D mode. Further setting options are available to you in the extended settings. >D > GB >F >I >E > PL Changing the map orientation You can view your surroundings in 3D mode.
NAVIGATION MODE Route calculator (depending on the model) The route calculator provides a data display with average speeds, maximum speeds, etc. and a stopwatch with the option to record laps. > Call up the options menu for the map display. > Press the Trip computer button. 1 2 5 3 6 Travel time without breaks in the journey 7 Travel time with breaks in the journey 8 Compass 9 Calls up the stopwatch with lap recording 6 Press the Reset button to reset the values to zero.
>>> NAVIGATION MODE >D > GB >F Press the Stop button to stop the recording. The time continues if you press the Start button again after stopping the recording. Press the Reset button to delete all recordings and reset all times to zero. Setting day/night display You can switch the Navigation device display from day to night and vice versa. > Call up the options menu for the map display. You can display the individual laps in list form using the List view button. > Press the Day/Night button.
NAVIGATION MODE ¤ Danger! The information in the map data may be incorrect as a result of short-term changes (road works, for example). The traffic situation and the local road signs take precedence over the navigation system information. Note: In map view, the roads that cannot be driven on in accordance with the truck profile settings are shown with a light red outline. (depending on the model) > Confirm the currently selected profile by pressing OK or select Change profile to change the profile.
>>> NAVIGATION MODE >D Adjusting truck profiles > Select one of the saved truck profiles or the general truck profile. > GB 6 >F Setting the size > In the profile settings press the button for setting the size. 1 2 2 >I 5 You can then modify the selected profile. 1 Use this button to set the size of the truck. 2 Use this button to specify whether the truck has a trailer and how many axles it has. 3 Use this button to set the maximum permissible weight and the actual weight.
NAVIGATION MODE > Enter the desired weight. > Confirm the entry in the input menu by pressing . Once you have performed the desired settings, confirm your settings by selecting OK. Selecting the truck symbol and name If you have changed one of the saved truck profiles, it is also possible to enter the truck symbol and name displayed. > Press the button symbol displayed.
>>> NAVIGATION MODE Entering a destination (Only available when route guidance is not active.) You can enter a destination. > Open the options menu for the map display. >D > GB >F >I >E Enter/delete waypoint (Only available when route guidance is active.) With this function, you can enter a waypoint or delete an entered waypoint. > Open the options menu for the map display. The entered waypoint is marked on the map as a red flag. > Press the Enter destination button. > Press the Add stopover button.
NAVIGATION MODE Displaying the entire route (Only available when route guidance is active.) You can display the entire route to the destination on the map. You also have the option of displaying the complete directions and blocking particular sections/ roads of the route permanently. As a further option you can display the various routes that you can set in the route options and also select them if you wish. > Open the options menu for the map display. > Press the Show route button.
>>> NAVIGATION MODE >D > GB >F >I > Select Block for current route to block the section of the route for the current route guidance session only. >E > PL Note: If the route section is more than 10 kilometres long, you can choose, in another menu, whether to block the entire section or just part of it. > CZ >H > RU > Select Block permanently to block the section of the route for future route guidance sessions too. You can now set whether or not the road should be blocked for each day of the week.
NAVIGATION MODE Displaying/selecting different routes You can use the Navigation device to display various routes. > With the entire route displayed, press the Alternative button. This function can also be selected in the options of the map display, See “Map display options” on page 82. After a short time, the map will appear. The individual routes are calculated one after another and marked on the map.
>>> NAVIGATION MODE >D • Use Start guidance to start guidance for the selected stage. • Define the expected loading time using Set loading time. > GB >F Skipping destination If a planned route with several destinations is active, you may delete the current destination of the route. Route guidance to the next destination is then started. This may be necessary if a destination was not driven to directly. The Navigation device otherwise tries to guide you to the current destination.
NAVIGATION MODE Saving a position You can save the current position. > Call up the options menu for the map display. Calling up the telephone (depending on the model) You can call up the telephone function. > Open the options menu for the map display. > Press the Save position button. > Press the Phone button. The telephone function is called up. > Enter the name you want for the position. > Press the button to confirm the name.
>>> NAVIGATION MODE >D > GB >F >I > Select the desired function from the displayed list. > Confirm your selection by pressing the OK button. The map display is opened and the fast access button has the chosen assignment the next time the options menu is opened.
TELEPHONE MODE If your navigation device has an integrated Bluetooth® interface, you can connect it to a mobile phone equipped with Bluetooth® wireless technology. Your Navigation device can then be used as a very comfortable hands-free unit. TELEPHONE MODE Note: • For some cell phones equipped with Bluetooth® wireless technology, it is possible that some of the functions described are not available. • The following descriptions assume that Bluetooth is activated on the cell phone.
>>> TELEPHONE MODE >D > GB >F >I The Navigation device now attempts again to connect the cell phone last connected. When the connection is established, the telephone menu is then displayed after a short period. If no cell phone has been connected yet or if the device last connect is not available, the following display is generated. Telephone menu (only selected models) > Press the Yes button to find Bluetooth cell phones as described in "Searching for cell phones" on page 107.
TELEPHONE MODE Note: Press the button to delete the characters entered. Press Pause if you wish to pause the dialling process. > Press the Dial button. The Navigation device then attempts to establish a connection to the phone number entered. You can find out how to continue operation in "Telephone calls" on page 109. Phonebook In the phonebook, the system displays the phonebook entries loaded from the SIM card and from the memory of the cell phone.
>>> TELEPHONE MODE >D > In the input menu, select the first letters of the entry you are looking for. Note: • For example, if you entered the letters “M” and “I”, the entries are displayed whose last names or first names start with “MI”. That means, “Miller John” or “Bauer Michael”. • You may enter the first letter of the last name and then enter the first letter of the first name separately using a space (button ).
TELEPHONE MODE Text messages (SMS) (only selected models) If this function is supported by the mobile phone, all the received text messages on the SIM card and in the mobile phone’s memory will be loaded onto the Navigation device. The text messages can be displayed on or read out by the unit and edited. > In the telephone menu press the SMS button. The selected text message is displayed. > Press the Read out button in order to have the message read out.
>>> TELEPHONE MODE Incoming text message You will receive notification of any text messages received, depending on the settings under "Text message notification (depending on the model)" on page 114. If you have activated the Show popup setting, the following menu will be displayed on receiving a new text message. >D > GB >F >I >E Number lists In the number lists, the telephone numbers or names last dialed, accepted or not accepted will be shown in chronological order.
TELEPHONE MODE Icons used The following icons are used in the number list. Icon Significance This entry is a standard entry without any special features. This entry is protected. If the number list is full, this entry is not automatically deleted. You have the option to do this manually. For a protected entry, you also have the option to set the position in the quick access. Scrolling in the number list With the buttons, you may scroll in the number list in the relevant direction of the arrow.
>>> TELEPHONE MODE >D Lists loaded from cell phone > In the number list, call the respective list using the buttons Missed, Accepted and Dialled. > GB >F >I >E Connecting Bluetooth telephones So that you may make and receive calls with your Navigation device, a cell phone that is equipped with Bluetooth® wireless technology must be connected to the Navigation device. The following describes the various ways to establish a connection.
TELEPHONE MODE Automatic connection After activation, your Navigation device attempts to establish a connection to the cell phone last connected. Selection Significance Protect entry The device is protected against automatic deletion (only available for unprotected devices). Remove The protection of the deprotection vice is canceled (only available for unprotected devices). Move up / The device is moved one position forwards/backMove down wards. Delete The device is deleted from the device list.
>>> TELEPHONE MODE Connecting from device lists From within the device list, you may initiate a connection to a cell phone. If a cell phone is already connected, that connection is automatically disconnected and the new device is connected. > Call up the device list. >D > GB >F >I > Then select the name of the cell phone to be connected. The Navigation device will then attempt to establish the connection. On the cell phone, the password prompt should then occur.
TELEPHONE MODE Disconnecting a connected telephone You may disconnect the connection to a cell phone currently connected via Bluetooth. Telephone calls In the telephone calls section, you can find a summary of the control options that are available for establishing a call, accepting a call, and ending a call. >>> Accepting a call For an incoming call, a ringing tone will sound. Also the following is displayed. >D > GB >F >I Establishing a call > Press the Disconnect button.
>>> TELEPHONE MODE If you have switched on the automatic call acceptance as described in "Automatic call acceptance" on page 113, the time to call acceptance is also displayed for the Accept button. >D > GB >F Ending a call During a call You can end an active call. During a call, you have various control options. >I >E > In the call screen, press the End call button. The call is ended. The screen last active is displayed. > PL > CZ >H Note: The call is also ended if the other party hangs up.
TELEPHONE MODE > To call the options menu of the call screen, press the Options button. • Volume By pressing the Volume button, you can call the volume adjustment. See “Telephone volume” on page 113. • Microphone off/Microphone on For a private conversation in a vehicle, you can switch off the microphone of the Navigation device. The other party on the phone will not hear anything. Press the Microphone off button to switch off the microphone. Press the Microphone on button to switch the microphone back on.
>>> TELEPHONE MODE >D You will branch to the menu for the telephone settings. > GB Start In the menu, various pages with the functions are available: >F >I Switching Bluetooth on and off Visibility With the Bluetooth button, you can switch Bluetooth on or off. With the Visibility button, you can switch on or off whether or not for a search other Bluetooth devices can detect the Navigation device. > In the settings menu, press the Bluetooth button.
TELEPHONE MODE Automatic call acceptance Telephone volume Updating phonebook With this function, you can set whether or not or after which time an incoming call is accepted automatically. With this function, you can set the volume of the ringtone and the volume of the call. With this function, you can update or retransfer the stored phonebook entries in the Navigation device. >>> >D > GB >F > In the settings menu, press the Autoaccept call button. > In the settings menu, press the Volume button.
>>> TELEPHONE MODE Bluetooth name With this function, you can assign a name for your Navigation device. This assigned name will then be displayed by other Bluetooth devices. >D > GB >F >I > In the settings menu, press the Bluetooth name button. >E Text message notification (depending on the model) With this function you can set how the Navigation device should respond when a new text message is received. > Press the SMS signal button in the settings menu.
EXTRAS Under Tools, the following functions are grouped together, depending on the model: • MP3 player* • Picture viewer* • Video player* • Country information The extras menu is called up from the main menu. Extras MP3 player* The MP3 Player can play MP3 tracks saved on an inserted micro SD memory card or on the internal memory. Selecting a track Tracks can be selected from the selection menu. >D > GB >F >I >E Press the Music button.
>>> EXTRAS • Genres When you select Genres the tracks on the memory card are listed sorted by genre (e.g. rock, pop). • Albums When you select Albums the tracks on the memory card are listed sorted by album. • Folders When you select Folders you can select the tracks according to the folder structure on the memory card. • Songs When you select Songs all the tracks on the memory card are listed in alphabetical order. • Playlists When you select Playlists the playlists on the memory card are listed.
EXTRAS The playback menu You can use the playback menu to control the playback of the MP3 tracks.
>>> EXTRAS >D Track repeat / random play You can set a track to repeat on a loop, or play the tracks in a random order. > GB >F Setting the volume You can set the volume of the MP3 playback. Closing the MP3 player Pressing the button closes the MP3 player and displays the media menu. ¤ Note: Please note that music playback will continue, despite leaving the playback menu. Press the pause icon to stop music playback. (See “Interrupting playback” on page 117.) Warning.
EXTRAS Image viewer* >>> The image viewer menu In the image viewer menu, you can select images, start a slide show and call up the settings. Note: The image viewer cannot be called up when route guidance is active. The Image Viewer can display pictures saved on an inserted micro SD memory card or on the internal memory. The jpg and bmp image formats are supported. Press the Pictures button. 2 2 2 2 2 > GB >F >I A message is displayed stating that the image viewer must not be used when driving.
>>> EXTRAS Selecting an image >D > GB >F Press the buttons to the left and right of the image to move to the next or previous image. Press the centre of the image to hide the image menu. Enlarging the image > Show the image menu. > Press the Zoom button. >I >E > In the image viewer menu, select the desired folder, and then the desired image. You can use the and buttons to scroll through the pages of images and folders. The selected image is displayed along with an image menu.
EXTRAS Displaying image information > Show the image menu. > Press the EXIF button. Information on the current image is displayed. > Press the button to close the information. >>> Slide show In the slide show, all the pictures in the current folder level are automatically displayed sequentially. > Press Slide show in the image viewer menu. The image display changes to full screen display and initiates the slide show according to the settings made, with the first image in the current folder level.
>>> EXTRAS Video player* >D Note: The video player cannot be called up when route guidance is active. The video player must not be operated during driving. > GB >F >I >E The Video Player can show videos saved on an inserted micro SD memory card or on the internal memory. The Navigation device supports the MPEG4 Part2 video format with the file extension .avi. > PL > CZ >H A message is displayed stating that the video player must not be used when driving. Please observe this warning.
EXTRAS Displaying the video menu You can use the video menu to control the playback of the video. > Press the screen when a video is running in full-screen mode. 8 1 2 7 6 5 4 3 The video menu appears.
>>> EXTRAS >D Setting the volume You can set the volume of the MP3 playback. > GB ¤ >F Warning. Always adjust the volume so that you can still hear any ambient noise while driving. >I >E Country information The country information enables you to display country-specific information for numerous countries (maximum permitted speed, alcohol limits, etc.). The country-specific information is displayed (maximum permitted speed, alcohol limits, etc.). > In the playback menu, press the button.
EXTRAS Symbol >>> Meaning Speed limit in built-up areas >D > GB Speed limit outside built-up areas >F >I Speed limit on motorways >E Alcohol limit > PL > CZ Reflective jacket requirement >H Driving lights requirement during daytime > RU Tow rope must be carried Spare bulbs must be carried Fire extinguisher must be carried Press the OK button or the leave the menu.
>>> SETTINGS Selecting system settings Settings >D You can change various basic settings for all applications on the Navigation device. > GB >F >I >E > PL > In the main menu, press Settings. > CZ The system settings menu You can select the various settings options from the system settings menu. Operation Selection options Select the desired menu item by pressing the appropriate button.
SETTINGS The individual menu items Battery Your Navigation device may be operated using an external power supply unit or an integrated rechargeable battery. Note: The current charging state is important when operating with a battery. If the battery is low on power, it may not be possible to continue navigation right to the destination. The power level is shown in the charge display. In the example, the battery still has around two-thirds charge.
>>> SETTINGS >D Calibration If the touch screen responds incorrectly when buttons are pressed, it needs to be calibrated. > GB >F Starting the calibration You can start the calibration using the following button: >I Brightness You can set the brightness of the display separately for day and night display. With the following button, you may call the setting: Language The texts on the touch screen can be displayed in a variety of languages.
SETTINGS Scrolling Using the buttons, it is possible to scroll through the list in the direction of the relevant arrow. Selecting the language > Press the button for the required language. > The selection is confirmed by pressing OK. A prompt appears indicating that the software has been re-started, and you are asked whether you really want to change the language. > Confirm the prompt using Yes. Cancelling the language selection Pressing the button cancels the language selection and shows the settings menu.
>>> SETTINGS >D Setting the colour You can change the colour of the icons and other design elements. > GB >F > Press the Colours button. >I Factory settings You can reset your Navigation device to the factory settings. This deletes the following amended data: saved destinations, saved routes, the home address, telephone data, images, videos etc. saved on the internal memory. Information The following button displays information regarding the Navigation device. > Press the Information button.
SETTINGS >>> My XTRAS You can display the content installed on your Navigation device, the content that has already been updated, the content that has been purchased and the content that can be additionally purchased via the Content Manager. >D > GB >F >I >E > Press the XTRAS button. > PL > CZ >H > RU > Press the button with the information on the content you want. The content is displayed. You can display further information by pressing the various content.
>>> SPECIALIST WORDS GMT (Greenwich Mean Time) Central European Time The standard time at 0 degrees of longitude (the longitude which passes through Greenwich, Great Britain). This time is used worldwide for the synchronisation of data collection. Specialist words >D > GB >F >I >E Bluetooth Technology for wireless data transmission at short range up to 10 meters. > PL > CZ >H GPS (Global Positioning System) GPS determines your actual geographical position by the use of satellites.
SPECIALIST WORDS >>> TMC (Traffic Message Channel) Traffic announcements transmitted by most FM stations via RDS. Basis for dynamic navigation. >D > GB >F USB (Universal Serial Bus) The Universal Serial Bus (USB) is a bus sytem for interconnection of a computer with external USB peripherals for the exchange of data.
Keywords >>> KEYWORDS 3D buildings . . . . . . . . . . . . . . . . . . 65 3D display . . . . . . . . . . . . . . . . . 64, 86 Coordinate entry . . . . . . . . . . . . . . . 59 Country information . . . . . . . . 61, 124 Current position . . . . . . . . . . . . . . . . 96 A D Altitude . . . . . . . . . . . . . . . . . . . . . . 78 Announcing streets . . . . . . . . . . . . . . 70 Automatic call acceptance . . . . . . . . 113 Automatic connection . . . . . . 107, 112 Daylight saving time . . . . . . .
KEYWORDS I ID3 tag . . . . . . . . . . . . . . . . . . . . . . 115 ID3-Tag . . . . . . . . . . . . . . . . . . . . . 132 Image viewer . . . . . . . . . . . . . . . . . . 119 Intended use . . . . . . . . . . . . . . . . . . . . 6 J Journey time . . . . . . . . . . . . . . . . . . . 78 JPG/JPEG . . . . . . . . . . . . . . . . . . . . 132 Junction . . . . . . . . . . . . . . . . . . . . . . . 47 L Lap recording . . . . . . . . . . . . . . . . . . . 87 Last announcement . . . . . . . . . . . . . .
>>> KEYWORDS >D > GB >F >I >E > PL > CZ >H > RU 136 S T W Safety information . . . . . . . . . . . . . . . 6 Safety instructions . . . . . . . . . . . . . . 37 Satellites . . . . . . . . . . . . . . . . . . . . . . 96 Schnellzugriff . . . . . . . . . . . . . . . . . . 40 SD card . . . . . . . . . . . . . . . . . . . . . . 21 Searching for a telephone . . . . . . . . 107 Selecting a country . . . . . . . . . . . . . . 44 Selecting a destination Entering an address . . . . . . . . . .
MODEL OVERVIEW AND TECHNICAL SPECIFICATIONS >>> MODEL OVERVIEW AND TECHNICAL SPECIFICATIONS z: standard -: not available {: optional Weight Processor in MHz Flash memory SD-RAM LiIon battery (see also page 127) Headset output 3.
>>> NOTICE Dear customer, In conformance with current EC guidelines, any person may operate this unit. This unit conforms to the current valid European or harmonised national standards. This designation is your guarantee that the unit conforms to the applicable specifications regarding electromagnetic compatibility. This means that interference with other electrical/electronic devices caused by the unit, or interference with this unit caused by other electrical/electronic devices, is largely prevented.
NOTICE >>> Disposal of the unit >D Customer information on the disposal of electrical and electronic devices (private households) In accordance with the self-imposed company principles of United Navigation GmbH your product has been developed and manufactured from high-quality and recyclable materials and components. This symbol on the product and/or accompanying documents means that at the end of their life electrical and electronic products must be disposed of separately from domestic waste.
>>> NOTICE Disposal of the battery >D Duty to supply information according to battery legislation (BattV) > GB Batteries must not be disposed of in household waste. It is the duty of the user to return used batteries. Please only dispose of batteries via specialised dealers or at battery collection points. In this way, you make a positive contribution to environmental protection.
NOTICE >>> 5 >D > GB >F >I >E 4 3 > PL > CZ >H 2 1 > RU > Completely discharge the battery (leave the unit switched on with no power supply until it automatically switches off). > Remove the two rubber covers 1 from the screw holes. > Unscrew and remove the two housing screws 2 using a small cross-slot screwdriver. > Lever off the rear of the housing 3 using a flat-blade screwdriver (placed at the slits on the sides of the housing). > Pull out the connector of the battery connecting cable 4 .