
Operating instructions

RQT8152
34
Convenient
functions
Changing the unit’s settings
Preparation
• The settings remain intact even if you switch the unit to standby.
• Turn on the television and select the appropriate video input to suit
the connections to this unit.
• Turn the unit on.
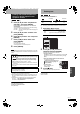
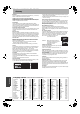
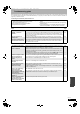
1 While stopped
Press [SETUP].
2 Press [e, r] to select the tab and
press [q].
3 Press [e, r] to select the menu and
press [ENTER].
4 Press [e, r] to select the option and
press [ENTER].
Note
There may be differences in operation methods. If this happens,
follow the on-screen instructions for the operation.
In the case of a power failure, the clock setting remains in memory
for approximately 1 minute.
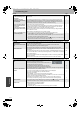
1 While stopped
Press [SETUP].
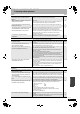
2 Press [e, r] to select “Setup” and
press [q].
3 Press [e, r] to select “Clock
Settings” and press [ENTER].
4 Press [e, r] to select “Set Clock
Automatically” and press [ENTER].
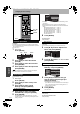
5 Press [ENTER].
Auto setting starts. This can take some time, up to a few
minutes in some cases. The following screen appears when
setting is complete.
• If the time was not set correctly, use manual clock setting or time
zone adjust.
• DST, Daylight Saving Time, shows the summertime setting.
• Time Zone shows the time difference from Greenwich Mean Time
(GMT).
EST (Eastern Standard Time) = GMT –5
CST (Central Standard Time) = GMT –6
MST (Mountain Standard Time) = GMT –7
PST (Pacific Standard Time) = GMT –8
AST (Alaska Standard Time) = GMT –9
HST (Hawaii Standard Time) = GMT –10
For other areas: xx hr
6 Press [ENTER].
To cancel partway
Press [RETURN].
Adjust the time zone (–1 or +1) if it was not set correctly with auto
clock setting.
You cannot change this setting if you set the clock manually.
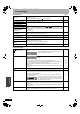
4 Press [e, r] to select “Adjust Time
Zone” and press [ENTER].
5 Press [e, r] to select “–1” or “+1” and
press [ENTER].
4 Press [e, r] to select “Set Clock
Manually” and press [ENTER].
5 Press [w, q] to select the item you
want to change and press [e, r] to
change the setting.
DST (Daylight Saving Time): On or Off
If you select “On”, the clock is advanced one hour starting at
2 a.m. on the first Sunday in April and ending at 2 a.m. on
the last Sunday in October.
Time Zone (Ô above)
6 Press [ENTER].
The clock starts.
To exit the screen
Press [SETUP].
To return to the previous screen
Press [RETURN].
Common procedures
Clock settings
Set Clock Automatically
ADD/DLT
OPEN/CLOSE
SKIP SLOW/SEARCH
REC MODE ERASE
REC
F Rec
TIME SLIP
FUNCTIONSDIRECT NAVIGATOR
TOP MENU
RETURN
STATUS
DISPLAY
SUB MENU
SETUP
CREATE
CHAPTER
SCHEDULE
CM SKIP
AUDIO
CANCEL
VCR Plus+
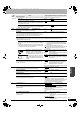
RETURN
e, r, w, q
ENTER
SETUP
Numbered
buttons
CableTV
Channel
SETUP
Setup
Channel Captions
Signal Source (RF IN)
Set Channels Automatically
Preset Channel Captions
M l Ch l C ti
Tabs Menus Options
Adjust Time Zone
Set Clock Manually
SETUP
Setup
Disc
Video
Audio
Set Clock Automatically
Auto Clock Setting is complete.
4/4/2002 12:15 AM
DST............. On
Time Zone.... CST
Channel
SETUP
Channel
Disc
Video
Setup
Adjust Time Zone
1
0
1
SETUP
Disc
Video
Setup
Set Clock Manually
/ :
/
SAT AM
Month Day Year
Hour Minute
1
1
12 00
2000
DST Time Zone
Off
EST
Channel
DMR-ES20-P10_1.fm 34 ページ 2005年8月31日 水曜日 午前11時44分