
Operating instructions


RQT8152
11
Getting started
n If the clock is an hour slower or faster than the
actual time
Select “–1” or “+1” in “Adjust Time Zone” in the SETUP menu
(Ô page 34).
n If the unit couldn’t set the clock automatically
Set the time manually (Ô page 34, Set Clock Manually).
n To start Plug-in Auto Tuning again (after
relocation, for example)
When the unit is on and stopped
Press and hold [1 CH] and [2 CH] on the main unit for
about five seconds.
The unit turns off.
Press [^ DVD POWER] to turn the unit on.
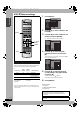
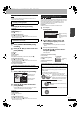
1 Press [SETUP].
2 Press [e, r] to select “Channel” and
press [q].
3 Press [e, r] to select “Signal Source
(RF IN)” and press [ENTER].
4 Press [e, r] to select “Antenna” or
“CableTV” and press [ENTER].
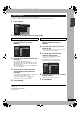
5 Press [e, r] to select “Set Channels
Automatically” and press [ENTER].
6 Press [ENTER].
Auto Channel Setting starts. This takes a few minutes.
7 Press [ENTER].
To cancel partway
Press [RETURN].
To exit the screen
Press [SETUP].
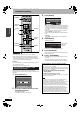
Add or delete channels if necessary channels are not set or
unnecessary channels are set.
1 Press the numbered buttons to select
a channel.
• You can also use [1 2 CH] when you are going to delete a
channel.
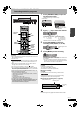
2 Press [ADD/DLT].
e.g., The channel is deleted.
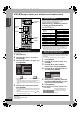
Signal source, channel caption, and VCR Plus+ guide
channel settings all revert to the default values when you
perform the procedure below. Scheduled recording settings
are also cleared.
If Plug-in Auto Tuning fails
1
2
Channel Captions
Cable TV
Channel
SETUP
Setup
Disc
Video
Audio
Display
TV Screen
Signal Source (RF IN)
Set Channels Automatically
Preset Channel Captions
Manual Channel Captions
VCR Plus+ Ch. Setting
SETUP
Setup
Video
Audio
Display
TV Screen
Channel
Signal Source (RF IN)
Antenna
CableTV
Disc
ENTER
Adding and deleting channels
TV
REC
P
Antenna Mode (Airwaves)
e.g., 5: [0] Ô [5]
15: [1] Ô [5]
CableTV Mode (Cable)
e.g., 5: [0] Ô [0] Ô [5]
15: [0] Ô [1] Ô [5]
115: [1] Ô [1] Ô [5]
Unit’s display
Channel 15 Deleted
DMR-ES20-P10_1.fm 11 ページ 2005年8月31日 水曜日 午前11時44分