
Troubleshooting guide


6. Set up header information, data location, file names. Several parameters need to be set before taking an
exposure. The script config.exposure.pl [Configure Exposure] will print out a list of exposure parameters, and
query if you wish to change any of them. If you do, you can step through each of the modifiable parameters;
enter the new value or hit return to keep the old value. Here is a complete list of parameters that are printed out:
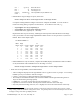
OBS_TYPE Type of observation being taken; commonly used keywords are object, standard, flat, dark.
OBJECT Name of object being observed. NOT provided by TCS.
FILEBASE Image filename's prefix; the naming convention is filebase.####.fits where the numbers
(####) are automatically incremented by the data taking script from 0001 to 9999.
ORIG_DIR Absolute pathname of the directory to which you wish to write data. Make sure you
include the trailing / on the pathname.
DATE_OBS UT date at the end of the night (YYYY-MM-DD). Provided by TCS.
EXP_TIME Exposure time for integration in seconds. Must be an integer ≥ 2 and at least twice the
value of the parameter NREADS.
NREADS Integer number of non-destructive reads per endpoint per image.
• For imaging use NREADS = 1, which corresponds to Correlated Double Sampling
(CDS).
• For spectroscopy you can use multiple read sampling:
• The minimum value is NREADS = 3.
• The maximum recommended value is NREADS = 8.
• The minimum allowable EXP_TIME is 2×NREADS.
• Note that this script does not always rigorously enforce this condition, so please
double check that EXP_TIME and NREADS are mutually consistent.
• For NREADS ≥ 3 the output image will have signals NREADS times higher than for a
CDS frame; i.e., the output image is a coadd, not a coaverage frame.
• A schematic of the readout scheme appears in Figure 7, Appendix 2.
BIAS The value of the last requested bias is recorded here. The imaging bias is 1.0 V; for
spectroscopy one uses a bias of 0.75 V, which yields a substantially lower dark current,
although at the cost of some well depth. To determine the actual bias value hit the Update
All button on the UFSTATUS GUI.
WEATHER A numerical descriptor of common environmental conditions (1=photometric, 2=thin
cirrus, 3=broken clouds, 4=overcast, 5=snowing, 6=fog).
WIND A numerical range descriptor of the wind speed (1=calm, 2=low, 3=moderate, 4=high,
5=closed).
After prompting you for all of these parameters, config.exposure.pl will ask if you want to change the bias. If
you answer "y" it will automatically run the script set.bias.pl. In imaging mode, the bias should always be
set to 1.0 V.
7. Take an image. Execute the command singleimage.pl [Take Image]. This will take one image with the
exposure time specified by config.exposure.pl and display it on the ds9. The first image after starting up may
look bad, so take a second one if this is the case.
8. Verify Telescope. After taking the first image, use the File/Display Fits Header pulldown menu on the ds9
display to verify that the TELESCOP keyword is correctly set to 2m. If it is not, the scale on the display will be
incorrect and the MOS setup routines will not work. It will be necessary to run the script config.location.pl
-telescope kp2m to reset the telescope to the KPNO 2.1m. Because this loads a default header, one must run
config.exposure.pl again to reset the parameters.
9. Execute Mirror Script on second-1/2. Run the mirror script on one of the MacMinis (usually the one not
used for observing) to automatically move the data from the flamingos1a data directory to a directory on the
FLAMINGOS@2.1-m, Ver. 2.39, 2011 May 13 Page 14 of 46