
Owner Manual
ASSEMBLY INSTRUCTIONS
READ ALL SAFETY WARNINGS & ASSEMBLY INSTRUCTIONS CAREFULLY BEFORE ASSEMBLING OR OPERATING
YOUR COOKER. Inspect contents in the box to ensure all parts are included and undamaged.
FOR MISSING PARTS OR ASSISTANCE, PLEASE CALL 1-800-864-6194 M-F 8am - 5pm CST.
Proof of purchase will be required.
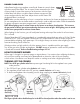
TOOLS REQUIRED:
Adjustable Wrench
9
PARTS INCLUDED:
1- Frame
1- Regulator
Hose Assembly
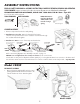
1. Remove components from the box and packing.
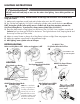
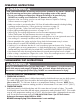
2. Attach Burner to Crossbar - Remove locking bolt from bottom
of burner. Line up burner bolt to hole in crossbar. Insert the bolt through
the crossbar and wrench tighten.
3. Attach Hose to Burner - In one of two ways as shown below:
Refer to Connecting Regulator Hose Assembly to Cooker on page 12.
NOTE: Do not over tighten brass hose connector to burner. The air control shutter
must be able to easily turn for adjustment of flame quality. If you over tighten the brass hose connector to the burner and
the air shutter cannot turn, then unscrew the brass hose connector until the shutter can be easily turned... Very Important!
Turn Air Control Shutter to
adjust flame quality
Turn CLOCKWISE
Wrench Tighten
OR
Turn CLOCKWISE
Wrench Tighten
Turn Air Control Shutter to
adjust flame quality
Place large end of spring
against Air Control Shutter
Screws may need tightening
DO NOT over tighten!
IMPORTANT:
Must be able to turn
Air Control Shutter...
DO NOT over tighten!
NO
SPRING
ASSEMBLED
UNIT
1 - BG12 Burner
with Locking Bolt
1- Air Shuter
1- Spring
NOTE: BG12 Burner
may have Air Shutter
attached with screws
instead of using a
Spring.
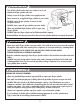
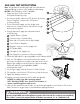
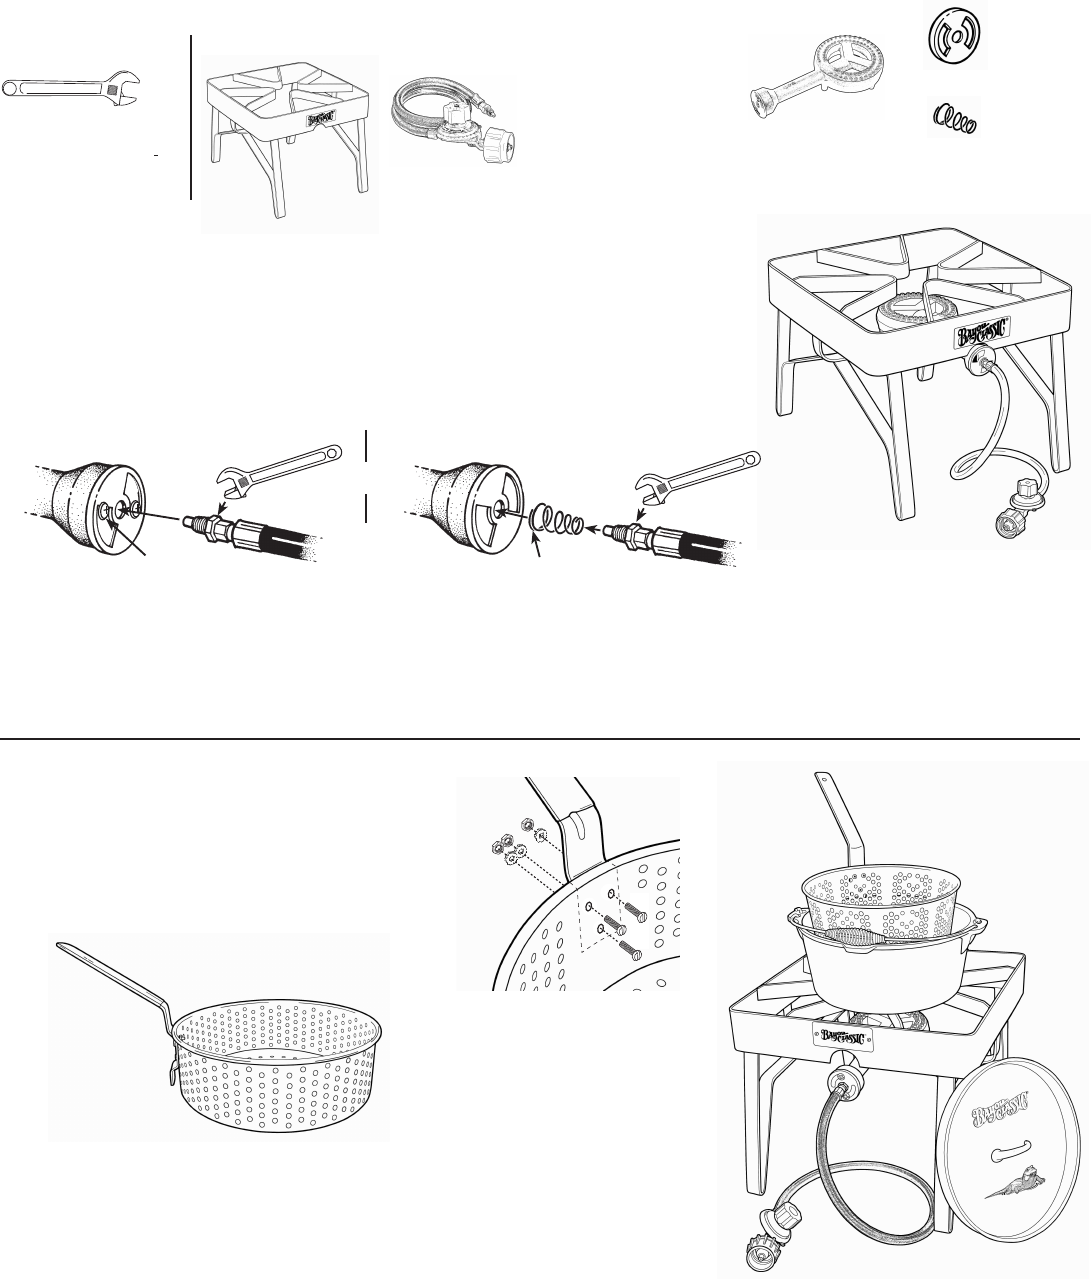
FRY BASKET ASSEMBLY
1. Remove fry basket and handle from the box and
packing. Attach handle with bolts and nuts to the
outside of basket as shown. Wrench tighten.
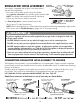
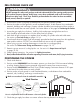
COOKER ASSEMBLY
Model #SQ59
ASSEMBLED UNIT
ASSEMBLED BASKET
Model #SQ59