RPC Series Manual REMOTE POWER CONTROL QUICK START For Horizontal and Vertical Units BayTech Manual Publication Revision May 2008
Copyright 2007 by Bay Technical Associates, Inc. BayTech, is a registered trademarks of Bay Technical Associates, Inc. Windows 2000®, Windows XP® are products and registered trademark of Microsoft Corporation. Tera Term is a product and registered trademark of Vector, Inc.
For those Administrators who have requested the bare minimum for this type of equipment, follow these steps exactly. If this is a new unit shipped directly from Baytech, follow the steps. If this is a previously own unit, perform a factory reset to clear out any users and passwords still in the unit. Outlet Control: 1. Connect the 9FRJ45PC-4 or 9FRJ45PC-1 adapter to your PC. 2. Connect the supplied rollover flat cable RJ08X007 to the adapter and to the EIA232 serial port on the Baytech RPC device. 3.
5. NOTE: The ‘root’ user can not be deleted. 6. Select ‘A’ to add user. Type the name and password at the prompts. 7. Press ‘Enter’ until get to the ‘Login Setup Menu’ (Figure 9). 8. Select option ‘Access Control’ to enable or disable the Tenet and Serial Login Prompt. 9. Press ‘Enter’ until you get the Configuration menu (Figure 8). 10. Select ‘Network Port Configuration’ option. You should see a menu similar to (Figure 11). 11.
QUICK START: Combined RPC Series by Bay Technical Associates • • • • Connect the 9FRJ45PC-4 adapter to the user’s computer Connect the RPC EIA-232 port to the adapter via the RJ08X007 rolled flat ribbon cable. NOTE: The RJ08X007 is NOT an RJ45 network cable. Use terminal emulation software to access the unit, 9600 bps, 8 data bits, 1stop bit and no parity, B/C switch set to ‘B’. NOTE: At any time during the session you need to go to the Network Access menu, use the Attention Character = semi-colon (;).
Figure 1 Unit ID: RPC3ADE-20 ------------------------------------------------------------------------------| Outlet | True RMS | Peak RMS | True RMS | Average | Volt- | | Group | Current | Current | Voltage | Power | Amps | ------------------------------------------------------------------------------| Outlet 1-8 | 0.2 Amps | 0.2 Amps | 120.7 Volts | 23 Watts | 23 VA | ------------------------------------------------------------------------------Internal Temperature: 73.4 F Ext: 68.
Figure 3 RPC>password Enter new Password: ***** Re-Enter new Password: ***** Type Help for a list of commands RPC> Power Controller Configuration Menu: To select the configuration menu, type ‘config’ at the prompt. NOTE: If the unit display with the following message, “Configuration mode in use” A user in the other port is in the “Configuration” menu. Figure 4 RPC>config Unit ID: RPC3ADE-20 1)...Manage Users 2)...Change Outlet Name 3)...Enable/Disable Confirmation 4)...Enable/Disable Status Menu 5)...
Add a User: Select A), “Add user,” from the User Management Menu. Enter the name of the user to be added, followed by . NOTE: User name is case sensitive. Assigned Outlets Select a user number from the User Management Menu, the RPC unit will display the Assign Outlet Menu: Figure 6 ------------------------------------------| User | Assigned Outlets | | | 1| 2| 3| 4| 5| 6| 7| 8| ------------------------------------------1) engineer | N| N| N| N| N| N| N| N| ------------------------------------------1)..
NOTE: For initial network access, the IP address, subnet mask, and gateway must be configured from the serial port. Default setting is 0.0.0.0. Figure 7 Module: 1 Attention Character: ; Outlet Control..................1 Status..........................S Configure.......................C Unit Reset......................RU Unit Status Unit Configuration menu Terminates external connections, does not effect the outlets. Logout..........................
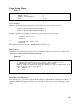
Login Setup Menu Figure 9 Access Control..................1 Manage Users....................2 Radius Configuration............3 Exit............................X,CR Access Control Enable or disable usernames and passwords for both network and serial port access. Telnet Login Prompt Enable/Disable..1 Serial Login Prompt Enable/Disable..
Figure 11 Network setup : Ethernet Address................ IP Address...................... Subnet Mask..................... Default Gateway................. 00:C0:48:00:01:FD 70.150.140.89 255.255.255.224 70.150.140.65 Connection Inactivity Timeout (mins): Disabled Carriage Return Translation: Enabled Break Length (msecs): 350 DHCP is Disabled Telnet is Enabled SSH is Enabled SSH host keys are set to factory default IP Address........................1 Subnet Mask.......................2 Gateway Address..
RPC RJ-45 pin Signals Pin EIA 232 Signal Signal Direction 1 DTR Out 2 GND 3 RTS Out 4 TX Out 5 RX In 6 N/C In 7 GND 8 DCD In Description +10V when activated by DCD. Toggles on logout for modem disconnect. Signal Ground +10 V when power is applied. Not used as a handshake line. Transmit (Data Out) Receive (Data In) No Connection. Signal Ground DCD into the RPC.
Figures 1 and 2 provide visual representation of an RJ-45 receptacle and plug.