
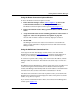
Technical data


Getting Started with Site Manager
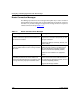
117347-A Rev. A 1-17
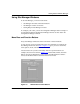
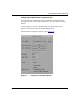
Using the Router Connection Options Window
To access the Router Connection Options window:
1. In the main Site Manager window (refer to Figure 1-2), click on the
Connection function button or choose Options > Connections.
The Router Connection Options window opens (refer to Figure
1-1).
2. In the Node Name/IP Address field, type the IP address of the destination
router.
3. Accept the default values for the remaining parameters in the window or
supply new values. See the parameter descriptions on page B-2.
You can click on Delete to delete the currently displayed connection.
4. Click on OK.
Site Manager connects to the router. The connection is successful if the
router’s system information is displayed in the lower half of the main Site
Manager window.
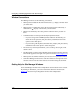
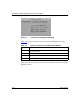
Using the Well-Known Connections List
At the right of the main Site Manager window, there is a list box entitled
Well-Known Connections (refer to Figure
1-2), which lists the IP addresses of
routers you have already connected to with this version of Site Manager.
To connect to a specific router, simply click on the router’s IP address, and Site
Manager makes the connection. This method is the easiest way to connect to a
router.
Site Manager lists the IP addresses in numeric order. Every time you make a new
connection using the Connection button or the Router Connection Options
window, Site Manager automatically adds the new IP address to the Well-Known
Connections list. You can have a maximum of 50 addresses in the list.
The status of the connection to the router is polled at a rate you can define. The
Well-Known Connections window displays the results of the poll next to the IP
address, as Up, Down, or Ignore.
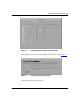
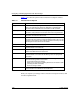
If you click on an IP address listed as Down, the Connection List Management
window opens (Figure
1-8).