
Technical data


Configuring and Managing Routers with Site Manager
6-14 117347-A Rev. A
Saving a Modified Image
The Image Builder automatically archives all software images in the Image
Builder directory, which is created when you install Site Manager. (Refer to
Quick-Starting Routers for information about installing Site Manager.) The Image
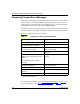
Builder saves only individual components in this directory, which are listed in the
Available Components list. Bay Networks recommends that you save modified
software images in a different directory.
If you save files locally on the Site Manager workstation, use different image file
names for each router on your network and keep a record of which images are
operating on which routers.
You may want to save the image in the same directory in which you loaded the
router software. (Refer to “Loading Image Files into the Image Builder
” on
page
6-7.) Be sure that you include all components you want before you save the
image.
To save the modified image:
1. In the Image Builder window, choose File > Save.
This saves the image to your current directory. There is no confirmation
window after the image is saved successfully.
2. To save a second copy of the image under another name, choose
File > Save As.
The Save As window opens. This window is similar to Figure
6-2.
3. Select a directory from the Directories scroll list.
4. Type a file name in the Selection field.
5. Click on OK.
The new image is saved and the updated file name, version, compressed and
uncompressed file size appear at the top of the Image Builder window (refer
to Figure 6-5).
If you are copying the new image to a diskette, refer to the compressed and
uncompressed size of the image to determine whether it will fit on a diskette.
6. Choose File > Exit.
You return to the main Site Manager window.