Operating Instructions WIFI door intercom system Item No.
Table of Contents Page 1. Introduction............................................................................4 2. Explanation of Symbols.........................................................5 3. Intended Use.........................................................................5 4. Package Contents.................................................................7 5. Safety Instructions.................................................................8 a) General...............................
10. Advanced setup...................................................................28 a) Registering another device on the WiFi door intercom system ���������������������������������������������������������������������������28 b) Deletion of the WiFi Door Intercom System from the Device List ��������������������������������������������������������������������29 c) Setting the date and time...............................................30 d) Managing notifications......................................
1. Introduction Dear customer, Thank you for purchasing this product. We kindly request the user to follow the operating instructions to preserve this condition and to ensure safe operation! This user manual is part of the product. It contains important information on starting up and handling the device. Bear this in mind if you pass this product to a third party.
2. Explanation of Symbols The lightning symbol inside of a triangle is used when there is a potential risk of personal injury, such as electric shock. An exclamation mark in a triangle indicates important instructions in this operating manual which absolutely have to be observed. The arrow symbol is used when specific tips and information on handling are provided. 3. Intended Use The product is intended for surveillance of access to private living quarters.
The video and audio transmission between exterior unit and your network occurs preferably wirelessly via WLAN. Alternatively, the exterior unit can be tethered to your network via LAN. Here your smartphone or tablet is connected to your normal WLAN network as usual. Power is supplied by the AC adapter included in the delivery. For safety and approval reasons, you may not convert and/or alter the product. If you use the product for purposes other than those described above, the product may be damaged.
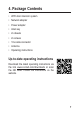
4. Package Contents • WIFI door intercom system • Network adapter • Power adapter • Allen key • 2x dowels • 2x screws • 10x cable connector • Antenna • Operating instructions Up-to-date operating instructions Download the latest operating instructions via the link www.conrad.com/downloads or scan the QR code. Follow the instructions on the website.
5. Safety Instructions The warranty will be void in the event of damage caused by failure to observe these safety instructions. We do not assume any liability for any resulting damage! We do not assume any liability for damage to property or personal injury caused by incorrect handling or non-compliance with the safety instructions.
• Safe operation can no longer be assumed if: -- the product shows visible signs of damage -- the appliance ceases to function -- the device was stored for a longer period of time in unfavourable conditions -- it was exposed to heavy loads during transport • Do not leave the packaging material unattended, since it could become a dangerous plaything for children.
• The power socket for the AC adapter should be near the exterior station and easily accessible. • The AC adapter is only suitable for indoor use in dry interiors; it must never get damp or wet. There is a risk of a life-threatening electric shock. • Do not pull the AC adapter from the mains socket by pulling on the cable. • Protect the cable of the AC adapter from sharp edges and do not step on it. • If the AC adapter is damaged, do not touch it.
c) Exterior unit • The exterior unit is suitable for use in in- and outdoor areas. However, it must never be used in or under water, as this will destroy it. • Install the exterior unit in the outdoor area under an eave (e.g., a canopy). • Make sure that the connection cable is not pinched or damaged by sharp edges. • Mount the exterior unit in such a way that the camera is not pointing towards bright sources of light (e.g., sun and/or flood lights).
6. Controls and Connections Exterior unit 1 2 7 8 3 9 4 5 6 1 4 infrared LEDs 2 Camera 3 Loudspeaker 4 Twilight sensor 5 Sound key 6 Microphone 7 Tamper contact for the exterior unit; an alarm will sound, if the exterior unit is removed from the weatherproof frame without authorization.
7. Installation and connection a) Installing the exterior unit The exterior unit should be installed in the protected outdoor area near the front door (e.g., under a canopy), so that a visitor would have to stand directly in front of it to press the bell push button. The exterior unit should be installed in an environment that features better wireless signal strength. Use a repeater as well, if the signal at the preferred location is insufficient.
Install the exterior unit on a sturdy surface only, do not use metal surfaces and do put it near other electric/ electronic appliances. Be careful not to damage cables or wires while drilling and/or bolting down! The same goes for laying the connection cables (voltage/power supply and door opener) and any necessary masonry. Arrange the exterior unit into the weatherproof frame,as shown in the following picture (introduce at an angle upwards, then tilt downwards).
• Connect the WLAN antenna included within the delivery content to the terminal “Antenna” (screw connection/SMA). • Connect the red wire of the AC adapter to the red cable “Power in DC+(12V)”. • Connect the black wire of the AC adapter to the black cable “Power in DC+(12V)”. • Connect the door opener to the wires “Lock Relay COM” and “Lock Relay NO”. The wire coming from the door opener must be connected to the yellow cable and the wire coming from the power supply must be connected to the purple cable.
Door opener of the type “Fail Secure” (working current - door opener): This door opener is commonly used as door opener for residential front doors. The lock of the latch in the door opener is only unlocked when operating current is present; e.g., when the door opener button in the apartment is pressed. Then the door is opened and the visitor gets access to the apartment. In the absence of the operating current, the door is locked.
• If necessary, connect to the wires “Lock Relay COM” and “Lock Relay NO” an additional doorbell. The wire coming from the bell must be connected to the grey cable and the wire coming from the power supply must be connected to the white cable. The exterior unit features a potential-free relay for an additional bell with a load capacity of max. 36 V (AC/DC) and max. 3 A. When the bell push button is pressed, the relay will close also.
8. Installation and initial launch of the app Your smartphone or tablet should be connected to the same WLAN as the WiFi door intercom system so that it can be configured or operated. a) Installing the App • Open the appropriate App Store on your smartphone or tablet. For Android™, this is e.g., “Google Play Store”. If you are using an iPhone, iPad or an iPod Touch, open Apple’s “iTunes Store”. • Search for the app “SafeSmart” and install it.
b) First launch of the app When launching the app for the first time, you may receive a message asking you whether you agree that push notifications are sent to you by the app. You should confirm anyway with Yes or Ok in order to make use of the app’s full range of functions. The following description refers mainly to the AndroidTM App. But the process runs similar in the iOS App. At the start or use of the app for the first time, you will need to create an account.
• Select Register by email and tap the button (image at the left). We recommend using the registration by email. Basically you can also use registration by phone/mobile phone, but here in the AndroidTM App, you must still give an email address. In the iOS App, you can register only with a phone number. Then the process is almost identical, but additionally you must select your country with the country code. • Give an email address and twice a secure password.
• O nce you complete the registration, return to the login screen and select the login by email again. • Enter the email address registered previously and the password assigned. • Tap the button login and confirm the login with OK. • If all went well, you will see now the app’s main page. You will find a plus button in the upper right. If you intend to use more than one tablet or smartphone, it is best to set up a separate account for each device.
9. Initial setup of the WiFi door intercom system a) WLAN set up In order to integrate the exterior unit into your network wirelessly via WLAN, proceed as follows. Connect: • If not yet done so already, plug the AC adapter into the mains socket to power the exterior unit and wait for approximately 30 seconds for the start-up procedure to complete. Important! The following description for the WLAN connection will function only, if no network cable isconnected.
Set up: • Tap + on the main page in the upper right corner. • Now tap on the upper surface Smart Scan. • Check whether the name of the WLAN matches your WLAN and enter the password for the WLAN network in the appropriate field. • Tap the button under the password field.
Phone 10-15c m ipad and tablet 20cm “DING” • The QR code with information about your WLAN is now displayed on the screen of your smartphone or tablet. Hold this against the camera of the door intercom. Depending on the device, keep a distance of min. 10 cm for a smartphone and max 30 cm for a tablet. If there are issues, move your mobile device a bit back and forth. Make sure that the brightness control of the display is set to high.
If, however, the connection fails, disconnect the intercom for a moment from the power supply, then wait for about 30 seconds until the system is started. Press the arrow in the upper left corner, check the WLAN data once more and try again. If it still does not work, reset the door intercom system to the factory settings and try once more. Alternatively, you may first set up the WiFi door intercom via a LAN cable and later in settings you can connect to WLAN manually.
• If the new device is not shown, swipe down to update the list. • Once the new device is shown, tap on it. • If necessary, change the name of the door intercom and enter a new, secure password. • Finally, tap the button in the upper right corner to save the settings. • The app returns to the main page. In the device list the new WiFi door intercom should now show up as online.
b) LAN set up In order to integrate the exterior unit into your network via LAN, proceed as follows. If the door intercom is already connected via WLAN, reset to factory settings first. Connect: • Connect first the 1 to 1 connected LAN cable to the network adapter of the exterior unit. • Connect the opposite side of the LAN cable to your WLAN router or network switch.
10. Advanced setup a) Registering another device on the WiFi door intercom system If your second smart phone or tablet and the door intercom system are in the same network, a device that can be added should be shown after the app starts. You may have to update the list first by swiping it downwards. Then tap on the blue surface and follow the instructions. In order to add a smart phone or a tablet manually, proceed as follows.
• Select Manual. • At the next step, enter the ID of the device. You will find it in the device list of the other smart phone or tablet. • Confirm by tapping the button Next. • On the next page, enter the device password and tap on the button in the upper right again to save. b) Deletion of the WiFi Door Intercom System from the Device List • In order to delete a door intercom system from the device list of the AndroidTM app, keep pressing on it until a pop-up appears.
• I n the iOS app, swipe on the respective WiFi door intercom system from right to left, until the red button is shown on the right. • T ap on Delete to delete the system. c) Setting the date and time • In the main view tap on the white space to the right of the status indication of the exterior station (online/off line in blue) to set date and time. You will see a tool bar. • Tap on Settings (gear).
• Then select Date and Time. • With the AndroidTM set first the Date and Time. For this purpose swipe simply the relevant number upwards or downwards. • Set the time zone in the same way. • Confirm the time zone by tapping on the button OK (next to the time zone on the right). • In order to save it, tap on the button Apply in the bottom (date and time are shown on the right next to it). • In order to return to the Settings Menu, tap on the arrow in the upper left corner.
• With iOS, likewise, set the Date and Time by swiping upwards or downwards. • Confirm with the button Apply below (date and time are shown on the right next to it). • Subsequently, set the time zone likewise, by swiping. • Confirm by tapping the button Apply. • In order to return to the Settings Menu, tap on the arrow in the upper left corner.
d) Managing notifications In the WiFi door intercom’s settings menu you are able to define certain notification settings. • For that purpose, open the Settings Menu again. • Tap on the tab with the bell symbol (Alarm Settings). • Here you can choose now whether you would like to receive notifications, whenever the bell button on the exterior unit is pressed. For that purpose, swipe the sliding button of the tab at the top from left to right.
• If the push messages are switched on, you can additionally select, whether you would like to receive the messages to all smart phones or tablets that are connected. Push messages must be activated in the app, so that the relevant device appears in the list. Tap on the second tab to select it. • Here, if you do not want to receive any messages of that WiFi Door Intercom System to a device, tap on the red symbol with – in front of the relevant Account ID. • In the following pop-up confirm with OK.
e) Other settings Besides the setting options already explained, the following options can be configured in the settings menu (enter by tapping on the white field of the respective device - Settings): • Media settings (change video format (PAL, NTSC) or volume) • Security settings (change administrator password) • Network settings (manual adjustment for LAN and WLAN) This setting is necessary, for example, if the exterior station was initially configured via LAN and should now connect via WLAN.
11. Operation a) Operation in general • If configured as such, a notification will be sent to your smartphone or tablet and a sound is heard when the bell push button on the exterior unit is pressed. AndroidTM: • Regardless of whether the device is locked or not, this popup is always shown. • Tap the right button to reject the ringing. • Tap the left button to accept the ringing. • Once accepted, the screen display switches automatically to live mode.
iOS: • If your iPhone is locked, first this message is shown. In order to switch to the app directly, swipe from left to right. • Tap the right button to reject the ringing. • Tap the left button to accept the ringing. • Once accepted, the screen display switches automatically to live mode.
b) Live image view In live screen view additional information is shown and also taking important actions straight away is possible. • Date and time are shown at the top left. • On the right side you can adjust the image quality (HD/SD/LD). • Bottom left you will find the microphone icon, which shows the active audio transmission of smartphone or tablet to the exterior station. You can turn this on or off with the button at the bottom on the right (5).
c) Video recordings Video Recording Settings • For that purpose, open the Settings Menu again. • Tap on the tab with the camera symbol (Record Settings). • First specify here the preferred type of recording. • Depending on the recording mode, you can also set the recording time (recording in case an alarm is triggered) or the time when recording should start (scheduled recording time).
Playback of the Video Records • Recorded video images can be displayed via the respective door intercom menu. • First tap on the white surface and subsequently in the tool bar on Playback (Play symbol on the left). • To play back, tap on the preferred sequence.
d) Other Setting and Operating Options Additionally, on the main page of the app, you have the option to make basic settings for the app. Moreover, basic operating options are available here likewise. • The second button on the left in the bar below opens the direct selection of the WiFi Door Intercom System. Here you can search a system in the network or activate the camera or the door communication function directly. Search the system and tap on it or type the full ID directly.
12. Resetting to Factory Settings Proceed as follows to reset the exterior unit to factory settings. • Disconnect the exterior unit from the voltage supply. • Remove the screws on the camera below and take these out from the weatherproof frame. • Keep pressing the tamper contact (7) on the back of the camera and connect the exterior unit to the voltage supply again. Wait for 30 seconds until the boot up is completed.
13. Troubleshooting The exterior unit does not work at all: • Check the exterior unit’s power supply (AC adapter) and the correct wiring of the exterior unit. The door opener does not work: • Check whether the door opener is correctly wired to the exterior unit. • The switching output for the door opener is potential free. Only an internal relay is switched here (for contact rating, see chapter Technical Data). You will therefore need an additional external power supply for the door opener.
Only a flickering image is transferred: • This is caused, for instance, by backlight or reflecting objects in the range of the camera. Find another place for the exterior unit. Loud whistling noises are played back: • Acoustic feedback will occur when your smartphone or tablet is too close to the exterior unit. Keep an adequate distance. • For the purpose of testing purposes, cover the opening of the microphone of the exterior unit with a film of thick adhesive tape to avoid an acoustic feedback effect.
14. Care and Cleaning • D isconnect the product from the mains supply before each cleaning procedure. • Use a dry, lint-free cloth to clean the product. Do not apply too much pressure on the camera lens, as it may crack. If it is very dirty, moisten the cloth with warm water. Never use aggressive cleaning agents, alcohol or other chemical solutions which will affect the surface of the housing (discolouration). 15.
16. Disposal Electronic devices are recyclable material and do not belong in the household waste. Dispose of an unserviceable product in accordance with the relevant statutory regulations. 17. Technical Data a) Exterior unit Operating voltage.................... 12 V/DC Power consumption................. max. 500 mA Network................................... RJ45 via adapter WLAN...................................... 2.4 GHz Image sensor........................... 6.
Internal memory....................... 8 GB micro-SD card, integrated Operation at dark..................... yes; IR illuminator including 4 LEDs (Ø 4 mm); on/off 12 Lux (±2 Lux) IR range................................... approx. 2 m Illuminated bell push button..... no Contact door opener................ potential-free relays Contact bell.............................. potential-free relays Contact rating.......................... max. 36 V (AC/DC), max. 3 A Protection grade......................
This is a publication by Conrad Electronic SE, Klaus-Conrad-Str. 1, D-92240 Hirschau (www.conrad.com). All rights including translation reserved. Reproduction by any method, e.g. photocopy, microfilming, or the capture in electronic data processing systems require the prior written approval by the editor. Reprinting, also in part, is prohibited. This publication represent the technical status at the time of printing. Copyright 2017 by Conrad Electronic SE.