
User's Manual


User Manual Mobile Computer MC 9090
ex
Page 48
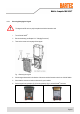
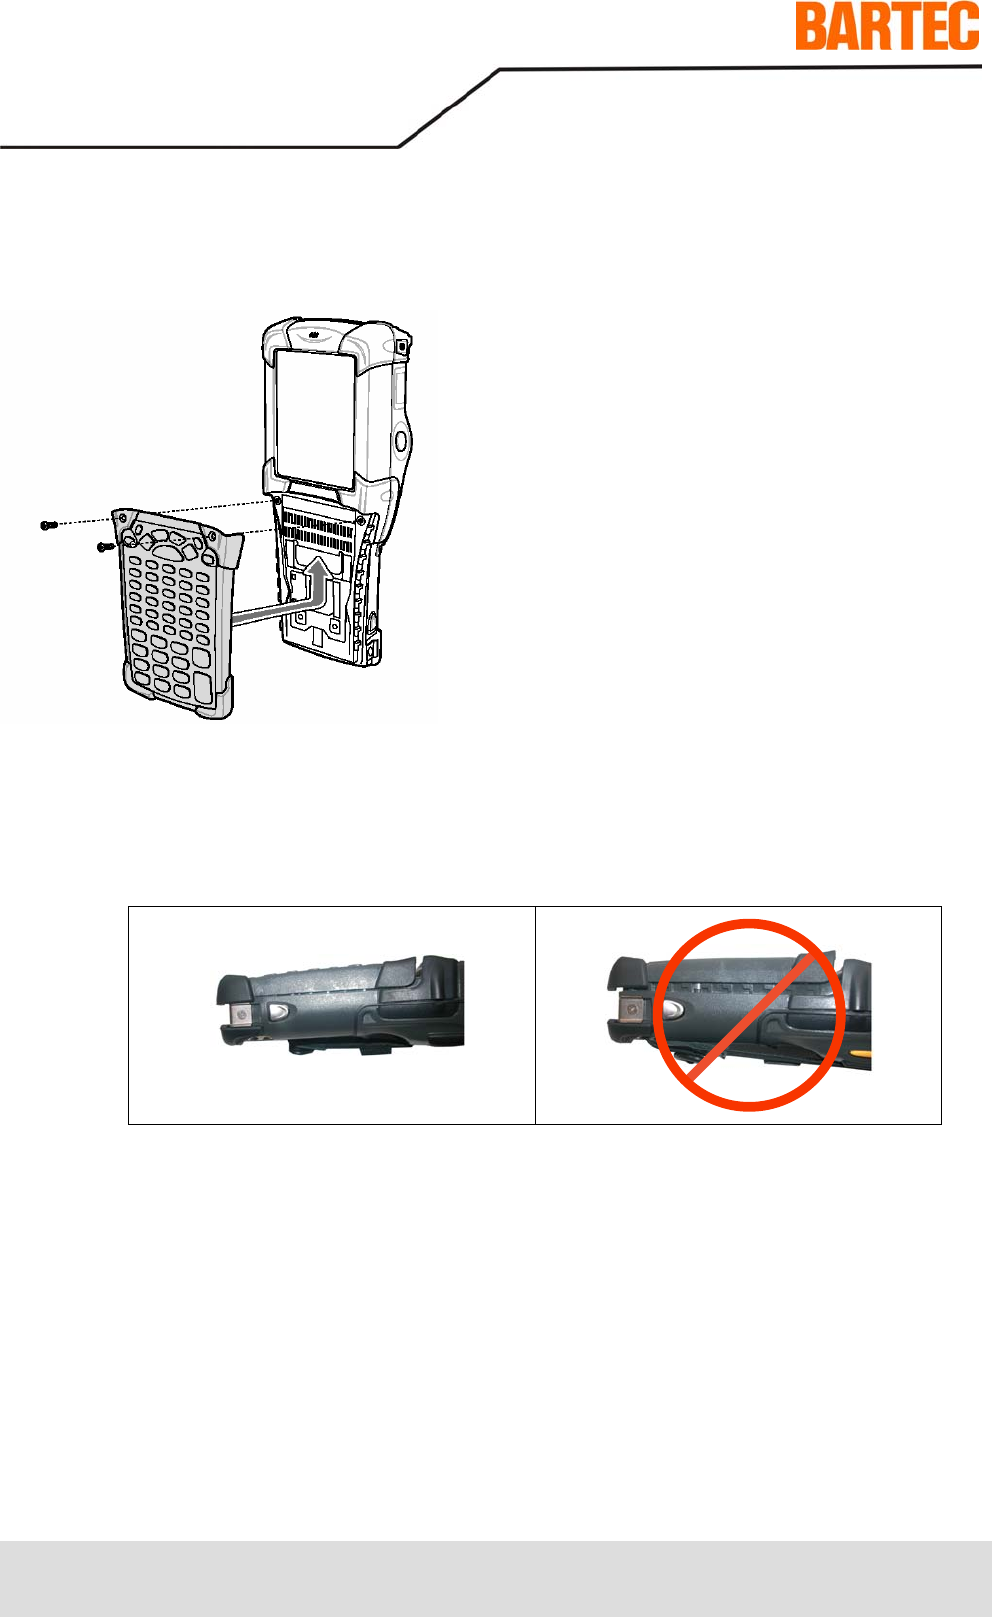
7. Snap on the keypad in the direction of the arrow (see fig. 4) and push it upwards until the boreholes for
the screws are over the threaded sleeves.
Fig. 4: Changing the keypad
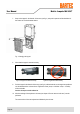
8. Check that the keypad is mounted correctly.
Figure 5: Keypad mounted incorrectly Figure 6: Keypad mounted correctly
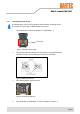
9. Push the keypad in the direction of the arrow (see fig. 6) until the boreholes on the keypad are positioned
over the threaded holes on the enclosure. Tighten the screws (torque = 0.565 Nm / torque = 5.0 in-lbs),
0.5 Nm advisable
Caution: the torque must be adhered to.
10. After the exchange of the keyboard a cold start (see chapter 5.5" warm start and cold start ") must be
performed.
The current drivers of the new keyboard are initialized by the cold start.