
Specifications


103
• Port: The port on which the remote is listening. If the VNC server uses display numbers
instead of ports (i.e. if the VNC server is hosted on a Linux system), simply add 5900 to the
display number to get the port number.
• Password: The password for the remote VNC server.
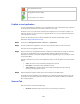
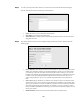
Display Tab
Each of the options is described briefly below:
• Full Screen: When enabled the remote desktop session will take up the entire screen.
• Display Scale: Magnify or reduce the display area of the remote desktop.
• Disable Status Bar: Disables the Status Bar when connecting to a WinVNC server.
• Disable Hot Keys: Disables the WinVNC Hot keys.
• Disable Toolbar: Disables the UltraVNC Toolbar.
• View Only: Local mouse and keyboard input is disabled.
• Cursor Type: Displays a specific type of cursor in the display window.
o No Cursors: Local systems current cursor type.
o Dot Cursor: A small dot as the remote cursor.
o Normal Cursor: Displays the remote cursor.
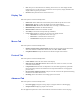
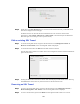
Mouse Tab
Each of the options is described briefly below:
• Emulate 3 button mouse (2 button click): Pressing the left and right mouse button at the
same time emulates a middle mouse button click (i.e. LMB + RMB = MMB).
• Swap Mouse Buttons: Swaps the functions of the left and right mouse buttons.
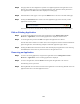
Protocol Tab
Each of the options is described briefly below:
• Colour Scheme: Alters the color scheme of the display.
• Share the Server with other viewers: Allows other VNC viewers to connect, view and
control the remote desktop.
• Compression Level: The level of compression to be used when supported by a particular
form of encoding. The lower the number the less compressed which has a saving against
processor time.
• Do not transfer Clipboard contents: This prevents the contents of the clipboard from being
transferred to the remote client/viewer.
• Encoding: Allows the selection of encoding types for the session.
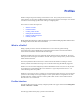
Advanced Tab
Each of the options is described briefly below:
• Level of Logging: Change level of log output. Use higher numbers to aid debugging.
• Output Console: Display log output on the console.
Once the application options have been entered click the next button to advance to the next page.