
Specifications


102
Delete Application shortcut
Edit Application shortcut details
Execute resource (user console)
Publish a new Application
In order to demonstrate the publishing of a new application this section will detail the steps required to
use the UltraVNC Extension to create a VNC connection to a system.
UltraVNC is easy to use, fast and free software that can display the screen of another computer (via
internet or network) on your own screen. The program allows you to use your mouse and keyboard to
control the other PC remotely.
License: It is free and open source software released under the GNU General Public License.
Official Site: http://www.ultravnc.com/
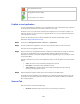
Step 1 First browse to Management Console > Resources > Applications.
Step 2 In order to publish a new application, click the Create Application Shortcut in the action menu.
This starts the Create Application Wizard.
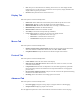
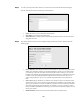
Step 3 In this screen the type of application extension is defined. The wizard behavior changes for step three.
This is due to each application type having potentially different requirements for operating
information. UltraVNC is used in this example but the other application types are covered later in this
section. Select Next.
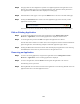
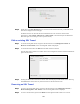
The next screen allows for the entry of the application details. A brief description of each of the fields
follows.
• Name: The name to be used to identify the application shortcut.
• Description: A description of the application shortcut.
• Add to favorites: A checkbox that if selected will add the application shortcut to the
favorites of the appropriate accounts.
Step 4 When the fields have had the desired values entered simply click the Next button.
As already mentioned, depending on the application type a different Application Options screen will
be presented. In this instance UltraVNC is being used. Each of the options available on the different
tabs is explained below.
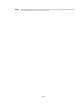
General Tab
Each of the options is described briefly below:
• Hostname: Hostname of the remote VNC server that is being connected to.