
Specifications

1.
2.
3.
4.
5.
6.
1.
2.
3.
4.
a.
b.
c.
5.
6.
1.
In this article:
Before You Begin
Step 1. Install the SSL Certificate
Step 1.1. (Optional) Generate a CSR Request
Step 1.2. Upload Signed Certificates
Step 2. Configure System Contact and Alert Email Addresses
Step 3. Change the Administrator's Password for the SSL Interface VPN Web
Next Steps
Related Articles
Administrative Interfaces
Barracuda SSL VPN Quick Start
Guide (PDF)
Before You Begin
Install Java Runtime version 1.6 or above on your client computers.
Register a full DNS name for the Barracuda SSL VPN (e.g., ).sslvpn.example.com
(Recommended) Purchase an SSL certificate signed by a trusted CA.
Step 1. Install the SSL Certificate
To prevent certificate errors whenever your users connect to the Barracuda SSL VPN, it is recommended that you install SSL certificate signed an
by a trusted CA. You can generate the signing request directly on the Barracuda SSL VPN. Your SSL certificate must use the full DNS name
(e.g., ) for the attribute.sslvpn.example.com Common Name
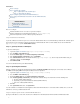
Step 1.1. (Optional) Generate a CSR Request
To generate a CSR request:
Log into the (e.g., appliance web interface ).https://sslvpn.example.com:8443
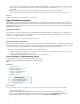
Go to the page.BASIC > SSL Certificate
From the list, select .Certificate Type Trusted (Signed by a trusted CA)
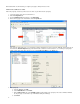
In the section, click . Trusted (Signed by a trusted CA) Edit Data
In the window, enter the full DNS name (e.g., ), enter the requested information about yourCSR Generation sslvpn.example.com
organization, and then click .Save Changes
Click . Download CSR
You can now submit the CSR to your Certificate Authority.
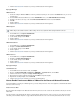
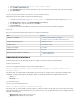
Step 1.2. Upload Signed Certificates
When the certificates are uploaded to the Barracuda SSL VPN, the table displays the current status of the certificates.Certificate Candidates
The column displays when all required certificates have been uploaded. Status OK
Log into the (e.g., appliance web interface ).https://sslvpn.example.com:8443
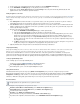
Go to the pageBASIC > SSL Certificate
From the list, select .Certificate Type Trusted (Signed by a trusted CA)
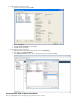
In the section, upload the certificates that you received from the CA in the following order:Trusted (Signed by a trusted CA)
Root CA certificate (PEM or PKCS12)
(Depending on your CA) Intermediate CA certificate (PEM or PKCS12)
SSL server certificate (PEM or PKCS12)
Click .Use
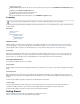
In the section, click .Synchronize SSL Synchronize
Your SSL certificate is now installed on both the appliance and the SSL VPN web interface. To avoid Java runtime certificate errors, use the full
DNS name to connect to your Barracuda SSL VPN.
Step 2. Configure System Contact and Alert Email Addresses
Specify the email addresses of those who should receive notifications from the Barracuda SSL VPN and emails from Barracuda Central.