
System information


6.
7.
8.
9.
10.
11.
1.
2.
3.
4.
5.
Click .Save
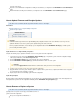
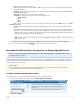
In the dialog box, in step 3, enter the following information:Add setting
Select .Modify message
Under turn on . Click and enterAlso deliver to Add more recipients Add the email address of the Archive/Journal
including the domain.mailbox created in the section Create an Archive/Journal Mailbox
Select the appropriate domain; select the primary journal mailbox unless you want to set up a mailbox and rule for each domain.
Click .Save
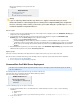
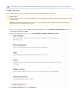
Step 4 (Optional). To bypass the settings in this dialog for messages received from specific addresses or domains, turn on step 4 Option
and follow the instructions in the dialog box.s
Click Add Setting when you are done.
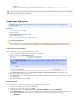
Enable IMAP/POP in Google Apps
Use the following steps to enable IMAP/POP in the Archive Mailbox Settings.
Sign in to the Google Apps administrator control panel as the Administrator.
From the menu at the top of the page, select .Settings
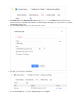
From the left-navigation menu, click , and click .Email General Settings
Scroll down to POP and IMAP access, and clear the check box for Disable POP and IMAP access for all users to enable IMAP/POP.
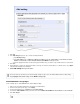
Click Save changes.
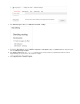
This rule can take up to 30 minutes to take affect and begin sending messages sent to the Archive Mailbox. Added or edited settings
display highlighted in yellow-orange on the Email settings page.