. Barracuda Message Archiver - Overview . . . . . . . . . . . . . . . . . . . . . . . . . . . . . . . . . . . . . . . . . . . . . . . . . . . . . . . . . . . . . . . . . . . . . . . . . 1.1 What's New in Barracuda Message Archiver . . . . . . . . . . . . . . . . . . . . . . . . . . . . . . . . . . . . . . . . . . . . . . . . . . . . . . . . . . . . . . . . . . 1.2 30 Day Evaluation Guide - Barracuda Message Archiver . . . . . . . . . . . . . . . . . . . . . . . . . . . . . . . . . . . . . . . . . . . . . .
1.6 Backup and Storage . . . . . . . . . . . . . . . . . . . . . . . . . . . . . . . . . . . . . . . . . . . . . . . . . . . . . . . . . . . . . . . . . . . . . . . . . . . . . . . . . . . . . 1.6.1 Storage Backup . . . . . . . . . . . . . . . . . . . . . . . . . . . . . . . . . . . . . . . . . . . . . . . . . . . . . . . . . . . . . . . . . . . . . . . . . . . . . . . . . . . . 1.6.1.1 Understanding Archived Data Backup . . . . . . . . . . . . . . . . . . . . . . . . . . . . . . . . . . . . . . . . . . . .
1.11 Maintenance . . . . . . . . . . . . . . . . . . . . . . . . . . . . . . . . . . . . . . . . . . . . . . . . . . . . . . . . . . . . . . . . . . . . . . . . . . . . . . . . . . . . . . . . . . 1.11.1 Configuration Backups . . . . . . . . . . . . . . . . . . . . . . . . . . . . . . . . . . . . . . . . . . . . . . . . . . . . . . . . . . . . . . . . . . . . . . . . . . . . . 1.11.2 Updating Your Firmware and Definitions . . . . . . . . . . . . . . . . . . . . . . . . . . . . . . . . . . . . . . . . . . .
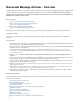
Barracuda Message Archiver - Overview The Barracuda Message Archiver is a complete and affordable email archiving solution designed for optimizing email storage, meeting regulatory compliance and e-discovery requirements, and providing anytime/anywhere access to old emails. The Barracuda Message Archiver integrates with all standards-based email servers and provides powerful search, retrieval, and export capabilities for administrators, auditors, and end-users.
Office 365 IMAP/POP Deployment Unix Mail Server Deployment Barracuda Message Archiver and the Barracuda Spam Firewall What's New in Barracuda Message Archiver What's New in Release 3.
Step 6. Retention Policies Use Case – Global Retention Policy Step 7. Search Mail Using the Web Interface Use Case – Export Messages Step 8. View Reports Use Case – Automatically Generate Daily Reports Step 9. View Statistics Step 10.
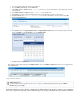
In this example, the administrator adds Jake in the auditor role. Jake has requested a custom Saved Search to automatically apply to all of his searches to reduce the number of items in the results pane. Jake wants only email related to petitions from the domain @corporatenamehere.com. Jake uses the following steps: Click here to expand... 1. On the BASIC > Search page, click Advanced. Select Email > Entire Message > contains, type petition* as the first set of search criteria.
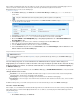
1. 2. Select Email > Entire Message > contains, type Henneh as the first set of search criteria, then click the + (plus) button to the left of the search parameter. 3. Select Email > Domain > contains, and type @corporatenamehere.com as the second set of search criteria: 4. Click Search to execute the search and verify that the provided search parameters return the expected results. 5. Click Save Search, enter Henneh Client as the name under which you wish to save this search, and click OK. 6.
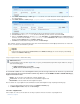
1. Log in to the Barracuda Message Archiver in the auditor role. 2. Go to the BASIC > Search page, and click Advanced. 3. Select Email > To/Cc > contains, and type fronteire as the first set of search criteria. Click the + (plus) button to the left of the search parameter. 4. Select Email > Domain > contains, and type @corpname.com as the domain name. 5. Click Search to execute the search and verify that the provided search parameters return the expected results. 6.
the Global Retention Policy and any Saved Search retention policies are run against all archived messages once a week. Note that before you can create a Saved Search retention policy, you must create at least one Saved Search in the BASIC > Search > Advanced Search page. Important: The Global Retention Policy setting does not apply to any messages that match a Saved-Search retention policy.
5. 6. Click Search to execute the search and verify that the provided search parameters return the expected results. 7. In the results window, use Ctrl- and Shift-click to select all of the messages to include in the .zip file. 8. Click the Tools menu, and select Export Messages; in the Export Messages dialog box, specify the following details: a. Enter the Export name as beckly_hernandez_sale b. c. d. e.
Wiley and Francis will now receive a daily report of all policy violations, and the number of times each policy was violated, by user for the previous day. This report includes custom policies, and all built-in policies when enabled on the POLICY > Alerts page. Step 9. View Statistics Additional Resources For more information, refer to the article Viewing Performance Statistics or log in to your Barracuda Message Archiver, go to the BASIC > Status page, and click Help.
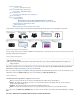
Search deleted messages and emails no longer visible in your mail application; View and interact with (reply to, reply all, or forward) archived messages; Redeliver messages to your mailbox using the Resend to Me option. These actions are available directly from your Android phone, allowing transparent access to, and interaction with, your archived messages.
The Stand-Alone Search Utility provides access to the search features of the Barracuda Message Archiver for Mac OS X and Microsoft Windows users. This utility allows users to search through their own archived messages directly from their desktop without needing to log in to the Barracuda Message Archiver web interface, and perform such actions as forwarding or replying to the located messages.
How to Enable RPC over HTTP Connectivity This article refers to Barracuda Message Archiver firmware version 3.5 or higher, and Microsoft® Exchange™ Server. RPC over HTTP (RoH), also known as Outlook Anywhere, is available for Exchange Integration in firmware 3.5 and higher, and is required by Exchange Server 2013.
mailbox ID@domain format, for example: d66ba-e2g8-48fb-9300-f64d01c52f2b@company.com Important: This format is required for hosted Exchange 2013 providers. For more information, refer to the Microsoft TechNet article What's New in Exchange 2013. 5. Once you have entered the Exchange Server details, click Advanced Options. 6. Enter the proxy server that is to provide RoH connectivity; that is, enter the Hostname of the RoH Proxy itself in the Advanced > Proxy fi eld. RoH will be used if available.
The remote connectivity tool is available from the Microsoft website: https://testconnectivity.microsoft.com/ Test RoH Connectivity using Outlook Use the following steps to verify your RoH configuration: 1. Go to the Mail applet in the Outlook Control Panel; the exact appearance of the Mail applet varies depending on your version of Windows and Outlook: 2. Click Show Profiles: 3. Click Add to create a temporary profile.
3. 4. Click OK. In the Add Account page, select Manual setup or additional server types: Do not attempt to automatically configure this profile. 5. Click Next.
6. Click Next. Enter the Exchange Server hostname in the Server field, and enter the Barracuda Message Archiver service account name in the User Name field: 7. Click More Settings.
7. Depending on the version of Outlook you are running, warning messages may display alerting you to Exchange Server connection issues; this is expected as RoH is not yet configured. You can ignore these error messages at this step in the process. 8. 9. 10. 11. Click Exchange Proxy Settings. In the Microsoft Exchange Proxy Settings dialog box, complete the following: Enter the RoH proxy server hostname in the https:// field. Turn on Connect using SSL only.
Requirements You must have the following privileges to complete these steps: Administrative privileges to your Microsoft Exchange Server Barracuda Message Archiver login credentials Note that single sign-on (SSO) for OWA is not available at this time. Use the following steps to add the Barracuda icon to the Microsoft OWA navigation bar: 1. Go to the Barracuda secure server, and download the Barracuda icon to your Exchange Server. The .zip file contains the following icons: LargeCuda.
Existing Barracuda Message Archiver Deployment Relocating a Previously Deployed Barracuda Message Archiver New Barracuda Message Archiver Deployment If this is a new deployment, prior to migrating your Exchange Server, consider the following: You can deploy the Barracuda Message Archiver as a searchable “backup” of your email stores prior to migration to allow users to access all of their emails even when mail stores are unavailable during the Exchange migration.
messages sent from inside your organization, you can configure internal email clients to use the Barracuda Message Archiver as an SMTP relay placed in front of your internal email server. If you are migrating to a newer version of Exchange Server, refer to the Barracuda Message Archiver and Microsoft Exchange Server Migration overview for more information.
How to Configure Envelope (SMTP) Journaling for Microsoft Exchange Server 2013 - Standard Journaling This article refers to the Barracuda Message Archiver firmware version 3.2 and higher, and a Microsoft® Exchange Server 2013 environment utilizing Standard Journaling, also known as mailbox database journaling.
Step 1. Register Each Exchange Server as a Trusted SMTP Server To ensure that archiving begins as soon as your Exchange Servers are configured to send journal copies, first register each Exchange Server that is in a Client Access Server (CAS) role as a Trusted SMTP Server with the Barracuda Message Archiver on the MAIL SOURCES > SMTP/IM page in the web interface. 1a. Log into the Barracuda Message Archiver web interface, and go to the MAIL SOURCES > SMTP/IM page. 1b.
3b.
3c. Click save.
Hide Contact from Global Address List Barracuda Networks recommends hiding the mail contact from the Global Address List. You can use the following PowerShell command to hide the mail contact: Get-MailContact | Where {$_.Name -eq "Journal Contact"} | Set-MailContact -HiddenFromAddressListsEnabled $True Enter the following command to verify the setting: Get-MailContact | Where {$_.Name -eq "Journal Contact"} | Format-table Name, HiddenFromAddressListsEnabled Step 4.
4b. In the Name field, enter a name for the connector, and in the Type section, select Custom: 4c. Click next.
4d. Click next. In the add smart host page, enter the fully qualified domain name (FQDN) or IP Address of the Barracuda Message Archiver: 4e. Click save.
4f. Click next.
4g.
4h. In the Address Space page, enter the domain that matches the domain for the external email address used to create the journal contact, for example, bma.
4i.
4j. Click next.
4k. Verify all of the appropriate Exchange Servers are listed; click add to add additional servers: 4l. Click ok.
4m. Click finish.
4n. Click the Edit ( ) icon to edit the Send Connector properties. From the Maximum send message size (MB) d rop-down list, select unlimited, and then click save: Step 5. Set Up Mailbox Database Journaling Journaling This article assumes you are setting up mailbox database journaling. If you intend to implement a journal rule, refer to the article How to Configure Envelope (SMTP) Journaling for Microsoft Exchange Server 2013 - Premium Journaling .
5b. In the Properties page, click maintenance in the left pane: 5c.
5d. Navigate to and select the destination location for journaled messages, for example journal@bma.
5e. Click ok to select the journal message recipient.
5f. Click save to save your settings. The configuration is now complete and journaled mail is forwarded to the Barracuda Message Archiver. Log into the Barracuda Message Archiver, and go to the BASIC > Search page in the web interface to verify that new mail is being processed. Note that it may take up to 30 minutes before journaled mail is available in the search results.
Step 2. Create a Remote Domain From the Exchange Management PowerShell Step 3. Create a Recipient Mail Contact/Alternate Email Address Step 4. Create a Send Connector for the Remote Domain Step 5. Create a Journal Rule Related Articles Understanding SMTP Forwarding and Trusted Servers Full support for Exchange integration is available in Barracuda Message Archiver firmware version 3.5 or higher; support for Exchange Server 2013 Journaling is available in release 3.1 or higher.
This command ensures TNEF encoding is disabled and auto-forwarding is enabled. Barracuda recommends disabling TNEF encoding. Auto-forwarding is enabled to allow mail for the contact to be forwarded to the Barracuda Message Archiver. Step 3. Create a Recipient Mail Contact/Alternate Email Address The Mail Contact is the account that is to act as a "holding location" for journaled messages.
3c. Click save.
Hide Contact from Global Address List Barracuda Networks recommends hiding the mail contact from the Global Address List (GAL). One method to hide the mail contact is to utilize the following shell command: Get-MailContact | Where {$_.Name -eq "Journal Contact"} | Set-MailContact -HiddenFromAddressListsEnabled $True The setting can be verified by executing: Get-MailContact | Where {$_.
3e.
3f.
Hide Alternate Contact from GAL the new mailbox still selected, ) icon.
Step 4. Create a Send Connector for the Remote Domain To route journaled mail that is sent to the contact to the Barracuda Message Archiver, use the following steps to create a Send Connector for the Remote Domain: 4a.
4b.
4c. Click next. In the Network settings page, select Route mail through smart hosts: 4d. Click next. In the add smart host page, enter the fully qualified domain name (FQDN) or IP Address of the Barracuda Message Archiver: 4e. Click save.
4f. Click next.
4g.
4h. In the Address Space page, enter the domain that matches the domain for the external email address used to create the journal contact, for example, bma.
4i.
4j. Click next.
4k. Verify all of the Exchange Servers that are in the CAS role are listed; click add to add additional servers: 4l. Click ok.
4m. Click finish.
4n. Click the Edit ( ) icon to edit the Send Connector properties. From the Maximum send message size (MB) drop-down list, select unlimited: 4o. Click save. Step 5. Create a Journal Rule Journaling refer to the article How to Use only one journaling This article assumes you are setting up a journal rule. If you are setting up mailbox database journaling, Configure Envelope (SMTP) Journaling for Microsoft Exchange Server 2013 - Standard Journaling.
5b. In the new journal rule page, enter the following details: Enter a name for the journal rule From the If the message is sent or received from list, select Apply to all messages From the Journal the following messages list, select All messages In the Send Journal Reports field, enter the email address of the contact created in Step 4 (bma.int): 5c. Click save.
5d. The journal rule check box displays selected in the journal rules page: 5f.
5g. In the non-delivery reports window, click browse: 5h.
5i. Click ok. Verify your selection, and then click save: 5j.
The configuration is now complete and journaled mail is forwarded to the Barracuda Message Archiver. Log into the Barracuda Message Archiver, and go to the BASIC > Search page in the web interface to verify that new mail is being processed. Note that it may take up to 30 minutes before journaled mail is available in the search results. How to Configure an IMAP or POP3 Journal Account for Microsoft Exchange Server 2013 This article refers to the Barracuda Message Archiver firmware version 3.
Additional Resources Microsoft Exchange Permissions Depending on your deployment, refer to Microsoft TechNet for configuration requirements: Enable POP3 in Exchange 2013 Enable IMAP4 in Exchange 2013 The maximum size email that will be retrieved by the Barracuda Message Archiver via POP or IMAP is 100MB. Setting Up a POP3 Journal Account Step 1. Enable POP3 Use the following steps to enable POP3 on your Exchange 2013 Server. 1.
5. 6. Scroll down and click More options. Under Connection limits, use the following settings: In the Maximum connections field, specify the total number of authenticated and unauthenticated connections the specified server can accept. The default value is 2,147,483,647; enter a value between 1 and 2,147,483,647. In the Maximum connections from a single IP address field, specify the number of connections that the server can accept from a single IP address.
7. Click save, and then Step 2. Start the POP3 Services click ok in the warning dialog to save your changes. Use the following steps to start the POP3 services; you must log in as the system administrator to complete these steps: 1. Log into the system running the Client Access server role, and open Services (Start > Programs > Administrative Tools > Services). Right-click Microsoft Exchange POP3, and then click Start. 2.
3. In the Journal Accounts Configuration section, specify the following details for each journal account: Status – Displays the connection status for each account. Server – Enter the hostname of the mail server where the account resides. Protocol – Select whether the account is POP3 or IMAP; once you select the protocol, the default port number automatically populates the Port field. Username – Enter the username or ID associated with this mailbox as defined by your server.
Use the following steps to assign permissions to the account created in the previous step: 1. Log in to the Exchange Server as the administrator, and open the Exchange Management Shell . 2. At the command prompt, type the following command: New-ManagementRoleAssignment -Name:BarracudaMessageArchiver -Role:ApplicationImpersonation -User:Poli cyAdmin Where PolicyAdmin represents the new account name.
Enable Journaling Configure Exchange Integration Operations Email Service Account Creation Related Articles Message Archiving Concepts Message Import, Stubbing & Configuration Search Options & Configuration Stubbing and Microsoft Exchange Import For stubbing and Microsoft Exchange imports initiated via the Barracuda Message Archiver web interface, there is a 100MB limit on file import.
Firewall Ports If the Barracuda Message Archiver is located behind a corporate firewall, open the following ports on the firewall to ensure proper operation: Port Direction TCP Out 22 UDP Yes Usage No Remote diagnostics and service recommended (1) (1) 25 Out Yes No Email and bounces (25 inbound may be necessary for some deployments) 53 Out Yes Yes Domain Name Service (DNS) recommended 80 and 443 Out Yes No Virus, Policy, and Document Definition updates 123 In/Out No Yes Network T
3. Click Save Changes once you have completed both of the preceding bullet points. 4. In the Local Domains section, include all domains from which to accept mail for archive to identify internal and external email: Define external access configuration to determine how to integrate with other Barracuda Message Archiver tools and Add-Ins. Define internal or external DNS names depending on how you want to deploy Add-Ins, for example, message stubbing. 5.
Email Service Account Creation An email service account is a shared account that is accessible by multiple users, allowing the specified users to view and manage email to the account. An email service account allows you to import historical data from your Exchange Server and to manage message attachment stubbing. For details on creating an email service account, refer to the article Creating an Email Service Account for Microsoft Exchange Server 2007/2010.
Additionally, Exchange cannot fully journal the following: Posts to public folders - Journaling cannot be enabled on public folder stores. Expansion of external distribution lists - While the actual contents of messages sent to or from internal and external distribution lists can be journaled, only an internal distribution list can be fully expanded and included in the envelope journaling data.
a (non-routable) Remote Domain, to act as the recipient domain for journaled traffic a Send Connector, for routing journaled messages a Journaling Rule to actually enable journaling on your Exchange Server Configure the Barracuda Message Archiver On the Barracuda Message Archiver, use the the following steps to enable SMTP forwarding: 1. Go to the MAIL SOURCES > SMTP/IM page. 2.
6. hange Rich Text format): In the Message Format Options section, turn on Allow automatic forward. In the Exchange rich-text format section, select Never Use: Verify that only Never use and Allow automatic forward are selected in the dialog box. 7. Click Apply to save your settings, and click OK to close the Properties dialog. Create a Mail Contact The Mail Contact is the account that is to act as a "holding location" for journaled messages.
2. In the dialog, select New Contact, and click Next. 3. Enter a First name and Last name; the Name field automatically populates based on the entered values.
4. Click Edit to the right of the External e-mail address field, and in the SMTP Address dialog, enter the delivery email address, for example, BMA_Journal@bma.int: The account name can be anything you want, but the domain name must match what you created in the preceding section, Cre ate a Remote Domain. 5. Click OK to close the dialog box.
6. Click New to create the Mail Contact. The newly-created contact appears in the Mail Contact list. Click Finish to close the Wizard. Create a Send Connector 1. In the EMC, expand Organization Configuration, select Hub Transport, and select the Send Connector tab. In the Actions panel, and click New Send Connector. The New Send Connector dialog displays. Enter a Name to identify this send connector, e.g.
2. From the Select the intended use for this Send connector menu, select Custom, and click Next. 3. In the Address Space section, click Add; the SMTP Address Space dialog box displays: 4. In the Address space field, enter the domain created earlier, e.g., bma.int, and click OK.
5. Click Next.
6. Click Add. In the Add smart host dialog box, select IP address, and enter the IP address of your Barracuda Message Archiver: 7. Click OK to add the IP address. Click Next, then click Next again. 8. In the Source Server page, if your Exchange server is not already listed, click Add to search for and add the server to this list. Click Next to verify your configuration, and click New to create the Send Connector.
11. Click Apply, and then click OK to save your changes and close the dialog box. Create a Journaling Rule Both the Standard and Enterprise versions of Microsoft Exchange Server 2007 and 2010 support Standard and Premium Journaling. Open the EMC, and complete the following steps to add a journaling rule: 1. In the EMC, expand Organization Configuration, select Hub Transport, and select the Journal Rules tab. 2. In the Actions panel, click New Journal Rule; the New Journal Rule dialog displays. 3.
4. Select the Scope for archiving; the recommended setting is Global - all messages for the most complete coverage. 5. Turn on Enable Rule, click New to create the Journaling rule, and click Finish to return to the Journal Rules tab where the newly-created rule displays in the list. Configuring an IMAP or POP3 Journal Account for Microsoft Exchange Server 2007 and 2010 This article refers to the Barracuda Message Archiver firmware version 3.1 and higher, and Microsoft® Exchange Server 2007 and 2010.
Migration. Service Availability Use the following steps to verify the IMAP or POP3 service is available on the Exchange Server. 1. 2. 3. 4. Log in to the Exchange Server as the Exchange Server Administrator. Go to All Programs > Microsoft Exchange Server > Exchange Management Console. In the Console tree, navigate to and click Client Access. In the Work pane, click the POP 3 and IMAP 4 tab: 5. Right-click on the desired service, for example, IMAP4, and click Properties. 6.
7.
8. To modify the port number, select from the available options: Add - Click to add an additional port number Edit - Click to modify the port details for the highlighted item Delete - Click to remove the highlighted port from the list 9. Click OK to save your changes and close the dialog box. Start the Service Use the following steps to start the service. 1. Log in to the Exchange Server as the Exchange Server Administrator, and go to Start > Programs > Administrative Tools > Services. 2.
3. Right-click on the service name, and click Properties. 4. In the Properties dialog box, select Automatic from the Startup type drop-down menu: 5.
5. Click Start, and then click OK to save your settings. 6. In the Services window, verify the Status is Started and the Startup Type is Automatic: 7. Close the Services window. Add a Journal Account to the Barracuda Message Archiver Once you configure the Service on your Exchange Server, you can add the journal account to the Barracuda Message Archiver to begin retrieving new messages for archiving. 1.
4. Select On to prevent the Barracuda Message Archiver from removing the journaled messages from the mail server; only turn this option on if the contents of the journal account is required by other applications. In this case, make sure that another method for cleaning up the journal account is enabled on the mail server in order to prevent unlimited growth on the mail server and to stay in compliance with your organization’s message retention policies.
Microsoft Exchange Server 2003 Deployment Recommended Method Microsoft Exchange Server 2003 Deployment Template Understanding Microsoft Exchange Server 2003 Envelope Journaling Configuring an SMTP Journal Account for Microsoft Exchange Server 2003 For a PDF version of this deployment, see the Document Downloads page Alternate Method Configuring an IMAP4 or POP3 Journal Account for Microsoft Exchange Server 2003 See Also Microsoft Exchange Server 2003, 2007, and 2010 Integration describes how to automatic
Implementation Prerequisites You will need configuration Access to the Exchange environment, and the ability to make firewall changes, if deemed necessary. To use push journaling, you must create a dedicated mailbox store. Microsoft recommends placing the Exchange Mailbox Store containing the journaling mailbox on a drive that does not hold user mailboxes. For more information, see the Microsoft Support article Troubleshooting message journaling in Exchange Server 2003 and in Exchange 2000 Server.
(1) 80 and 443 Out Yes No Virus, Policy, and Document Definition updates 123 In/Out No Yes Network Time Protocol (NTP) recommended Access via Port 22 is required only if Barracuda Networks Technical Support is requested. Activation Complete the following steps to activate and configure the Barracuda Message Archiver: 1. In the browser address bar enter http:// followed by the Barracuda Message Archiver IP address, followed by the default web interface HTTP Port :8000. For example: http://192.
Define external access configuration to determine how to integrate with other Barracuda Message Archiver tools and Add-Ins. Define internal or external DNS names depending on how you want to deploy Add-Ins, for example, message stubbing. 5. Go the BASIC > Administration page, and configure access, management, and default display settings. For more information, refer to the article How to Configure Administrative Settings.
If you are migrating to a newer version of Exchange Server, refer to Barracuda Message Archiver and Microsoft Exchange Server Migration. How it Works In Microsoft Exchange 2003, journaling is enabled at the mailbox store level. Configuring envelope journaling allows messages sent to the journaling mailbox to retain complete recipient information including 'bcc' recipients.
Step 4. Create a Journal Account Mailbox Step 5. Create a Custom SMTP Recipient Step 6. Hide Mail Contact in Exchange Global Address List, Modify SMTP Addresses, and Enable Server-Side Mailbox Forwarding Step 7. Modify Journal Mail Contact Step 8. Enable Envelope Journaling on Mail Storage Step 9. Configure Exchange Mailbox Management Step 10.
Posts to public folders - Journaling cannot be enabled on public folder stores. Expansion of external distribution lists - While actual message content sent to or from internal and external distribution lists can be journaled, only an internal distribution list can be fully expanded and included in the envelope journaling data.
1c. In the Properties dialog box, click the General tab, and type Non-Journaled Mailstore in the Name field: 1d.
1e. Browse to and select the default database location where you want to add the mailbox store, click Apply, and click OK. The mailbox store No n-Journaled Mailstore displays in the ESM.
1f. Click Allow, and then click OK. Step 2. Create Remote Domain 2a. In the ESM console, expand Global Settings, right-click Internet Message Formats, point to New, and click Domain: 2b. In the Properties dialog box, enter Barracuda Message Archiver in the Name field, and in the SMTP domain field, type bma.
2c. Click Apply, click the Advanced tab, and in the Exchange rich-text format section, click Never use. Select Allow automatic forward, and deselect all other options: Verify that only Never use and Allow automatic forward are selected in the dialog box.
2d. Click Apply, and click OK to save your changes and close the dialog box. Step 3. Set Up Message Routing for Journal Contact Use the following steps to route messages specified for the Journal Contact on Microsoft Exchange Server 2003. 3a. In the ESM, expand Connectors.
3b. Right-click Connectors, and click New > SMTP Connector. The SMTP Connector dialog box displays. In the Name field in the General tab, type Barracuda Message Archiver. 3c. Select Forward all mail through this connector to the following smart hosts, and enter the IP address of your Barracuda Message Archiver in the associated field enclosed in square brackets [ ]. If you do not enclose the IP address in square brackets [ ], an error displays. 3d. Below the Local Bridgehead section, click Add.
3e. Click Apply. Click the Address Space tab, and click Add. In the Add Address Space dialog box, select the address type SMTP: 3f. Click OK. The Internet Address Space Properties dialog box displays. Type the domain name bma.
3g. Click Apply, and click OK to close the dialog box.
3h. Click Apply, and click OK to close the Properties dialog box and save your changes. Step 4. Create a Journal Account Mailbox You must create a Journal Account Mailbox for a domain or OU as described in this step on the Mailbox Store you created in Step 1. 4a. Launch the Active Directory Users and Computers console (Programs > Administrative Tools or Programs > Microsoft Exchange), and connect to the non-journaled Mailbox Store created in Step 1. 4b.
4c. Click Next. Enter a password in the Password and Confirm password fields, clear User must change password at next logon, and select Password never expires: 4d. Click OK in the warning dialog box, and then click Next; select Create an Exchange mailbox: Verify the Server field points to your non-journaled mailstore location from step 1.
4e. Click Next, verify the entered information, and click Finish to create the User and close the dialog box. Step 5. Create a Custom SMTP Recipient In this step you disable Microsoft MAPI Rich-Text Format (RTF). 5a. In the Active Directory Users and Computers console, click on the domain or organization unit (OU) in which to create the custom SMTP recipient, point to New, and click Contact; the New Object - Contact dialog box displays. 5b.
5c. Click Next. Select Create an Exchange e-mail address, enter the email alias in the Alias field, and click Modify. 5d. The New E-mail Address dialog box displays: 5e. Click SMTP Address, and click OK; the Internet Address Properties dialog box displays. In the General tab, enter the external email address BMA_Journal@bma.int: 5f. Click OK. In the New Object - Contact dialog box, click Next and verify the entered details, click Apply, and click Finish to create the contact and close the dialog box.
6b.
6c.
6d.
6e. Click Delivery Options.
6f. Click Modify to the right of the Forward to field. In the Enter the object name to select box, type BMA_Journal, and click Check Names: 6g. Click OK to close the Delivery Options dialog box. In the Exchange General tab, click Storage Limits.
6h. Click OK. Click Apply in the Properties dialog box, and then click OK to close the dialog. Step 7. Modify Journal Mail Contact 7a. In the Active Directory Users and Computers console, right-click on the contact you created in Step 5, and click Properties. 7b. Click the E-mail Addresses tab, and remove all addresses except journaling@bma.int and the X400 address.
7c. Click Apply.
7d. Click Apply, and click OK to close the dialog box. Step 8. Enable Envelope Journaling on Mail Storage 8a. From the Microsoft website, navigate to the E-Mail Journaling Advanced Configuration tool complete the following to enable envelope journaling: , and Click Download, and save the file Exejcfg.
8d. In the Enter the object name to select field, enter the User name, and click Check Names. Click OK. 8e. Click Apply, and click OK to close the dialog and save your changes. Step 9. Configure Exchange Mailbox Management After a message is forwarded to the Barracuda Message Archiver, define an Outlook rule to automatically delete the archived message from the local mailbox store to reduce storage “bloat”. Step 9a. Create a Journal Account Mailbox Outlook Rule Step 9b.
2. On the first page of the Rules Wizard, click Start from a blank rule, and click Next. 3. Under Select when messages should be checked, select Check messages when they arrive, and click Next. 4. In the Select condition(s) section, verify all conditions are deselected, and click Next. Click Yes to verify you want to create the rule for all messages that are received in this mailbox. 5.
6. In the Edit section, click specified; the Rules and Alerts window displays. Navigate to and select the Deleted Items folder, and click OK to return to the Rules Wizard. The underlined phrase displays as Deleted Items. 7. Click Finish to create and activate the Rule. Step 9b. Create Recipient Policy to Delete Messages Use the following steps to create a recipient policy to delete messages. 1.
4. On the General tab, enter a name for the policy, and click Modify; the Find Exchange Recipients dialog box displays. Select Users with Exchange mailbox, and clear the remaining options: 5. Click the Advanced tab, and set the following conditions: Field = E-Mail Address Condition = Is (exactly) Value = BMA_Archive@your_domain.
6. Click Add, and then click Find Now. The Search results displays the matching email address: 7. Click OK.
8. Click the Mailbox Manager Settings (Policy) tab, and set the following options: From the When processing a mailbox drop-down, select Delete Immediately.
Click the Deleted Items entry, and click Edit; the Folder Retention Settings dialog box displays. Select Age Limit (Days), and enter an appropriate age limit in the associated field. The specified age refers to the length of time a message remains in the Deleted Items folder not when the message was received into Exchange. Clear Message Size (KB): 9. Click OK to return to the Properties dialog box, and then click OK to close the dialog. 10.
11. Click Yes to confirm you want to apply the policy immediately. Once the policy is created, you must schedule the policy to run on each journaling mailbox server that hosts a Journal Account Mailbox as described in Step 9c. Step 9c. Schedule Mailbox Manager to Run Recipient Policy Use the following steps to schedule the policy to run on each journaling mailbox server that hosts a Journal Account Mailbox. 1.
3. 4. Click in the schedule to specify day(s) and time(s), and click OK to save your settings. 5. Click Apply, and click OK to close the Properties dialog box. Step 10. Verify Journaling is Functioning as Expected Use the following steps to verify journaling is set up and functioning as expected. 10a. Log in to the Barracuda Message Archiver as the administrator. 10b. View the BASIC > Status page and verify messages are being processed in the Message Statistics table.
Verify the service account has a mailbox, and is not hidden in the Global Address list. (Optional but highly recommended) Establish a user account through OWA or other source before setting up the email service account. Verify public folder database exists on the Exchange Server. Microsoft Exchange 2003 1. 2. 3. 4. 5. Log onto the Exchange Server as the administrator. From the Start menu, go to Start > Programs > Microsoft Exchange > System Manager.
2. Launch Exchange System Manager, and navigate to Servers > Protocols > IMAP4. 3. In the center pane, right-click Default IMAP4 Virtual Server, and click Start: 4. To enable POP3, navigate to Servers > Protocols > IMAP4, and in the center pane, right-click Default POP3 Virtual Server, and click Start: Configure Account Use the following steps to create an Active Directory (AD) user. This account must reside on your organization's domain, not a local machine account.
1. 2. 3. 4. Log in to the Exchange Server as the Exchange Server Administrator. Launch Active Directory Users and Computers. Navigate to and right-click Users, and click New > User; the New User dialog box displays. Enter the relevant information to identify the exchange mailbox, and click Next: 5. Leave the Password field blank, and deselect User must change password at next logon: 6. Click Next. Turn on Create an Exchange mailbox, and click Next. 7.
Enable Envelope Journaling on Mail Storage From the Microsoft website, navigate to the E-Mail Journaling Advanced Configuration tool, and complete the following to enable envelope journaling: 1. Click Download, save the file Exejcfg.exe to a directory on the system, and take one of the following actions to run the executable: Click Open; or Click Run this program from its current location; or At a command prompt, navigate to the file directory, and run the following command: Exejcfg.exe -e 2.
to begin retrieving new messages for archiving. Log in to the Barracuda Message Archiver as the administrator, and go to MAIL SOURCES > Journal Accounts. 1. In the Journal Accounts section, enter the following details: Enable Journal Accounts – Select Yes to allow the Barracuda Message Archiver to poll the listed accounts for new messages for archiving. Enable Journal Testing – When set to Yes , all listed accounts are tested for connectivity with each page view.
Read First Firmware versions 3.2 and earlier: To create an email service account, you will need to: Verify the service account has a mailbox, and is not hidden in the Global Address list. (Optional but highly recommended) Establish a user account through OWA or other source before setting up the email service account. Verify a public folder database exists on the Exchange Server Firmware versions 3.
3. Get-MailboxDatabase -Identity database name| Add-ADPermission -User "CUDASVC" -AccessRights ExtendedRight -ExtendedRights Receive-As, ms-Exch-Store-Admin High Availability Deployment Caution High availability (HA) is an advanced feature and may not be appropriate for all environments; contact Barracuda Networks Technical Support before enabling this feature.
Related Articles Prepare Systems for HA Join Systems in a HA Configuration Update Firmware and Energize Updates How to Make Changes to an Existing HA Configuration Remove or Replace a System Additional Resource Barracuda Networks Knowledgebase Solution #0000618 3 Important High Availability (HA) is an advanced feature and may not be appropriate for all environments; it is highly recommended that you contact Barracuda Networks Technical Support before enabling this feature.
Message Import and Copy All messages imported into a Barracuda Message Archiver in an HA configuration, regardless of the mail source, are copied to the HA peer. New messages on each system are fully indexed by message content and attachments, and those messages are queued for copy to the other system in the HA configuration. Because message import takes precedence over message copy to an HA peer, queued copy tasks are deferred until there is a pause in new mail import tasks.
Once the system is back online, it resumes polling its accounts and receiving pushed mail. Any items that were queued to copy to the HA peer resume copying. Figure 3. Primary Barracuda Message Archiver in HA Configuration is Back Online. See View High Availability Status for more information on system status in an HA configuration.
Step 1. Complete the Installation Process Step 2. Back Up System Configuration Step 3. Verify Firmware Version Step 4. Verify Processes are Complete Related Articles Join Systems in HA Update Firmware and Energize Updates How to Make Changes to an Existing HA Configuration Remove or Replace a System Each Barracuda Message Archiver must function independently before it can be joined to another system for High Availability (HA).
Related Articles Prepare Systems for HA Update Firmware and Energize Updates Remove or Replace a System To join together two Barracuda Message Archivers for High Availability (HA), complete the steps outlined in this article. Step 1. Configure Barracuda Message Archivers for High Availability 1a.
Step 4. View High Availability Status You can view the number of messages that are waiting to be processed on the selected Barracuda Message Archiver in the BASIC > Status pag e in the HA Cluster Status section. If a system in the HA configuration goes offline, the status button in the Clustered Systems table on the ADVANCED > High Availability page displays red. Mouse-over the system to view system status. Archiving behavior continues as expected on the remaining system in the HA configuration.
ll systems in the cluster Any other secure administration configuration, including saved certificates (as configured on the ADVANCED > Secure Administration page) All SSL information, including saved certificates (as configured on the on the ADVANCED > Secure Administration page) How to Update Firmware and Energize Updates This article refers to the Barracuda Message Archiver firmware version 3.1 and higher.
when you are replacing one of the systems in the HA configuration. Related Articles Prepare Systems for HA Join Systems in HA Update Firmware and Energize Updates Warning If you are replacing a Barracuda Message Archiver, it is highly recommended that you contact Barracuda Networks Technical Support prior to removing it from a High Availability (HA) configuration.
2. a. Mirror to b. Enter , for example, enter archiver@192.168.200.200 The Barracuda Message Archiver automatically accepts and archives emails sent from CommuniGate Pro to the address . Google Apps Deployment This article refers to the Barracuda Message Archiver release 3.1 or higher, and Google® Apps Business™ and Google Apps Education™ editions.
4. Outbound Internal – sending Internal – receiving 5. In the Add setting dialog box, in step 2, select If ANY of the following match the message, and under Expressions click Add. 6. From the drop-down menu, select Advanced content match; the Advanced content options display. Select the following options: From Location select Full Headers. From Match type select Contains text.
7. Click Save. 8. In the Add setting dialog box, in step 3, enter the following information: Select Modify message. Under Also deliver to turn on Add more recipients. Click Add and enter the email address of the Archive/Journal mailbox created in the section Create an Archive/Journal Mailbox including the domain. Select the appropriate domain; select the primary journal mailbox unless you want to set up a mailbox and rule for each domain. 9. Click Save. 10. Step 4 (Optional).
5. It can take 15-30 minutes for global IMAP and POP changes to take effect. Enable IMAP/POP in Gmail Each user must enable IMAP/POP in the Gmail settings under Forwarding and POP/IMAP. To enable IMAP in Gmail: 1. 2. 3. 4. Sign in to Gmail. Click the gear icon in the upper right, then select Settings. Click Forwarding and POP/IMAP at the top of the page. In the IMAP Access section, select Enable IMAP, and configure your IMAP client: 5. Click Save Changes.
3. Server – Enter the Google Apps hostname. Protocol – Select whether the account is POP3 or IMAP; once you select the protocol, the default port number automatically populates the Port field. Username – Enter the "journaling" email address you created in the section Create an Archive/Journal Mailbox at the beginning of this article. Password – Enter the password associated with the email address.
To restrict the IP address from which the Barracuda Message Archiver accepts mail, contact Barracuda Networks Technical Support. Configure Google Apps Use the following steps to configure Google Apps to send journal mail to Barracuda Networks Cloud Relay: Custom Token You must have your custom token from Barracuda Networks Technical Support to configure Barracuda Cloud Relay Service for Google Apps Mail Service.
4. Click Add route. In the Add mail route window, type BMA-relay in the Name field, and e nter the host name provided to you by Barracuda Networks Technical Support including your custom token. For example, mytoken.bma.cudasvc.com 5. Select Perform MX lookup on host for proper MX lookup and IP resolution: 6. Click Save. Your entry displays in the Hosts list: 7.
7. 8. In the Email messages to affect, select Outbound and Internal - sending: 9. Scroll down to Also deliver to, and select Add more recipients. In the Recipients setting, select Advanced from the drop-down menu, and select Change envelope recipient. 10. In the Replace recipient field, enter journaling@ followed by the host name provided to you by Barracuda Networks Technical Support including your custom token, as the recipient. For example, journaling@mytoken.bma.cudasvc.com 11.
Spam Filtering You can optionally select Do not deliver spam to this recipient. However, if you select this option and you spam filter journal mail, the Barracuda Message Archvier will not receive any email that Google Apps considers to be spam. 12.
13. In the General Settings tab, scroll down to Receiving routing, and click Configure. 14. In the Email messages to affect, select Inbound and Internal - receiving: 15. Scroll down to Also deliver to, and select Add more recipients. In the Recipients setting, select Advanced from the drop-down menu, and select Change envelope recipient. 16.
18. Scroll down and verify the settings; click Add. 19.
Supplemental Service Information GroupWise Deployment This article refers to the Barracuda Message Archiver firmware version 3.1 and higher, and Novell® GroupWise® 6.5 and higher, except where noted. In this article: Trusted Application Key Options Option 1. Download the Trusted Application Key Generator Option 2. Manually Generate a Trusted Application Key Option 3.
Option 1. Download the Trusted Application Key Generator Click here to expand... Use the following steps to generate a GroupWise Trusted Key: 1. Log into the Barracuda Message Archiver web interface, and go to the USERS > Client Downloads page. 2. Download the Trusted Application Key Generator to a workstation that has the GroupWise client, the Novell 32-bit client installed, and is logged into the same eDirectory tree as the GroupWise Server. 3.
2. In the Configure Trusted Applications dialog box, click Create: 3.
4. In the Edit Trusted Application dialog box, enter Barracuda_IMAP as the trusted application name in the Name field. 5. In the Description field, enter a description for the trusted application: 6. TCP/IP Address field: To allow the trusted application from any server, leave this field blank. To restrict the location from which the trusted application can run, click the Edit icon next to the field, and specify the IP address or DNS hostname of the trusted application server. 7.
7. res SSL. 8. If the purpose of the trusted application is to retain GroupWise user messages by copying them from GroupWise mailboxes into another storage medium, select Provides Message Retention Service. 9. Select Allow Access to Archive Service to allow message retention to interact with the Barracuda Message Archiver. 10. The following options are not applicable for configuration with the Barracuda Message Archiver: Archive Service Address – leave this field blank.
If you continue to encounter GroupWise mail archiving issues after running the Novell tools, Barracuda Networks recommends that you contact Novell to resolve the issue. Kerio Connect Mail Server Deployment This article refers to the Barracuda Message Archiver firmware version 3.1 and higher, and the Kerio Connect Mail Server.
When enabled, all messages are stored intact; any viruses contained within the messages are stored in these files. Once configured, an archive folder is automatically created when the first message is delivered. The folder is named based on the selected interval (daily, weekly, or monthly) in the Archiving tab. Any time Kerio Connect is restarted, a new archive folder is created upon receiving the first message, and uses the settings specified in the Archiving section in the Archiving tab.
Archiver to allow connection to IBM Notes/IBM Domino use the account name BarracudaMailArchiver; substitute the actual file name when competing this configuration. Log in to the IBM Notes Client Console, and verify Journaling is capturing emails and that the journal file mailjrn.nsf can be opened from the Barr acudaMailArchiver account. If IMAP is not enabled, run the following command from the IBM Notes Client Console to enable IMAP on the Journal file mailjrn.nsf: load convert -e mailjrn.nsf Step 1.
1c. IMAP requires the presence of the Sent Items and Drafts folders. If these folders are present, go to Step 2. Create Agent. If they are not present, complete steps 1d and 1e. 1d. Click New Folder, and in the Create Folder dialog box, enter Sent Items in the Folder name field: 1e. Click OK. The Sent Items folder is added. Click New Folder, and in the Create Folder dialog box, type Drafts. Click OK to add the folder. Step 2.
2b. The Agent dialog box displays: 2c. In the Name field, type the following value: Barracuda Mail Archiver Copy to Inbox 2d. In the Comment field, you can optionally enter a comment to describe the agent. In the Runtime section, set the Trigger to On event, and select After documents are created or modified: 2e. Click the Close ( ) icon to save your changes; close the dialog box.
2f. In the right pane, from the drop-down menu, select Simple Action; a warning dialog displays. Click Yes to save your changes and close the warning dialog. At the bottom of the Agent view, click Add Action; the Add Action dialog box displays: 2g.
2h. Click Inbox, and then click Add to save your changes and close the dialog box. The Agent displays the new action: 2i. Close the Agent; a warning dialog displays. Click Yes, and then close IBM Domino Designer. Step 3. Update the Mail File Value Use the following steps to change the mail file value from its existing name to mailjrn.
You must have an IBM Domino account with edit rights to complete the following steps. 3a. Log in to the IBM Domino Client, and open the name and address book entry for the BarracudaMailArchiver account. Click on the Person n ame in the view to access the edit mode: 3b. In the Mail section, note the current value of Mail file, then change the value to mailjrn: Typically the initial mail file name is preceded by a folder, e.g.
4b. If the BarracudaMailArchiver account does not display, click Add at the bottom of the screen and add the account to the database file. Click OK to save changes and close the Access Control List. Test Your Settings Open an email application that supports IMAP, and verify that the BarracudaMailArchiver account can be read and that the Inbox contains the records from the mail archive file. The mailjrn.
Set Up MailEnable Standard Edition Set up MailEnable Professional or Enterprise Edition Additional Resource Barracuda Networks Knowledgebase Solution #00 003577 How to archive the messages that are sent and received by MailEnable MailEnable Enterprise Edition Configuration Guide MailEnable Standard Guide - 6.0 MailEnable Professional Guide - 6.0 MailEnable Enterprise Guide - 6.
2. In the Default Domain & Servers dialog box, click Archiving, and then: Select Send copies of all inbound and outbound mail to these addresses and enter the email address of your Barracuda Message Archiver in the associated field, for example, archiver@192.168.200.200
Step 2. Configure Barracuda Message Archiver Forwarding Step 3. Create a Non-Delivery Report Recipient Step 4.
To create an NDR recipient, 1. 2. 3. 4. Log in to the server as the administrator, and navigate to Manage My Organization > Mail Control > Journaling. Next to NDRs for undeliverable journal reports will be sent to, click Select address. In the NDRs for undeliverable journal reports window, click Browse. Select a recipient from the address book.
Because the journaling mailbox may contain sensitive information, it is recommended that you create organization-wide policies that govern who can access the journaling mailboxes in your organization. d. Name of rule – By default, the name of the journal rule is automatically generated from the journal recipients. If there are existing journal rules that contain the same journal recipients, numbers are automatically appended to the journal rule name to avoid duplicates.
5. The Protocol Settings dialog box displays the details you must enter in the Barracuda Message Archiver: 6. Open another window and log in to the Barracuda Message Archiver as the Administrator. 7. Navigate to the MAIL SOURCES > Journal Accounts page. In the Journal Accounts Configuration section, enter the details from the Office 365 Protocol Settings dialog box. 8.
8. 9. In the New Rule dialog box, from the Apply this rule menu, select Apply to all messages: 10.
11. In the Select Members dialog box, select the Journal/Archive Mailbox you created in Step 2, click Add, and then click OK. 12. In the dialog box, to the right of the Do the following menu, the selected Journal/Archive Mailbox name displays. 13. In the Name of rule field, enter the rule name, for example, Barracuda Message Archiver Rule: 14. Click Save. In the Warning dialog box, click Yes to save the new rule.
Unix Mail Server Deployment This article refers to the Barracuda Message Archiver release 3.1 or later, and Unix Mail Servers including Apple Mail Server, Sendmail, Postfix, and qmail. You can configure Sendmail, Postfix, and qmail to forward a copy of all incoming and outgoing messages as a blind-carbon-copy (bcc) to your Barracuda Message Archiver IP address. Sendmail, Postfix, and qmail support most Unix operating systems including Mac OS X.
Barracuda Message Center where it is encrypted, and a notification is sent to the intended recipient who can then log in and access the email over HTTPS: Inbound mail - When the recipient responds to the email, the response is sent back through the Message Center where it is encrypted and the Message Center notification is delivered.
Requirements Before getting started, verify that you have the following deployed and running in your environment: Important Upon activating archived mail encryption, the Barracuda Spam Firewall periodically contacts the Message Center for new mail sent or received for your domain. To ensure a secure outbound connection and delivery of email to the Barracuda Message Archiver, port 4234 must be open. Email Server configured to utilize journaling Barracuda Message Archiver firmware version 3.
2. is available in the Barracuda Message Center. Getting Started Recommended Steps Step 1: How to Install the Barracuda Message Archiver Step 2: How to Configure the Barracuda Message Archiver Step 3: How to Configure the Web Interface Step 4: How to Configure Administrative Settings Step 5: Understanding Message Archiving Concepts Alternatively, you can download the Barracuda Message Archiver Quick Start Guide.
Configure the IP Address and Network Settings The Barracuda Message Archiver is assigned a default IP address of 192.168.200.200. To set a new IP address from the administrative console: 1. Connect your keyboard and monitor directly to the Barracuda Message Archiver. 2. At the barracuda login prompt, enter admin for the login and admin for the password. The User Confirmation Requested window displays the current IP configuration of the Barracuda Message Archiver. 3.
Step 3: How to Configure the Web Interface This article refers to the Barracuda Message Archiver release 3.1 or higher. Before configuring the web interface, complete Step 2: How to Configure the Barracuda Message Archiver.
It is important that the time zone is set correctly as this information is used to determine the integrity of the message archive, and in all logs and reports. 5c. You can change the port number used to access the Barracuda Message Archiver administration interface. The default port is 8000. 5d. Enter the amount of time for the session expiration length (in minutes) of your web administration interface session. 5e. At expiration, you are required to log back in to the administration interface. 5f.
complete, the login page appears. Update Definitions To apply the newest definitions provided by Energize Updates: 1. Go to the ADVANCED > Energize Updates page. 2. Set Automatic Updates to On. The recommended setting is On for all available definitions. 3. Verify the current version is the same as the latest general release. If the rules are not up-to-date, continue to the next step, otherwise definition update is complete. 4.
SSL not only ensures that your passwords are encrypted, but also ensures that all data transmitted to, and received from, the administration interface is encrypted. The Barracuda Message Archiver supports SSL access without any additional configuration. However, some sites may enforce the use of a secured connection to access the web interface, or prefer to use their own trusted certificates.
In the Password Change section you change the system password for the admin account. Enter the Old and New Passwords, and re-enter the new password to change the password used to access the web interface for the Barracuda Message Archiver. Click Save Password to save your changes. Time The current time is automatically updated on the Barracuda Message Archiver via Network Time Protocol (NTP).
Email Notifications Separate multiple addresses in a list with commas. You can specify email addresses to receive notifications for the following: Mobile Apps Support Email Address (Available in release 3.5 and higher only) – Recipient email address within your organization where support queries from mobile application users are sent. System Contact Email Address – Notification about new firmware releases, security bulletins, and customer service issues.
The Barracuda Message Archiver can enable a local SMB/CIFS share called BarracudaMessageArchiverSmbPickup to be used to download .zip or .pst files from exports performed on the Search page. By default this share is not enabled, and exports must be downloaded from the ADV ANCED > Task Manager page. In some cases, for instance large exports, using the web interface is not desirable and enabling the share can be helpful. From the ADVANCED > Administration page, click on Help for more details on SMB Export.
Exporting Messages Alias Unification Archived Data Backup Policy Monitoring Many organizations need to keep track of organizational policy violations, and to be alerted when violations occur.
850 2MB = 1000 pages of text 950 4MB = 2000 pages of text 1050 6MB = 3000 pages of text Note: (1) The full attachment is always archived. Attachment parsing limits apply only to those areas within an attachment that are searchable. For example, a 10MB attachment generally contains elements that are not parsable text, for example, graphics, file metadata, formatting, etc.
How to Secure Network Access Understanding Compliance This article refers to the Barracuda Message Archiver release 3.1 or higher. The Barracuda Message Archiver provides everything an organization needs to comply with government regulations in an easy to install and administer plug-and-play hardware solution. The Barracuda Message Archiver stores and indexes all email for easy search and retrieval by both regular users and third-party auditors.
Email permanence – Email must be maintained in its original form without alteration or deletion Email security – Information must be protected against all threats including unauthorized access to the email as well as physical damage. This same concept applies to the process of legal discovery which often specifies who can access the email (i.e.
Saved-Search Retention Policy Litigation Holds Retention Policies By default, automated archived message purging on the Barracuda Message Archiver is disabled. If you enable this ability, the Global Retention Policy and any Saved-Search retention policies are run against all the archived messages once a week. If the age of a message exceeds the maximum age allowed by all Saved-Search retention policies that apply to the message, that message is permanently deleted from the Barracuda Message Archiver.
The system administrator can stop a Litigation Hold by clicking on the trashcan icon for the entry. How to Define Archived Message Retention Policies Based on Saved Searches This article refers to the Barracuda Message Archiver release 3.1 or higher. Saved Search Retention Policies You can define a retention policy based on a Saved Search to automatically delete archived messages from the Barracuda Message Archiver.
Default (Barracuda Networks); Private (self-signed); Trusted certificate - a certificate signed by a trusted certificate authority (CA). Specific steps for configuring SSL certificates is described in the section Enabling SSL for Administrators and Users. Track Changes to the Configuration and User Login Activities The syslog function of the Barracuda Message Archiver provides two kinds of logs, capturing: User login activities and any configuration changes made on the device; Data related to mail traffic.
Back Up Archives via NFS – Set to Yes to enable access to the Message Store as NFS shares. Back Up Archives via SMB – Set to Yes to enable SMB access to the Message Store. Workgroup – Enter the name of the Workgroup that the share is to be a part of. Password – Enter the password required to access the network share. NFS Shares The number of shares on the Barracuda Message Archiver can vary. All models will have share number 1, while higher model numbers may have additional shares.
If the IP address of your Barracuda Message Archiver is 192.168.1.10, to connect to the second share use: \\192.168.1.10\BMA-SMB-2 Desktop Backups Backups can be made of the configuration of your Barracuda Message Archiver to a file on your local machine. These files can be used for backup purposes, as well as for uploading to another Barracuda Message Archiver running the same or higher firmware version.
Important While use of the Storage Manager/Mirror capability ( ADVANCED > Storage Manager page) will push a real-time copy of raw emails to a customer data share, metadata snapshots are not mirrored. You must back up this content by connecting to the Barracuda Message Archiver’s read-only SMB share. Metadata content is available for Mirroring in a future point release of the firmware. To fully realize this restoration method, you must consistently back up the following: Raw Email data: *.
2. Raw Email data: *.zip (1GB-sized message archives) / (directory containing recently received emails, not yet merged into a .zip) Snapshots of Metadata: FolderSync (snapshot of folderync data) index (snapshot of archives of index metadata) index_backup (snapshot of the entire index) ldap_cache (snapshot of ldap group information) log (snapshot of important system information) postgres_backup (snapshot of system databases) Nightly Backups Snapshots are performed nightly.
(SAN). Use the following steps to add the mirror share to your configured network share: 1. Log into the Barracuda Message Archiver as the administrator, and go to the ADVANCED > Storage Manager page. New Group Note that you can select the default group, or click Add New Group to create a new storage group. 2. If you have an iSCSI or CIFS/Windows share already set up, complete the following step, otherwise go to step 3: a. Select the share from the drop-down menu, and enter the associated details. b.
2. Click Add Computer. In the Add Computer page, enter a computer description and enter the IP address or fully qualified domain name in the Computer Name field. 3. From the Computer Type drop-down menu, select Microsoft Windows. 4. Set Enable File Share Backups; type smb as the Username, and enter the password you set up on the ADVANCED > Backup page in 5. 6. 7. 8. 9. 10. 11. 12. 13. the Barracuda Message Archiver web interface. Click Test Credentials to verify access to the file share.
a. In the Group table, click Add Mirror; the CIFS/Windows Share section displays at the bottom of the page: b. Enter the share details, and click Add. c. In the Group table, from the drop-down menu, select the share you want to use to back up the data. Once you click Add Mirror, the Barracuda Message Archiver synchronizes the data on the existing share with the mirror share. During this sync, the Barracuda Message Archiver's Storage Manager may be unavailable for use, but will continue to archive mail.
Barracuda Message Archiver's data partition. The Barracuda Message Archiver provides authenticated read-only access to the internal data partition via CIFS. To do so, 1. 2. 3. 4. Log in to the Barracuda Message Archiver as the administrator, and go to the ADVANCED > Backup page. In the Backup of Archives section, set Back Up Archives via SMB to Yes to allow access to the message store as an SMB share.
information. Mirroring Enabling storage data mirroring provides data redundancy for added protection against corruption of the actual hardware, while reducing overall drive capacity. Note that you must disable anti-virus scan on mirror shares before adding those shares to a group on the ADVANCED >Storage Manager page. You must disable anti-virus scan on mirror shares and rollover storage before adding shares to a group.
Local Accounts are created with one of 3 Roles: User – Able only to view messages accessible to the account, either because the username for the account is also that of the sender or recipient of a message, or because it has been given explicit access to view an email address via Alias Linking. Auditor – Able to create and activate policies, and view, search, and export any messages to/from the domains to which they have access.
Executing a Search Basic Search Advanced Search Related Articles Auditor Role Manage User Accounts/Roles Accounts, Roles & Email Aliases Advanced Search Options Message Search Searches are the main tools for the Barracuda Message Archiver, and can be made on virtually every aspect of a message including: message body content recipients and senders attachment type and content date Searches can only be made over messages to which the Auditor has read access, so privacy is always preserved.
identifying messages that have a specific attribute, such as an attachment or an image restricting the search base to outbound, inbound, or internal messages only going only through those sent to or from specific email addresses, or those sent between specific dates See Advanced Search Options for more information. Saved Searches and Litigation Holds - Auditor This article refers to the Barracuda Message Archiver release 3.1 or higher.
Related Articles How to Set Up Saved Searches Auditing Role Accounts, Roles & Email Aliases Creating Custom Policy Alerts Use the following steps to create a new custom Policy Alert: 1. 2. 3. 4. 5. 6. 7. Log in to the Barracuda Message Archiver as an auditor, go to the BASIC > Search page, and click Advance d. Enter the criteria for the policy. Click the + (plus) symbol to add additional search parameters, and click AND/ OR to further clarify the search criteria.
Forwarding Messages Once a search is executed and the results listed in the BASIC > Search page, you can specify one or more of these messages to be forwarded to a desired list of recipients. To forward one or more messages, select the desired item(s) from the message list using shift- or ctrl-click to select multiple messages. Click on T ools located at the top of the message list, and select the desired action.
3. LDAP for the specified email address. 4. Click Save Changes to save the list of aliases for that user. The aliases are added to the Aliases field for this user in the USERS > Local Accounts page. Discovery Option for Alias-Based Search When conducting an Advanced Search, you can search on all aliases associated with an LDAP for a specified email address using "Discovery".
Export (available in firmware release 3.5 and higher only) - Click Export, enter an email address to which to send a .csv file containing the selected audit logs in the dialog box, and click OK. Once the report generates, it is sent to the specified email address. Tools - Click to select the number of items to display per page and to specify the Details Pane location. Adding LDAP Users This article refers to Barracuda Message Archiver firmware 3.5 and higher.
group. Exclude these Addresses A user cannot run a Search As User Search on the BASIC > Search page on a user that is on their Exclude these Addresses Exclusion Rules blacklist.
How to Configure Your Barracuda Message Archiver to Act as an SMTP Proxy to Your Email Server Related Information For details on automatically importing, stubbing, and synchronizing Microsoft Exchange Server folder data, refer to the article Microsoft Exchange Server 2003, 2007 and 2010 Integration. How to Set Up Email Journaling This article refers to the Barracuda Message Archiver release 3.1 or higher. This is the recommended method of sending messages to the Barracuda Message Archiver.
How to Archive Microsoft Non-Email Items In addition to emails that are automatically sent from your Microsoft Exchange Server to the Barracuda Message Archiver for storage, you can also configure non-email items such as Appointments, Contacts, Notes, and Tasks for archive. This enables you to get a more complete picture of all items that are or have been stored on your Exchange server, and eliminates the need to keep .pst files around solely for the purposes of retaining this information.
Related Articles GroupWise Deployment Understanding GroupWise Trusted Application Keys How to Create a GroupWise Trusted Application Key Additional Resource Barracuda Networks Knowledgebase Solution #00 002510 This article assumes you are downloading the Trusted Application Key Generator from the USERS > Client Downloads page to generate the GroupWise Trusted Key. To manually generate a key, see the article How to Create a GroupWise Trusted Application Key . To enable archiving with Novell GroupWise: 1.
This article refers to the Barracuda Message Archiver release 3.1 and higher, and Novell® GroupWise®. In this article Naming the Trusted Application Key for the Barracuda Message Archiver Validating the Trusted Application Locating the Trusted Application Key Related Articles Importing Novell GroupWise Messages Understanding GroupWise Trusted Application Keys A Trusted Application Key is created at the Domain database level.
If the login attempt fails, there may have been issues encountered during the creation of the Trusted Application Key. Use the following steps to troubleshoot the Trusted Application Key: 1. Validate that the key lists the Trusted Application Key in eDirectory.
Related Articles IBM Notes/IBM Domino IMAP Deployment Because the IBM Domino attachment and object service (DAOS) stores file attachments in a separate repository on the server that are retrieved by reference, before working with the NSF Import Utility, first restore these attachment objects to the customer mailbox. Important Barracuda Networks products interface with third-party products for email archival. Barracuda is not responsible for the performance or functionality of third-party products.
If you have a Barracuda Spam Firewall, and your email server has journaling capabilities, it is recommended that you set up Remote Journal Accounts as outlined in How to Set Up Email Journaling. However, if your email server is not able to journal messages, you can configure your Barracuda Message Archiver to act as an SMTP proxy to your email server and activate the journaling feature that is available on the Barracuda Spam Firewall to submit messages to the Barracuda Message Archiver.
Direct Imports (via MAPI) All emails currently on your Microsoft Exchange Server can be imported directly into the Barracuda Message Archiver via Microsoft’s Message Application Protocol Interface (MAPI). You can configure multiple Exchange servers on the MAIL SOURCES > Exchange Integration page to import to the Barracuda Message Archiver.
For example, if your Barracuda Message Archiver has the IP address of 192.168.2.24, use the following to connect to the share: \\192.168.2.24\BarracudaMessageArchiverPstDrop To allow access to the share to upload a .pst into the Barracuda Message Archiver, the administrator must enable and configure the PST Import Options from the BASIC > Administration page. Privileges can be assigned to all users, or to just a single password-protected account called p stdrop to be used by anyone with the password.
Barracuda Message Archiver). Folder Sync – Import into the Barracuda Message Archiver the complete folder structure of the selected users' Mailboxes. This action imports the selected users' custom folders and subfolders. Select Server Select an existing Exchange Server, copy an existing Exchange Server configuration to modify, or add a new Exchange Server configuration. To enable RPC over HTTP (RoH), refer to the article How to Enable RPC over HTTP Connectivity.
Has a mailbox; Visible on the GAL; Read-As, Write-As, and Administer-Store access to the target mailboxes; Account must not be locked. An Exchange Server Administrator account does not necessarily meet these requirements.
Item Source Select the target list from which to import: Public Folders - Looks in all public folders on the specified Exchange Server. Distribution List - Looks for items that are sent to the individual accounts that receive content sent to the list entered in the associated field. Users - Looks for items sent to specified users: All Users - All users on the specified Exchange Server Last Name - Any user on the specified Exchange Server whose last name matches the value entered in the associated field.
Item Source Select the target list from which to import: Public Folders - Looks in all public folders on the specified Exchange Server. Distribution List - Looks for items that are sent to the individual accounts that receive content sent to the list entered in the associated field. Users - Looks for items sent to specified users: All Users - All users on the specified Exchange Server Last Name - Any user on the specified Exchange Server whose last name matches the value entered in the associated field.
Item Source Select the target list from which to stub: Distribution List - Looks for items that are sent to the individual accounts that receive content sent to the list entered in the associated field. Users - Looks for items sent to specified users: All Users - All users on the specified Exchange Server Last Name - Any user on the specified Exchange Server whose last name matches the value entered in the associated field.
Item Source Select the target list to synchronize: Distribution List - Looks for items that are sent to the individual accounts that receive content sent to the list entered in the associated field. Users - Looks for items sent to specified users: All Users - All users on the specified Exchange Server Last Name - Any user on the specified Exchange Server whose last name matches the value entered in the associated field.
You can enable SMTP forwarding as a method for adding messages to the Barracuda Message Archiver, and also specify trusted hosts so that the Barracuda Message Archiver accepts only those messages forwarded by trusted (whitelisted) hosts. You enable SMTP forwarding on the MAI L SOURCES > SMTP/IM page.
Exchange Stubbing configuration is done on the MAIL SOURCES > Exchange Integration page. During the stubbing process, the Barracuda Message Archiver adds all attachments (Attachments Only option), or the entire message (Entire Message option) for a message to its own storage database and creates a hyperlink, or stub, to the original attachment or message depending on the option you select in the Exchange Integration page.
either an immediate or nightly stubbing process during this time. Restoring Stubbed Content to Microsoft Exchange Firmware Version This feature is available only in the Barracuda message Archiver Outlook Add-In version 3.2.30 and higher. To restore stubbed content to your Microsoft Exchange Server, click the Restore ( ) icon in the Outlook toolbar. When clicked, the selected stub content is restored to the Exchange Server and persists on the Server for 30 days.
Update, verify your operating system in the section System requirements, and following the steps described in the section Instructions. Microsoft Outlook 2007 - See the Microsoft article 2007 Office system Administrative Template files (ADM, ADMX, ADML) and Office Customization Tool version 2.0, your operating system in the section System requirements, and following the steps described in the section Instructions.
5. Click OK to save your settings. Enable Scripts in Microsoft Outlook 2007 Use the following steps to enable scripts in shared and public folders in Outlook 2007: 1. 2. 3. 4. Log in to Microsoft Outlook 2007. On the Tools menu, click Trust Center. In the Navigation Pane, click E-mail Security.
5. Click OK to save your settings. Enable Scripts in Microsoft Outlook 2010 Use the following steps to enable scripts in shared and public folders in Outlook 2010: 1. 2. 3. 4. Log in to Microsoft Outlook 2010. On the File menu, click Options. In the Navigation Pane, click Trust Center, and then click Trust Center Settings.
5. Click OK to save your settings. Policy Alerts This article refers to the Barracuda Message Archiver release 3.1 or higher, except where noted. Policy Alerts are email notifications that are sent out whenever the Barracuda Message Archiver detects an incoming message that meets the criteria of a Saved Search. This allows you to implement and monitor policies regarding your email traffic, and identify both new and existing messages that meet the specified criteria.
Administrators and auditors can choose to add themselves to the alerts list for these standard policies as well as for any custom Policy Alerts. They are then notified via email either weekly or daily, whenever messages meeting the specified criteria enter into the archive with the offending messages attached to the notification email in a .zip file.
Automate Message Purging To run Saved Search retention policies against archived messages, turn on Allow automatic message deletion. Once enabled, the Saved Search policies are run against archived messages on a weekly basis each weekend. Use the following steps to set up a Saved Search retention policy. 1. 2. 3. 4. 5. Log into the Barracuda Message Archiver. Go to the BASIC > Search page, and in the Standard tab, click Advanced. Enter the desired search criteria, and click Save Search.
Trusted SMTP Servers You must enter the IP addresses of all trusted senders of SMTP messages to be archived. On the MAIL SOURCES > SMTP/IM page, enter the IP addresses of trusted forwarding servers that will be sending messages to be archived.
A single click on any message in the Search results sends it to the embedded Preview Pane for viewing. Double-click on a message to view it in a separate Message Details popup window. Both methods offer the ability to view the message as the sender intended for it to be viewed, as well as the underlying message source code. You can also select the character set to use for a particular message which can be especially useful when viewing a poorly formatted message that does not declare an appropriate charset.
Enter the name under which the query is to be saved, and then click OK. If you enter a name that already exists, the new search parameters replace the previous search criteria. To run a previously-saved search - Click the Saved Searches tab, and click Search in the Actions column following the Saved Search you want to run. To receive an alert via email when a message that fits the parameters of a Saved Search is received by the Barracuda Message Archiver, Policy Alerts are required.
Once a search is executed and the results are listed in the BASIC > Search page, you can choose to export one or more of these messages as a .pst or .zip file. To export one or more messages, select the desired item(s) from the message list using Shift- or Ctrl-click to select multiple messages. Click the Tools menu at the top of the message list, and click Export Messages. In the window select the desired action and export method. The desired messages are gathered into a single .pst or .
The search query tips in this article apply to both Basic and Advanced search queries. Searches are performed across only the items to which you have access. Only messages that are owned by you, or those to which your account has been given access either as a Auditor or as an administrator, are searched on by your query. All searches are case insensitive. The string polish matches both "Polish sausage is not a hot dog" and "Please polish this".
From the BASIC > Search page, click on Help for additional search criteria details. The following tables describe the available advanced search parameters. Table 1. Search Parameter = All. Entire Message Look in all fields and all data contained in each item for the entered text. Entire Message (Phrase) Look in all fields and all data contained in each item for the EXACT phrase as entered. From/Owner Look only in the From and Owner fields of each item, as applicable, for the entered text.
Has Attachment Returns all messages that have at least one attachment. Attachment Name Look only in the names of message attachments for the EXACT phrase as entered. Contains Images Returns all messages that contain images embedded in the body. Image Type Look for messages with embedded images that are of the specified type. No dot (.) before the extension is needed. For example, enter gi f to return all messages that contain images in the .gif format.
Date Searches for all Appointments scheduled for the specified time period. Combine two (or more) Date searches to get a list of Appointments scheduled to occur between a specific start and end date. Location Look only in the Location field of each item for the entered text. Attendees Look only in the Attendees field of each item for the entered text.
Entire Message (Phrase) Look in all fields and all data contained in each item for the EXACT phrase as entered. Owner Look only in the Owner field of the item for the entered text. Name (Subject) Look only in the Subject of the Contact item for the entered text. This is usually equivalent to the First and Last Names of the Contact. Date Searches for all items with a timestamp that matches the specified date range. Address Look only in the Address field of each Contact for the entered text.
"Reviews due now" Matches "performance reviews due now" as well as "all reviews are due now" (due to Stop Words being ignored). This does not match "reviews for all employees are due now" Integer Number-Based Search Strings A single integer string in bytes to be matched exactly to an index attribute as entered. Valid formats are: a single number (with no whitespace). To find a range, use a Compound Search String.
(This is used only in Keyword Expressions.) A combination of two or more strings in any of the above formats (Text-based, Multi-Text, Wildcard or Domain as applicable to the fields being searched) or with other Compound search strings, each separated by the keywords AND or OR. Surround logical groupings with parentheses as needed to determine order of operations.
Related Articles Understanding Basic and Advanced Search Advanced Search Options Search Strings Advanced Search Tips Commonly used search_field values are listed in the following table: Term Description Search Type to Search is limited to the To and Cc fields of each message Text from Search is limited to the From field of each message Text domain Search is limited to the domain names in the From, To, and Cc fields of each message Domain subject Search is limited to the Subject line of each me
attachment_mimetype The attachment MIME type Text attachment_extension The attachment's extension Text You may specify other search_field values as long as the correct name for the field is used. Consult Barracuda Networks Technical Support if you are unsure of the exact syntax. The phrase can only contain a single item.
Overview Setting Up a Saved Search Setting Up a Saved Search Retention Policy Related Articles Saved Searches & Litigation Holds - Auditor Policy Alerts - Auditor Search Options & Configuration Overview Once you execute an Advanced Search, you can save and name the search for re-execution at a later time. A list of all such Saved Searches and their definitions are available on the BASIC > Search page in the Saved Searches tab, and the search can be performed from this tab.
4. click Save Changes. The specified saved search is added to every user's default search filter. Viewing Search-Related Activities This article refers to the Barracuda Message Archiver release 3.1 or higher. In this article: Audit Log Page Filter Options Results Pane Related Articles Audit Log Filtering Audit Log Page The ADVANCED > Audit Log page of Barracuda Message Archiver displays a list of all search-related activities that have been performed on the Barracuda Message Archiver.
The Results Pane also lets you navigate through large quantities of results, via the Page Navigation controls in the upper-left corner. Additionally, you can customize the look of the pane using the Tools menu. The options in the Tools menu are: Results Per Page - Choose how many rows of audit log results display per page in the Results Pane. If there are more results than can fit on one page, you can always use the Page Navigation controls to view them.
Shared Mailbox Support - Auto-Mapping Enabled Shared mailbox support is easily available when auto-mapping is enabled. Auto-mapping is typically enabled by default on Exchange Server 2010 SP1 and higher. Auto-Mapping Disabled If you are not using auto-mapping, you must create attributes in Active Directory (AD) to enable shared mailbox support as described in the section Shared Mailbox Support - Auto-Mapping Disabled.
User Search When a user searches for emails in the Barracuda Message Archiver web interface, Barracuda Message Archiver Outlook Add-In, or through a B arracuda Message Archiver Mobile Application, the search results include emails from both the user's mailbox as well as all mailboxes shared with that user. How to Assign and Unassign PST Files This article refers to the Barracuda Message Archiver release 3.1 or higher. In this article: Assign a PST File to a User Unassign a .
Monitoring In this Section Viewing Performance Statistics Setting Up Alerts Viewing System Tasks Understanding the Front Panel Indicator Lights Reports Viewing Performance Statistics This article refers to the Barracuda Message Archiver release 3.1 or higher.
box for the desired policies. Storage Statistics (Not available to auditors) This section displays statistics on the amount of data stored on the Barracuda Message Archiver this hour, today (since midnight), and total (or since last reset). Effective - The "real" combined size of all messages stored on the Barracuda Message Archiver. This is the actual size of the messages as they are sent to the Barracuda Message Archiver. On Disk - The actual amount of storage used on the Barracuda Message Archiver.
Possible backup, synchronization, Journal account, or other connectivity failures Your system is low on disk space SNMP Manager You can use the SNMP Manager to query system information. Setting Up SNMP Manager Use the following steps to set up SNMP Manager, 1. Log into the Barracuda Message Archiver web interface, and go to the BASIC > Administration page. 2. In the SNMP Manager section, set Enable SNMP Agent to Yes. This setting allows the Barracuda Message Archiver to accept and respond to SNMP queries.
Traffic Green Blinks when the Barracuda Message Archiver processes traffic. Data I/O Green Blinks during data transfer. Power Green Displays a solid green light when the system is powered on. Reports This article refers to the Barracuda Message Archiver release 3.1 and higher, except where noted. In this article: Email Activity Report Top Storage Users Report Policy Violations Report Global Searches Report Usage Report (Available only in Release 3.
Usage Report (Available only in Release 3.2 and Higher) This report displays a comprehensive report of archiving activity, cost savings, and projected storage growth based on U.S. dollars per gigabyte for the selected date range. For additional information, see Barracuda Message Archiver Usage Report. Generate Reports On the BASIC > Reports page you can generate individual reports on a one-time basis by specifying the desired Report Type and Date Range.
User - displays user login, export, and search activity for web interface, Outlook Add-In, and Mobile App (excluding Administrator and Auditor roles) Storage - Displays message stubbing and PST management details: Microsoft Exchange Stubbing - Displays the total messages stubbed, storage savings, and cost savings by week, month, and year PST Management - Displays the total number of uploaded PST files, PST storage size, and cost savings by week, month, and year Capacity and Retention Policy Management - Dis
1. Restore Auto Backup - Path and name of the automatically-created backup file. Click Browse to open a window with a list of all currently available backup files currently in the location specified in the Automated Backups section. 2. Click Upload; a confirmation screen displays a list of items in the backup file that are to be restored. 3. Click Apply Now to begin the restoration.
Before you replace your Barracuda Message Archiver, use the tools provided on the ADVANCED > Troubleshooting page to try to resolve the problem. In the event that a Barracuda Message Archiver fails and you cannot resolve the issue, customers that have purchased the Instant Replacement service can call Barracuda Networks Technical Support and arrange for a new unit to be shipped out within 24 hours.
4. Use your keyboard to select the desired boot option, and press Enter. Important You must select the boot option within three seconds of the splash screen appearing. If you do not select an option within three seconds, the Barracuda Message Archiver defaults to starting up in the normal mode (first option). To stop a hardware test, press Ctrl-Alt-Del to reboot your Barracuda Message Archiver. Reboot Options Description Barracuda Starts the Barracuda Message Archiver in the normal (default) mode.
Tools and Add-Ins Go to the USERS > Client Downloads page in the Barracuda Message Archiver to download Tools and Add-Ins.
Related Articles Outlook Add-In Installation and Configuration Outlook Add-In Customization Options Outlook Add-In Troubleshooting Secure Connectivity The Barracuda Message Archiver Outlook Add-In requires secure (HTTPS) connectivity to the Barracuda Message Archiver. If an insecure (HTTP) connection is attempted the Outlook Add-In is redirected to use https: with the configured secure port (the default port is 443).
3. 4. 5. 6. 7. Barracuda Message Archiver Outlook Add-in installer for all other versions of Outlook (BmaOutlookAddIn-version_x86.msi) Barracuda Message Archiver Outlook Add-in Administrator module (Barracuda Message Archiver Outlook Add-In version.adm) Move (or copy) the Barracuda Message Archiver Outlook Add-In version.adm file to your local %systemroot%\inf directory typically found in: c:\winnt\inf Copy the .msi file(s) to a location that is accessible by your users.
2013 64-bit, the x86 version of the MSI is recommended for deploying the add-in by default to all 32-bit as well as 64-bit machines. However, if there are some 64-bit machines that have Outlook 2010 or Outlook 2013 64-bit installed, then there are three possible deployment scenarios. Scenario 1 Every 64-bit machine in your environment has Outlook 2010 or Outlook 2013 64-bit installed. Click to view Scenario 1 In this case, perform all of the following steps: 1.
Use the following steps to create an SRV record in the form: _barracuda_ma._tcp.[AD domain] 1. 2. 3. 4. 5. 6. 7. 8. 9. On the DNS server, click Start, click Administrative Tools, click DNS. Expand the tree until the domain displays, for example, archiver.local, right-click on the domain name, click Other New Records. In the dialog, select the resource record type Service Location (SRV), and click Create Record.
running Add-Ins such as the Barracuda Message Archiver Outlook Add-In. As a result, the Barracuda Message Archiver Outlook Add-In may not function as expected. For additional information, refer to the Microsoft Knowledgebase article Office 2010 Click-to-Run compatibility with add-ins. Message Archive and Search For Search and Archive options, refer to How to Search and Archive Messages Using the Barracuda Message Archiver Outlook Add-In.
Once you enter these details and click OK, Microsoft Outlook automatically remembers your login credentials, and there is no need to enter this information again unless you change your password. If you forget your password or are unable to access the Barracuda Message Archiver Outlook Addin, contact your system administrator. Important If your organization configures local users on the Barracuda Message Archiver, each user receives a Barracuda Message Archiver User Rollout email.
Figure 1. Barracuda Message Archiver Options dialog box.
Change - Click to change the Barracuda Message Archiver URI and user access details. For more information, see the Changing the URI (Location) section. Log Off - Click to log out the current user. Archiver Stores - This section displays the Barracuda Message Archiver stores (Mailboxes) to which you have access. Firmware Version Note that you must have Barracuda Message Archiver release 3.1 or greater to search through folder hierarchy in PST files within the Barracuda Message Archiver web interface.
In the Message Stubbing section, you specify message stubbing options. For a description of each option, see the Message Stubbing Options section. Changing the URI (Location) If you need to change the location of your Barracuda Message Archiver, first contact your system administrator for the correct URI, and then use the following steps. 1. In the Barracuda Message Archiver Options dialog box, click Change to display the dialog box: 2.
have direct access to the Barracuda Message Archiver. Maximum Age of Messages to Include (Days) Maximum age (number of days) of mail that will be copied to the local workstations stub cache. Maximum Size of Cache (MB) Use this option to specify the maximum amount of disk space, specified in megabytes (MB), on your local computer to use for caching stubbed attachments.
This article refers to the Barracuda Message Archiver release 3.1 or greater except where noted, and the Barracuda Message Archiver Outlook Add-In version 3.1 or greater, except where noted. The Barracuda Message Archiver Outlook Add-In supports Outlook versions 2003, 2007, 2010, and 2013. Verify the Outlook Add-In version (available for download on the USERS > Client Downloads page) is the same major revision as the Barracuda Message Archiver firmware.
In drop-down list - Select the search location: All data - Search everywhere in the selected item type Specific folders - Click Specific folders, or click Browse to select one or more folders across all of your Archiver stores in which to search; click OK to save your selections Release 3.5 and Higher In release 3.5 and higher, the administrator can associate an LDAP user or group to a role and list of email addresses in the USERS > LDAP User Add/Update page.
Messages Tasks From Message sender(s). Only those messages that were sent from the specified user(s) are searched. You can enter user names or email addresses, or click From to select users from an address book. Sent To Message recipient(s). Only those messages that were sent to or copied to the specified user(s) are searched. Enter user names or email addresses, or click Sent To to select users from an address book. Date Date restrictions on the item.
Any search criteria specified in the Advanced tab is used in conjunction with the criteria specified in the selected search item type search tab. Keywords in the Advanced tab must be alpha-numeric characters, and are not case sensitive. You can include wildcards in the Attachment Name field (refer to Table 3 below for more information). Table 3. Advanced Search Criteria. Criteria Description Attachments Number of attachments required in the messages in which to search.
Reply Reply to All Creates a Reply or Reply All to the selected item in the exact same manner as Outlook. Forward Crates a Forward of the selected item in the exact same manner as Outlook. Copy to Folder Opens the Select Folder dialog box in Outlook from which you can select a folder to which to copy the selected item(s). Use Ctrl- or Shift-click to select and copy multiple messages in the returned search window to a folder.
similar to: After the item is stubbed with a category, in this example Archived, it appears similar to: Restoring Stubbed Content to Microsoft Exchange Firmware Version This feature is available only in the Barracuda Message Archiver Outlook Add-In version 3.2.30 and higher. To restore stubbed content to your Microsoft Exchange Server, click the Restore ( ) icon in the Outlook toolbar. When clicked, the selected stub content is restored to the Exchange Server and persists on the Server for 30 days.
In this article: Components Error Unexpected Search Results Redirect Failure Capturing Log Files Components Error Microsoft Office Click-to-Run for Office 2010 If you are running Microsoft Office Click-to-Run for Office 2010, Microsoft has reported that the environment has potential issues when running Add-Ins such as the Barracuda Message Archiver Outlook Add-In. As a result, the Barracuda Message Archiver Outlook Add-In may not function as expected.
that a user can always see their own mail. The exclusion rules always take precedence; addresses that are whitelisted are searchable only if the exclusion rules do not block the mail. If a user is not configured and is a member of a group, then the blacklist/whitelist rules assigned to that group apply to that user. If a user is assigned to a group, when the user logs in via the Outlook Add-In or Barracuda Message Archiver Mobile Application, only that user’s mail displays.
Additional Resource Forms with VBScript do not work with Terminal Services in Outlook Barracuda Networks Knowledgebase Solution #00 006099 By default Microsoft Office 2003 and Office 2007 do not install the VBScript component in windows Terminal Server environments.
4. Both the property name and the value are case sensitive. 5. Complete the Custom Installation Wizard. For Microsoft Office Outlook 2007: 1. Log onto the Microsoft Terminal Server, and Install Microsoft Outlook 2007 as a standalone application or as part of a 2007 Office suite. 2. Determine the globally unique identifier (GUID) for the product that you installed in Step 1. If you installed Outlook, use that product GUID. If you installed Office Enterprise 2007, use that product GUID.
Barracuda Message Archiver URL Complete URL (e.g., https://archiver.mycompany.com:443 ) Microsoft® Outlook® users use to connect to the Barracuda Message Archiver.
Archiving (firmware release 3.5 and higher only) Stub Entire Message Specify whether to stub the entire message. Category to Apply to Archived Items Specify whether to apply a category to items archived or stubbed by the Barracuda Outlook Add-In. When enabled, enter the category name in the Category field, for example, enter Stored. Stub Caching Disable Stub Caching Specify whether users can cache stubbed messages for offline access. Maximum Cache Size Specify the maximum stub cache size in MB.
This article refers to the Barracuda Message Archiver release 3.1 or higher, and the Barracuda Message Archiver Outlook Add-In version 3.1 or higher, and Microsoft Outlook 2003, 2007, or 2010.
Enable Scripts on User Systems If you do not wish to use ADM templates to allow scripting across the entire organization, you can direct each user to enable scripts for shared and public folders based on their installed version of Microsoft Outlook. Enable Scripts in Microsoft Outlook 2003 Use the following steps to enable scripts in shared and public folders in Outlook 2003: 1. 2. 3. 4. Log into Microsoft Outlook 2003. On the Tools menu, click Options.
5. Click OK to save your settings. Enable Scripts in Microsoft Outlook 2007 Use the following steps to enable scripts in shared and public folders in Outlook 2007: 1. 2. 3. 4. Log into Microsoft Outlook 2007. On the Tools menu, click Trust Center. In the Navigation Pane, click E-mail Security.
5. Click OK to save your settings. Enable Scripts in Microsoft Outlook 2010 Use the following steps to enable scripts in shared and public folders in Outlook 2010: 1. 2. 3. 4. Log into Microsoft Outlook 2010. On the File menu, click Options. In the Navigation Pane, click Trust Center, and then click Trust Center Settings.
5. Click OK to save your settings. Barracuda Message Archiver Mobile Applications In This Section Barracuda Message Archiver Mobile Application for iPhone, iPod Touch, and iPad Barracuda Message Archiver Mobile Application for Android Barracuda Message Archiver Mobile Application for iPhone, iPod Touch, and iPad Requirements: Barracuda Message Archiver firmware version 3.
Related Articles Install/Configure the Outlook Add-In Secure Connectivity The Barracuda Message Archiver Companion mobile application requires secure (HTTPS) connectivity to the Barracuda Message Archiver. If an insecure (HTTP) connection is attempted the mobile application is redirected to use https: with the configured secure port. For existing mobile application users, if your URI was originally set up on an earlier firmware version, verify that the URI uses HTTPS.
5. enter: myname@company.com 6. Tap in the Password field, and enter your password for the specified email address. 7. Confirm your settings, and tap Save at the top of the screen. Searching for Archived Messages Once configuration is complete, you can begin searching your archived emails. Tap Email at the top of the view, and tap on the desired search criteria.
Tap in the Search field to display the keypad. Use the keypad to enter the desired keyword or search string; you must enter at least one keyword to perform a search. Keywords must be alpha-numeric characters, and are not case sensitive. Additionally, you can use wildcards to represent one or more other characters to use search patterns. Table 2. Wildcards. Wildcard Symbol Represents ? (single question mark) Specifies a single alphanumeric character.
To specify a specific date range in which to search, tap Advanced at the top of the view. The Advanced Search page displays the current date. To change the date range, tap on Date Range. Tap on the desired date to update the field with your selection. The date selected in the Date To field must be the same or later date than the date selected in the Date From field.
Barracuda Message Archiver Mobile Application for Android Requirements: Barracuda Message Archiver firmware version 3.5 or higher Barracuda Message Archiver URI from your system administrator Latest Android Message Archive application available for download from the Google Play Store: https://play.google.com/sto re/apps?hl=en Android phone or tablet running software version 2.3.
Android device: Barracuda Message Archiver hostname or IP address; Barracuda Message Archiver HTTPS port number; Specify whether the connection is secure; Your corporate email address from which messages are archived; Your email password. Use the following steps to get started. 1. Before you can set up Archived Mail, you need your Barracuda Message Archiver URI from your system administrator. For example: htt ps://archiver.company.com:443 2.
If an address is excluded (blacklisted), the address does not display unless the mail includes the user performing the search to assure that a user can always see their own mail. The exclusion rules always take precedence; addresses that are whitelisted are searchable only if the exclusion rules do not block the mail. If a user is not configured and is a member of a group, then the blacklist/whitelist rules assigned to that group apply to that user.
3. Tap the Search ( ) icon to display all messages matching your search criteria. The date selected in the Date To field must be the same or later date than the date selected in the Date From field. Any criteria specified in Advanced settings is used in conjunction with the criteria specified in the Search field; define your date range, and select Advanced from a Search to use the specified date range in conjunction with the keyword to search archived messages.
Components Barracuda PST Collector Server - The server regulates PST transfers in your network to prevent potential network overload, and displays the location and status of all PST files (as reported by the Barracuda PST Collector clients). It runs as a Windows service on any Windows-based computer in your environment, and is controlled by an administrative console from which all PST collection is configured.
When the Barracuda PST Collector Client is initially installed, it registers against the designated Barracuda PST Collector Server. No PST files are reported or transmitted during this initial registration; thus, no discovered PST files display in the Admin Console. A list of registered clients is available from the Reports > Registered Clients menu.
Important All new installations require some initial synchronization tasks to be performed between the Microsoft Exchange Server and the Barracuda Message Archiver. These tasks, including the direct import of messages, stubbing, and folder synchronization, can take a fair amount of time to complete. The Barracuda Message Archiver prioritizes these tasks over processing collected PST files.
System Compatibility If you install the 32-bit Barracuda PST Collector Client on a 64-bit operating system, and a PST file is in use on that 64-bit operating system, Microsoft Windows cannot use Volume Shadow Copy Service (VSS), therefore PST files cannot be collected until they are no longer in use. To resolve this issue, create two software deployment policies: One policy for the 32-bit client that targets only 32-bit machines, and One policy for the 64-bit client A 64-bit .
6. Double-click the Barracuda PST Collector Server.; the Properties window displays. 7. In the Server Hostname field, enter the hostname (not the URI) of the system where the Barracuda PST Collector Server is installed. For example, enter: pstcolserver.domain.local The hostname must be resolvable and the system must be accessible by all machines on which the Barracuda PST Collector Client is to be deployed.
3. Click the Deployment tab, and click Advanced. In the Advanced deployment options section, turn off Mak e this 32-bit X86 application available to Win64 machines: 4. Click OK to save your settings, and click OK to close the Properties window.
Install the Barracuda PST Collector Client Use the following steps to download and install the Barracuda PST Collector Client. 1. Copy the .msi file(s) to a location or file share accessible to users. 2. Open the Group Policy Management Editor for the organizational unit (OU) that is to use the Barracuda PST Collector, e.g., the default domain policy. 3. Either edit the default policy or create a new policy object, and link it to the desired container.
Monitor and Verify PST Collection Use the following steps to monitor and verify PST collection. 1. On the system where the Barracuda PST Collector Server is installed, open the Admin Console (Start > Programs > Barracuda > Mess age Archiver > PST Collector). 2. From the Reports menu click Import Progress: 3.
Windows User Profile, is collected and stored. If no user SID is available at the time the PST is sent to the PST Server, automatic user assignment is not performed. However, if auto-assignment cannot be made, the administrator can manually assign a PST to an active AD user by right-clicking on the PST file in the BASIC > Search page in the PSTs and Tags tab. In firmware 3.5 and higher, the Administrator can assign a PST to a local user.
3. For any listed file, including files that did not complete, click the View Log link to display a log of what transpired during the import, or click the Report link to view a summary of the imported data. Generate and Save a PST Collection Activity Report 1. On the system where the Barracuda PST Collector Server is installed, and go to Start > Programs > Barracuda > Message Archiver > PST Collector to open the PST Collector Admin Console. 2. From the File menu, click Export Discovered PST Data. 3.
1. While still logged into your Barracuda Message Archiver as admin, navigate to the USERS > Client Downloads page. 2. Download and install the server application on a Microsoft Windows-based system in your environment that can be reached by all the systems on which the client application is to be deployed. Note that this need not be an actual server, nor does it need any special configuration; you can even use a virtual machine (VM) to function as the Server. 3.
4. Use the New Advertisements Wizard to create a job to distribute the package to users; use the Schedule tab to select dates and times to run the package. Verify Barracuda PST Collector Client Installation Use the following steps to verify that the Barracuda PST Collector Client is installed and registered on all clients. 1. On the system where the Barracuda PST Collector Server is installed, open the Admin Console (Start > Programs > Barracuda > Mess age Archiver > PST Collector). 2.
3. 4. If there are PST files that failed to complete due to corruption or other errors, return to the main Admin Console window. From the View menu select Filter, and click Show Corrupt. A list of all such PST files displays in the main window along with detailed information including the owner, the originating client system, and creation and last modification dates.
1. 2. 3. 4. Log in to the Barracuda Message Archiver as the administrator, and go to the BASIC > Search page. Click the PSTs and Tags tab, navigate to and right-click the PST file to assign, and then click Assign PST. In the Assign PST dialog box, enter at least three characters of the email address to which to assign the PST. The Search for User field populates with all matching users; click on the user to which to assign the PST file, and click OK.
Install the Barracuda PST Collector Server Configure the Barracuda PST Collector Client Create the PST Collector Software Distribution Package Verify Barracuda PST Collector Client Installation Monitor and Verify PST Collection Assigned and Unassigned PSTs Manually Assigning a PST Verify Import of all Transferred PST Files Generate and Save a PST Collection Activity Report Uninstall the Barracuda PST Collector Important All new installations require some initial synchronization tasks to be performed between
4. desired import policy for PSTs: Automatic - All PSTs are approved for transfer without any further interaction from a system administrator. Recommended. Manual - A PST is approved for transfer only if that PST has been manually marked for transfer using the Admin Console. This setting always requires administrative input as each discovered PST file must be explicitly marked for import.
3. Once the software is installed, it displays in the list of registered clients. 4. Refresh the Registered Clients display on the Barracuda PST Collector Server, and verify the restarted system is registering correctly. Monitor and Verify PST Collection Use the following steps to monitor and verify PST collection. 1. On the system where the Barracuda PST Collector Server is installed, open the Admin Console (Start > Programs > Barracuda > Message Archiver > PST Collector). 2.
4. If there are PST files that failed to complete due to corruption or other errors, return to the main Admin Console window. From the View menu select Filter, and click Show Corrupt. A list of all such PST files displays in the main window along with detailed information including the owner, the originating client system, and creation and last modification dates.
1. 2. 3. 4. Log in to the Barracuda Message Archiver as the administrator, and go to the BASIC > Search page. Click the PSTs and Tags tab, navigate to and right-click the PST file you want to assign, and then click Assign PST. In the Assign PST dialog box, enter at least three characters of the email address to which to assign the PST. The Search for User field populates with all matching users; click on the user to which to assign the PST file, and click OK.
This article refers to the Barracuda Message Archiver release 3.1 or higher. Installation Use the following steps to install the Barracuda Message Archiver Standalone Search Addin Deployment Kit. 1. Log in to the Barracuda Message Archiver as an administrator. 2. Navigate to the USERS > Client Downloads page, and download the StandAlone Search Utility Deployment Kit. 3.
A common cause of failure is that the user and/or the user's computer does not have adequate access to the share location. Verify that all access and network privileges are configured appropriately. Additional error messages are available in the Event Log on the domain computer; if you do not find the desired information in the Event Log, consider enabling verbose logging and restarting the computer.
2. If you don't know the address of your Barracuda Message Archiver, contact your administrator. 3. Enter your Email Address and Password, and then click OK. You are now ready to search your message archives. Hardware Compliance This section contains appliance compliance information. Notice for the USA Compliance Information Statement (Declaration of Conformity Procedure) DoC FCC Part 15: This device complies with part 15 of the FCC Rules. Operation is subject to the following conditions: 1.
software is provided as is. In no event does Barracuda Networks warrant that the software is error free or that Customer will be able to operate the software without problems or interruptions. In addition, due to the continual development of new techniques for intruding upon and attacking networks, Barracuda Networks does not warrant that the software or any equipment, system or network on which the software is used will be free of vulnerability to intrusion or attack.
4. This License is effective until terminated. This License is automatically terminated without notice if you fail to comply with any term of the License. Upon termination you must destroy or return all copies of the Barracuda Software. 5. YOU EXPRESSLY ACKNOWLEDGE AND AGREE THAT THE USE OF THE BARRACUDA SOFTWARE IS AT YOUR OWN RISK AND THAT THE ENTIRE RISK AS TO SATISFACTION, QUALITY, PERFORMANCE, AND ACCURACY IS WITH YOU.
i. transfer, assign or sublicense its license rights to any other person, or use the Energize Update Software on unauthorized or secondhand Barracuda Networks equipment, and any such attempted transfer, assignment or sublicense shall be void; ii. make error corrections to or otherwise modify or adapt the Energize Update Software or create derivative works based upon the Energize Update Software, or to permit third parties to do the same; or iii.
list price, provided such Energize Update Service is available. All initial subscriptions commence at the time of sale of the unit and all renewals commence at the expiration of the previous valid subscription. In no event does Barracuda Networks warrant that the Energize Update Software is error free or that Customer will be able to operate the Energize Update Software without problems or interruptions.
the software is modified by someone else and passed on, we want its recipients to know that what they have is not the original, so that any problems introduced by others will not reflect on the original authors' reputations. Finally, any free program is threatened constantly by software patents. We wish to avoid the danger that redistributors of a free program will individually obtain patent licenses, in effect making the program proprietary.
The source code for a work means the preferred form of the work for making modifications to it. For an executable work, complete source code means all the source code for all modules it contains, plus any associated interface definition files, plus the scripts used to control compilation and installation of the executable.
NOT LIMITED TO, THE IMPLIED WARRANTIES OF MERCHANTABILITY AND FITNESS FOR A PARTICULAR PURPOSE. THE ENTIRE RISK AS TO THE QUALITY AND PERFORMANCE OF THE PROGRAM IS WITH YOU. SHOULD THE PROGRAM PROVE DEFECTIVE, YOU ASSUME THE COST OF ALL NECESSARY SERVICING, REPAIR OR CORRECTION. 12.
Redistributions of source code must retain the above copyright notice, this list of conditions and the following disclaimer. Redistributions in binary form must reproduce the above copyright notice, this list of conditions and the following disclaimer in the documentation and/or other materials provided with the distribution. The names of the authors may not be used to endorse or promote products derived from this software without specific prior written permission.
"Work" shall mean the work of authorship, whether in Source or Object form, made available under the License, as indicated by a copyright notice that is included in or attached to the work (an example is provided in the Appendix below). "Derivative Works" shall mean any work, whether in Source or Object form, that is based on (or derived from) the Work and for which the editorial revisions, annotations, elaborations, or other modifications represent, as a whole, an original work of authorship.
limitation, any warranties or conditions of TITLE, NON-INFRINGEMENT, MERCHANTABILITY, or FITNESS FOR A PARTICULAR PURPOSE. You are solely responsible for determining the appropriateness of using or redistributing the Work and assume any risks associated with Your exercise of permissions under this License. 8. Limitation of Liability.