
User`s guide

1.
2.
3.
4.
5.
6.
1.
2.
3.
4.
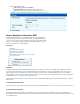
Step 2. Configure the Firewall Rule
Step 3. Verify the Order of the Firewall Rules
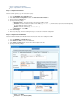
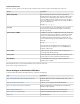
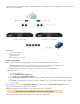
Step 1. Configure the Interface
Create a network segment (e.g., 172.16.10.0/24 on port 3).
Go to the page.NETWORK > IP Configuration
In the section, click .Static Interface Configuration Add Static Network Interface
Enter a name into the field.Name
Specify the following settings:
Network Interface – Select the interface connected to the DMZ (e.g., ).p3
IP Address – Enter the interface IP address for the DMZ (e.g., ). This IP address represents the default gateway172.16.10.1
for clients within this network segment.
Netmask – Enter the netmask (e.g., ).255.255.255.0
Classification – Select .DMZ
Click .Save Changes
At the top of the page, click on the warning message to execute the new network configuration.
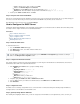
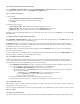
Step 2. Configure the Firewall Rule
Create a firewall rule that allows HTTP traffic from the Internet to the web server residing in the DMZ.
Go to the page.FIREWALL > Firewall Rules
Click to create a new firewall rule.Add Access Rule
In the window, enter a name and description for the rule.Add Access Rule
Specify the following settings:
Action – Click .DNAT
Connection – Select .Default (SNAT)