
User`s guide

1.
2.
3.
4.
5.
1.
2.
3.
4.
5.
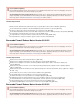
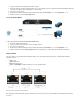
Set up the unit between the management PC and the network.
Connect the LAN to port 1 and the management PC to port 3. The management PC can configure the Barracuda Firewall while still being
connected to the LAN through the transparent port 1—port 3 bridge.
Go to .https://192.168.200.200
Continue at the certificate warning and log into the Barracuda Firewall (default : , default : ). username admin password admin
Follow the instructions in the wizard. Test at my desk
Protect my Network Wizard
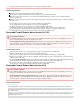
To deploy the Barracuda Firewall with the wizard:Protect my network
Connect the management PC to port 3.
Connect your ISP modems and LANs to the other available interfaces.
Go to .https://192.168.200.200
Continue at the certificate warning and log into the Barracuda Firewall (default : , default : ). username admin password admin
Follow the instructions in the wizard. The wizard helps you configure up to two ISPs and two LAN networks.Protect my network
Without a Wizard
If you do not want to set up the Barracuda Firewall with a wizard, use the web interface. By default, the ports on the Barracuda Firewall are
configured as follows:
Port 1: LAN
Port 2: DHCP client
Port 3: Management port
Port 1 – Port 3 Bridge: Transparent network access for the management PC
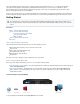
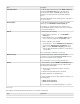
Step 3. Explore the Barracuda Firewall
After setting up the Barracuda Firewall, explore the following areas to learn where to get necessary information for working with your firewall and
its services: