
User`s guide


1.
2.
3.
1.
2.
3.
1.
2.
In this article:
Step 1. Enable the SSL VPN
Static IP Address
Secondary IP Address
Dynamic Network Interface
Step 2. Configure User Authentication
Step 3. Configure the SSL VPN Portal
Step 4. Upload a Certificate
Step 5. Enable the SSL VPN Client
Next Steps
Step 1. Enable the SSL VPN
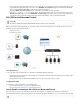
When you enable the SSL VPN portal, determine if you are using a static, dynamic, or the portal. Typically, the SSLsecondary IP address for
VPN portal is deployed on a static WAN IP address that faces the Internet with a respective DNS A resource record. The portal can also use a
secondary IP address of the Barracuda Firewall for internal access.
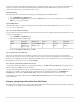
Static IP Address
If you are using a static IP address:
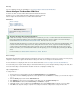
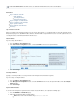
Go to the page.Network > IP Configuration
In the section, select the check box for the required interface.Static Interface Configuration SSL VPN
Click .Save Changes
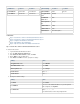
Secondary IP Address
Typically, a secondary IP address is used to provide the SSL VPN portal on internal network segments.
If you are using a secondary IP address:
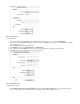
Go to the page.Network > IP Configuration
In the section, select the check box next to the required IP address in the Management IP Configuration SSL VPN Secondary IP
table.Addresses
Click .Save Changes
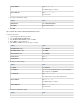
Dynamic Network Interface
To serve the SSL VPN portal on a dynamic interface instead of a static IP address, also complete the following steps:
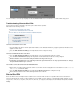
Go to the page.FIREWALL > Firewall Rules
Add a redirect firewall rule with the following settings:
Name: Enter a name for the firewall rule. E.g., Redirect-to-SSL-VPN
Disable for the VPN service to use both SSL VPN and VPN service on the same IP address.Use TCP Port 443